Easy crochet patterns, cute projects, and beginner-friendly ideas to inspire your next make.

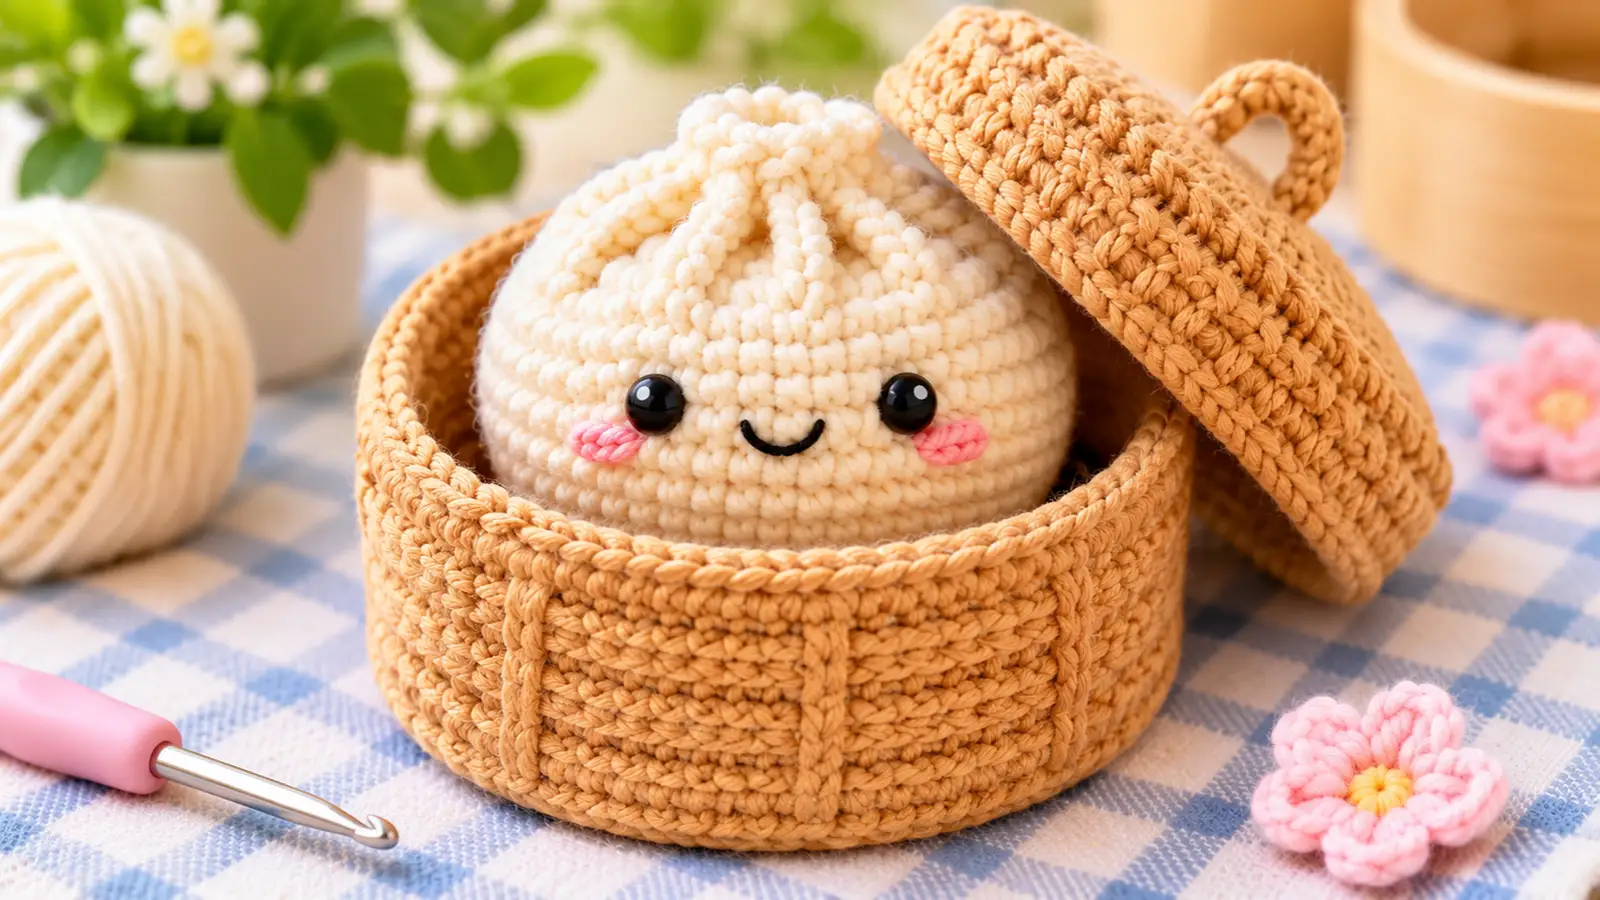
This dumpling crochet pattern shows you how to make a small stuffed amigurumi dumpling with a rounded body and a gathered, pleated top.
The main dumpling is crocheted as one continuous piece, so there are no separate body parts to sew together. The shaping grows gradually from 6 to 30 stitches, stays even through the body, then uses a special pleat decrease before narrowing to the final 6-stitch opening.
If you enjoy small projects with minimal assembly, you may also like the Capybara Crochet Pattern.
Table of Contents
Crochet Dumpling Pattern at a Glance
This pattern creates one stuffed crochet dumpling with:
- a rounded base;
- a simple one-piece body;
- six evenly distributed pleat sections;
- a gathered top;
- optional embroidered facial details.
The body is worked as one continuous crochet piece. A yarn needle is still needed for the final closure, weaving in the yarn end, and adding facial embroidery.
Skill Level
The pattern uses:
- single crochet;
- increases;
- decreases;
- front-loop-only work;
- careful stitch counting;
- one special pleat decrease, abbreviated PD.
Round 10 requires the most attention because this is where the pleated shaping is created.
Materials
For this dumpling crochet pattern, you will need:
- yarn;
- a crochet hook;
- stuffing;
- a yarn needle;
- scissors;
- yarn or embroidery thread for facial details.
The exact yarn type, yarn weight, hook size, gauge, yardage, and stuffing quantity have not yet been physically verified, so specific values are intentionally not included.
Finished Size
The finished measurements are not yet verified.
They should be added only after a complete physical sample has been made with documented materials and hook size.
Crochet Abbreviations
This pattern uses:
- sc — single crochet
- inc — increase
- dec — decrease
- sl st — slip stitch
- FLO — front loop only
- st / sts — stitch / stitches
- PD — special pleat decrease
Numbers in brackets show the completed stitch count at the end of each round.
For example:
[30]
means you should finish the round with 30 completed stitches.
For a general reference to standard crochet terminology, see the Craft Yarn Council Crochet Abbreviations Master List.
Before You Start This Dumpling Crochet Pattern
A few details are especially important for keeping the stitch counts correct.
Joined Round Rule
At the start of each new joined round, work the first stitch into the same actual stitch as the previous round’s join.
Do not work into the joining slip stitch.
The slip stitch does not count as an additional stitch.
Special Pleat Decrease — PD
The PD is the special shaping stitch used in Round 10.
For each PD:
- use the front loops of the next 3 stitches;
- combine those 3 base stitches into 1 completed PD stitch.
One PD therefore:
- consumes 3 existing stitches;
- creates 1 completed stitch.
The corresponding back loops remain unused.
Do not crochet into those unused back loops during Round 11.
Because the exact physical hook sequence for this special decrease still needs sample validation, this editorial version does not add an unverified sc3tog-style or other execution method beyond the approved PD definition above.
About the Pleated Shape
Round 10 divides the 30-stitch body into six equal sections.
Each section uses:
2 sc + PD over the next 3 sts
That means each section consumes 5 original stitches and produces 3 completed stitches.
Across six sections:
30 → 18 stitches
The mathematics are verified, but the final depth and appearance of the pleats still need physical testing.
Free Crochet Dumpling Pattern
Count your stitches after every round, especially before and after Round 10.
Rounds 1–5: Crochet the Base
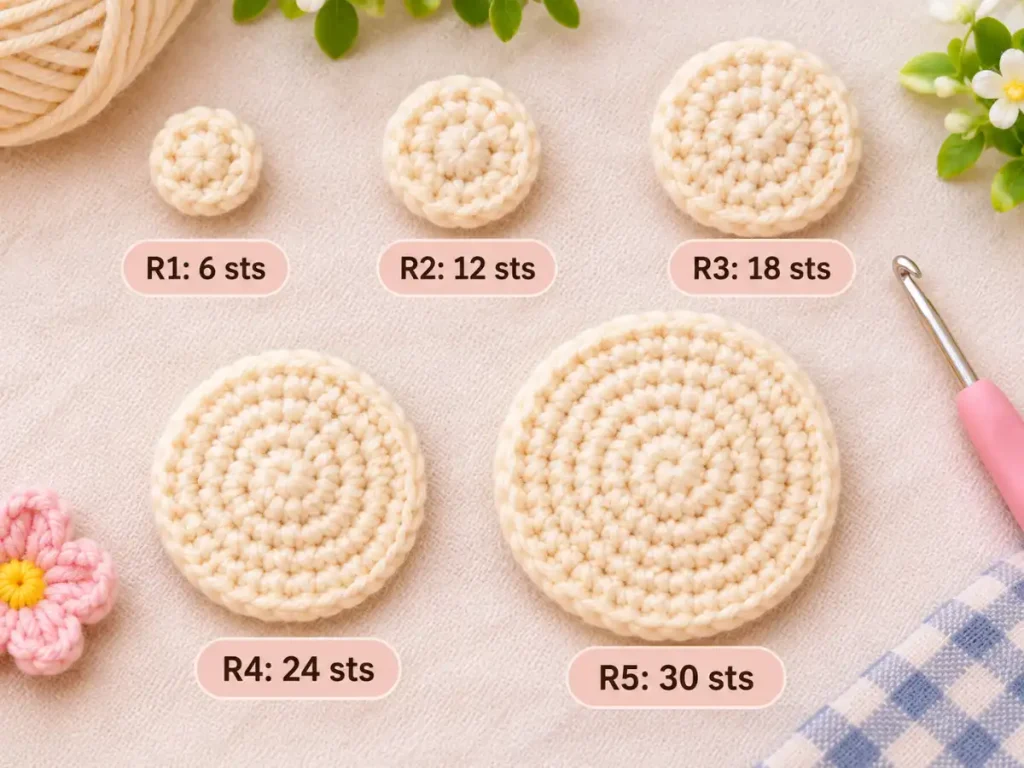
Start this dumpling crochet pattern by building the rounded base from 6 to 30 stitches.
Round 1
R1: 6 sc [6]
You should finish with:
6 stitches
The exact physical starting method for these first 6 stitches is still awaiting sample validation, so a magic ring, chain start, or other unverified method has not been added.
Round 2
R2: inc ×6 [12]
Work an increase in each of the 6 stitches.
You should finish with:
12 stitches
Round 3
R3: (sc, inc) ×6 [18]
Repeat six times:
- sc in the next stitch;
- inc in the next stitch.
You should finish with:
18 stitches
Round 4
R4: (2 sc, inc) ×6 [24]
Repeat six times:
- sc in each of the next 2 stitches;
- inc in the next stitch.
You should finish with:
24 stitches
Round 5
R5: (3 sc, inc) ×6 [30]
Repeat six times:
- sc in each of the next 3 stitches;
- inc in the next stitch.
You should finish with:
30 stitches
The increase section is now complete.
Rounds 6–9: Build the Dumpling Body
Round 6
R6: sc around [30]
Work 1 sc in each stitch.
Round 7
R7: sc around [30]
Work 1 sc in each stitch.
Round 8
R8: sc around [30]
Work 1 sc in each stitch.
Round 9
R9: sc around [30]
Work 1 sc in each stitch.
At the end of Round 9, you should still have:
30 stitches
Count carefully before moving to the pleat round.
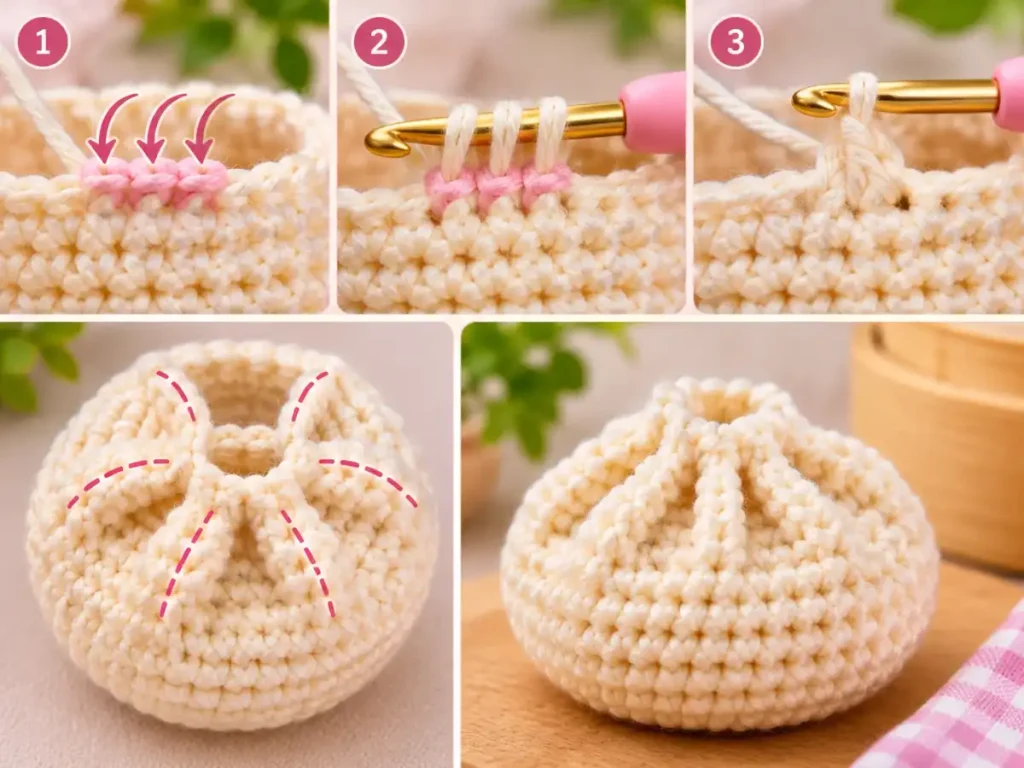
Round 10: Create the Dumpling Pleats
Round 10 creates the main shaping at the top of the dumpling.
R10: (2 sc, PD over next 3 sts) ×6 [18]
Repeat six times:
- sc in the next stitch;
- sc in the next stitch;
- work 1 PD through the front loops of the next 3 stitches.
Each repeat consumes 5 original stitch positions:
2 + 3 = 5
The PD converts its 3 base stitches into 1 completed stitch, so each repeat produces:
2 sc + 1 PD = 3 completed stitches
Across six repeats:
6 × 5 = 30 original stitches
and:
6 × 3 = 18 completed stitches
You must finish Round 10 with:
18 completed stitches
Do not count the unused back loops left behind by the PD stitches.
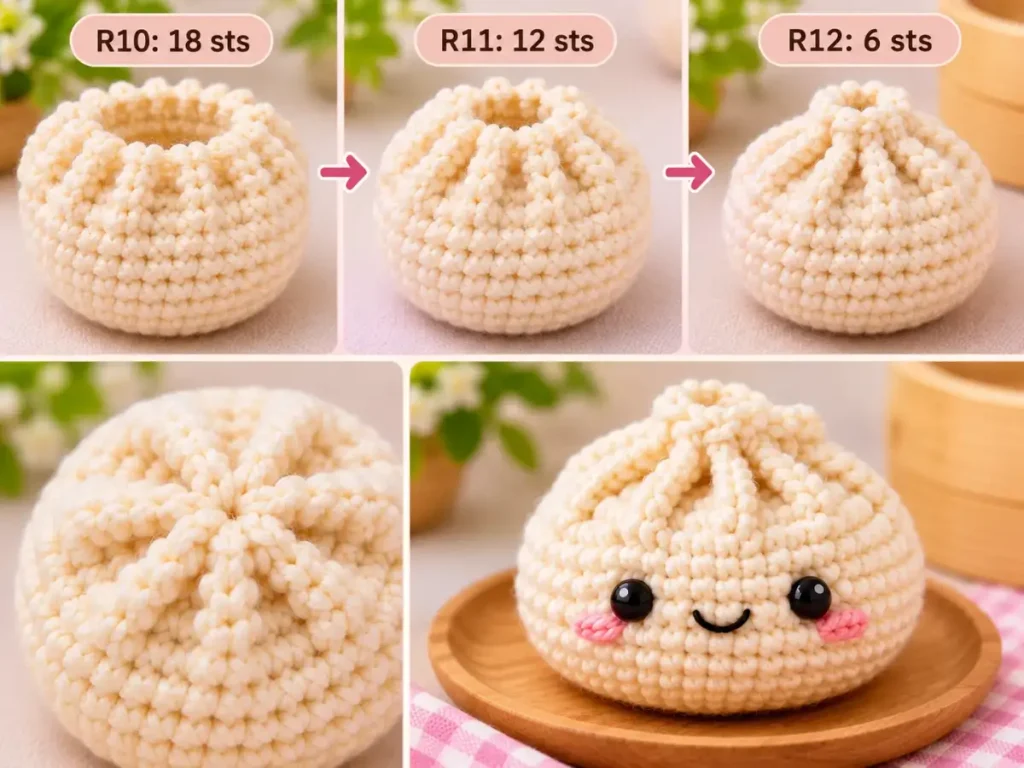
Round 11: Gather the Top
R11: (sc, dec) ×6 [12]
Work this round only into the 18 completed stitch tops from Round 10.
Repeat six times:
- sc in the next completed stitch;
- dec over the next 2 completed stitches.
Do not work into the unused back loops from the PD stitches.
Each repeat consumes 3 stitches and creates 2 completed stitches.
The round therefore changes:
18 → 12 stitches
You should finish Round 11 with:
12 stitches
Round 12: Finish the Dumpling Shaping
R12: dec ×6 [6]
Work 6 decreases around.
This changes:
12 → 6 stitches
Complete all six decreases before joining.
You should finish with exactly:
6 stitches
Stuff the Crochet Dumpling
Add stuffing while the final opening is still accessible.
There is no verified stuffing quantity yet, so add it gradually.
The physical sample will need to confirm how much stuffing gives the best balance between holding the dumpling shape and keeping the stitches from stretching excessively.
Close the Final Opening
After completing Round 12:
- cut the yarn, leaving enough tail for closing;
- thread the tail onto a yarn needle;
- pass the needle through the front loops of all 6 remaining stitches;
- pull the tail to draw the opening closed;
- secure the closure;
- weave in the yarn end.
The main crochet construction is now complete.
Add the Embroidered Face
You can leave your dumpling plain or add a simple embroidered face.
Using yarn or embroidery thread, add:
- two simple eyes;
- an optional mouth.
Exact stitch positions or measurements for the face are not specified because the final proportions still need to be confirmed on a physical sample.
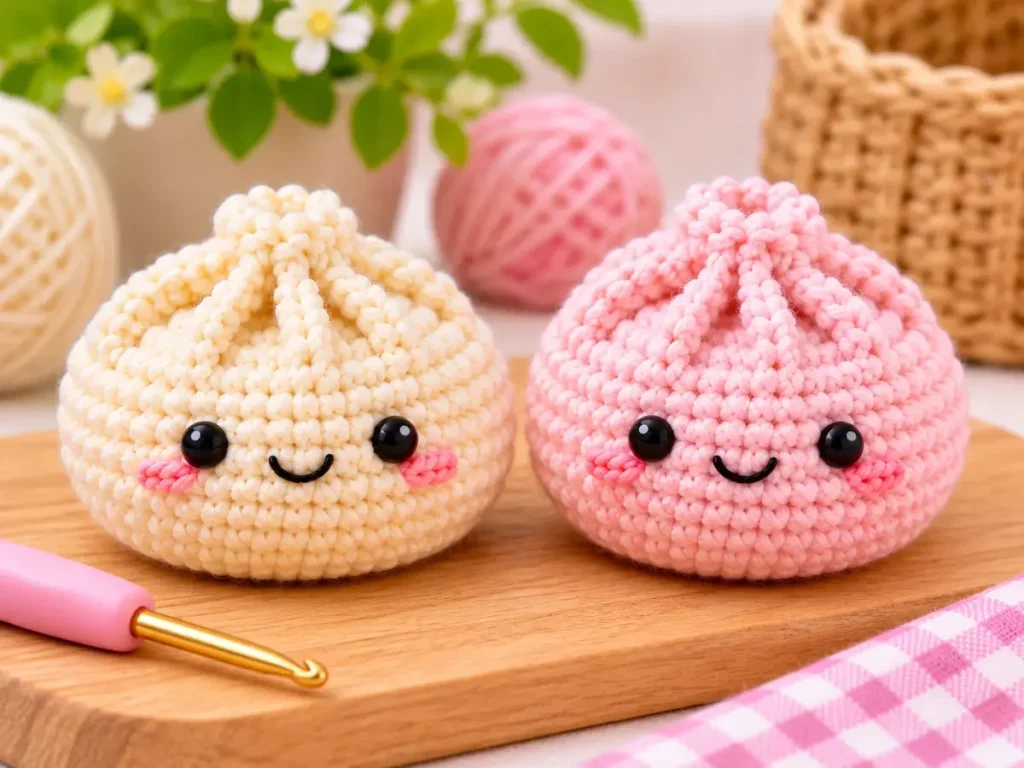
Crochet Dumpling Pattern Troubleshooting
If your dumpling crochet pattern is not shaping as expected, check these common issues first.
Why Is My Stitch Count Wrong After Round 10?
Round 10 must finish with:
18 completed stitches
The repeat is:
(2 sc, PD over next 3 sts) ×6
Each repeat consumes 5 original stitches and creates 3 completed stitches.
So:
6 × 5 = 30 original stitches
and:
6 × 3 = 18 completed stitches
If you have more than 18, check that you have not counted the unused back loops from the PD as additional stitches.
If you have fewer than 18, check that every PD was worked across exactly 3 base stitches.
Why Do I Have Extra Loops After Round 10?
Those loops are intentional.
Each PD uses only the front loops of 3 stitches, leaving their back loops unused.
They do not become the stitches for Round 11.
Round 11 is worked only into the 18 completed stitch tops produced by Round 10.
Why Are My Joined Rounds Shifting?
Check your round start.
The first stitch of each new round goes into the same actual stitch as the previous round’s join, not into the joining slip stitch.
Working into the slip stitch can introduce an extra stitch and change the shaping.
Why Do My Dumpling Pleats Look Different?
The final appearance can be influenced by:
- yarn;
- hook size;
- tension;
- stuffing;
- how the PD behaves in the actual fabric.
The stitch-count structure has been verified, but the final visual result has not yet been physically validated.
Crochet Dumpling Pattern FAQs
Is This a Free Crochet Dumpling Pattern?
Yes. This free crochet dumpling pattern includes the complete approved round sequence from the first 6 stitches through the final 6-stitch closure.
Specifications that still depend on physical testing, such as exact materials and finished measurements, have intentionally not been presented as verified.
Is This Dumpling Crochet Pattern Beginner-Friendly?
Most of the pattern uses basic single crochet, increases, and decreases.
The main section that needs extra attention is Round 10 because it introduces the special PD and requires careful stitch counting.
The most important rule to remember is:
Each PD consumes 3 base stitches and produces 1 completed stitch.
Is This Crochet Dumpling No-Sew?
The main dumpling is made as one continuous crochet piece, so there are no separate body parts that need to be sewn together.
A yarn needle is still used to:
- close the final opening;
- weave in the yarn end;
- embroider the face.
So one-piece is more accurate than claiming that no needle work is required.
For another small project designed around minimal assembly, see the Capybara Crochet Pattern.
How Does the Dumpling Pleat Decrease Work?
The PD uses the front loops of the next 3 stitches and combines those 3 stitches into 1 completed stitch.
The unused back loops are left alone.
When you reach Round 11, crochet into the completed stitch tops from Round 10 rather than those unused loops.
How Many Stitches Should I Have After Round 10?
You should have exactly:
18 completed stitches
Round 10 begins with 30 stitches:
(2 sc, PD over next 3 sts) ×6
Each group of 5 original stitches becomes 3 completed stitches.
Therefore:
30 → 18
How Many Stitches Should I Have After Rounds 11 and 12?
After Round 11:
12 stitches
After Round 12:
6 stitches
The complete shaping sequence is:
30 → 18 → 12 → 6
Can I Use a Different Yarn or Hook?
Different yarn and hook combinations can change the size, firmness, stitch density, and overall appearance of a crochet project.
Because this pattern has not yet completed physical sample testing, specific yarn substitutions or hook-size recommendations are not presented as verified.
What Size Is the Finished Crochet Dumpling?
The finished size is not yet verified.
Measurements should only be added after a physical sample has been completed using documented materials and hook size.
What Should I Crochet Next?
If you want another small amigurumi project with beginner-focused instructions, try the Crochet Bear Pattern.
Final Pattern Notes
This dumpling crochet pattern uses a simple one-piece construction with a verified stitch-count sequence:
- R1:
[6] - R2:
[12] - R3:
[18] - R4:
[24] - R5:
[30] - R6:
[30] - R7:
[30] - R8:
[30] - R9:
[30] - R10:
[18] - R11:
[12] - R12:
[6]
The critical shaping sequence is:
30 → 18 → 12 → 6
Remember these three details:
- R10:
(2 sc, PD over next 3 sts) ×6 [18] - R11:
(sc, dec) ×6 [12], worked only into the 18 completed stitch tops from R10. - R12:
dec ×6 [6], followed by closing through the front loops of the 6 remaining stitches.
The written construction and stitch mathematics are editorially complete.
Physical testing remains pending. The pattern should not be described as physically tested or publication-approved until the sample confirms the starting method, PD execution, material choices, stuffing behavior, closure, finished measurements, pleat appearance, and final silhouette.