Easy crochet patterns, cute projects, and beginner-friendly ideas to inspire your next make.


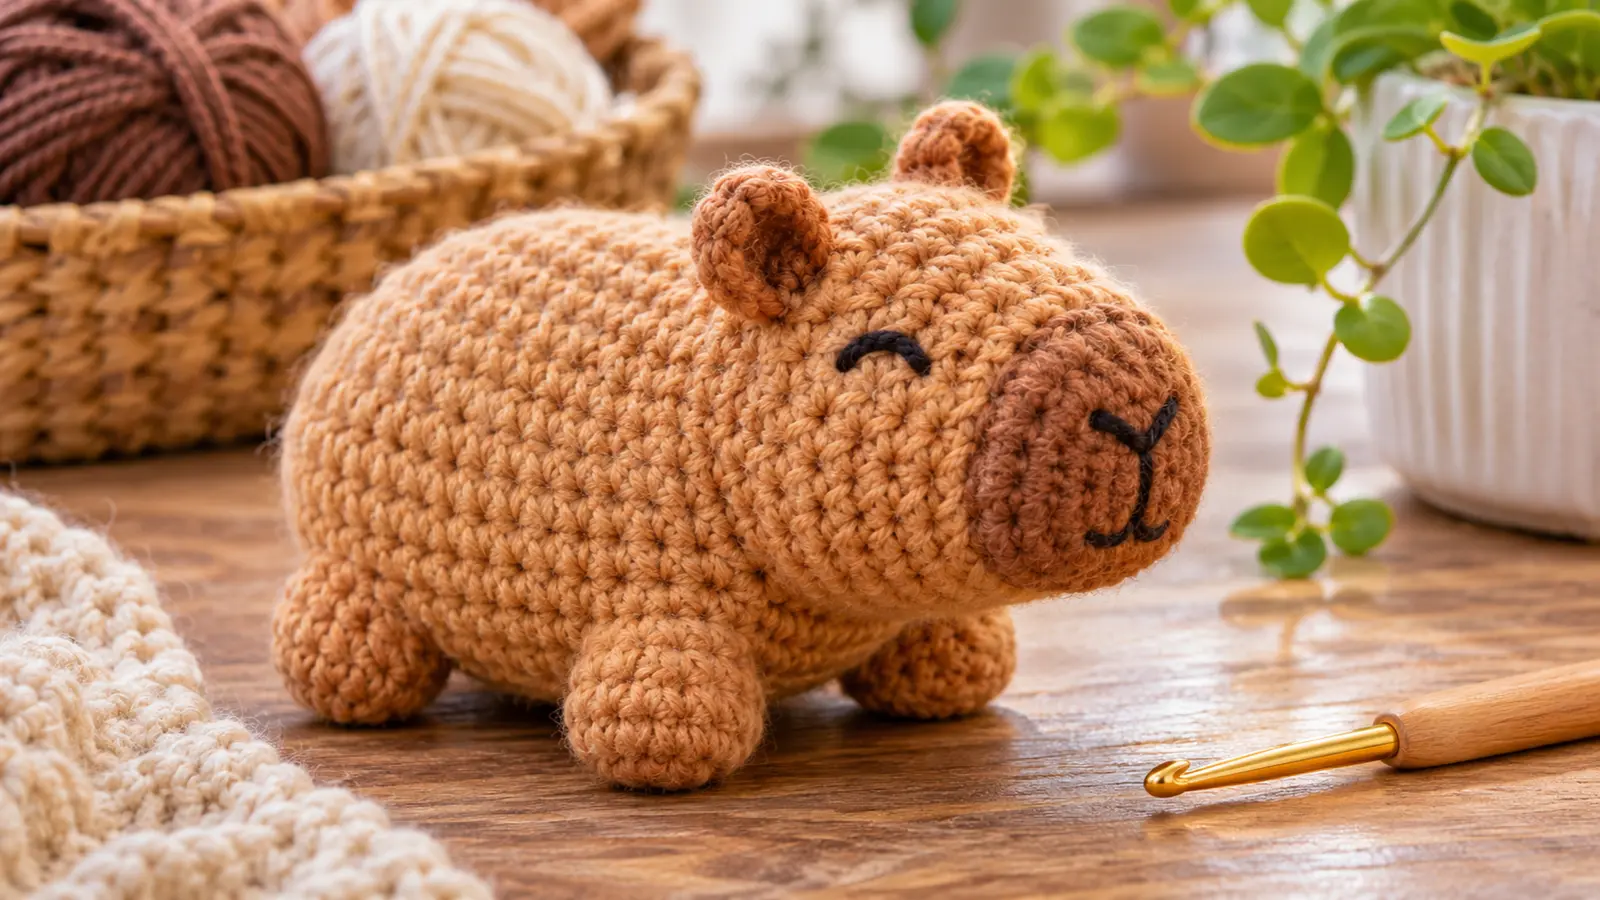
This capybara crochet pattern creates a small stuffed amigurumi worked as one continuous main piece from the muzzle toward the back of the body. The muzzle, head, and body flow directly into one another, while the ears and four short legs are formed with bobble stitches worked into the rounds.
That means there are no separate body pieces to sew on afterward. You will still use a yarn needle for finishing, closing the final opening, weaving in ends, and embroidering the face.
The stitch counts and feature placement in this pattern have been mathematically checked. Finished size, exact proportions, ear and leg projection, facial placement, and overall silhouette will still depend on your yarn, hook, tension, stuffing, and physical sample results.
Table of Contents
Capybara Crochet Pattern at a Glance
| Detail | Pattern |
|---|---|
| Style | Small capybara amigurumi |
| Construction | One continuous main piece |
| Total rounds | 18 |
| Muzzle | 6 → 12 sts |
| Head | Expands to 18 sts |
| Body | Expands to 24 sts |
| Ears | 2 integrated bobbles |
| Legs | 4 integrated bobbles |
| Stuffing | Yes |
| Separate body pieces | None |
| Assembly sewing | None |
| Facial details | Embroidered |
| Terminology | US crochet terms |
What Does “No-Sew” Mean Here?
This pattern uses no assembly sewing. The head, muzzle, body, ears, and legs are all crocheted as part of the same construction.
However, “no-sew” does not mean you will never need a yarn needle. A needle may still be used to close the final opening, weave in ends, and embroider the facial details.
What You’ll Need
- main yarn for the capybara body;
- black or dark brown yarn or embroidery thread for the face;
- polyester stuffing;
- crochet hook suitable for your chosen yarn;
- yarn needle;
- scissors;
- stitch marker.
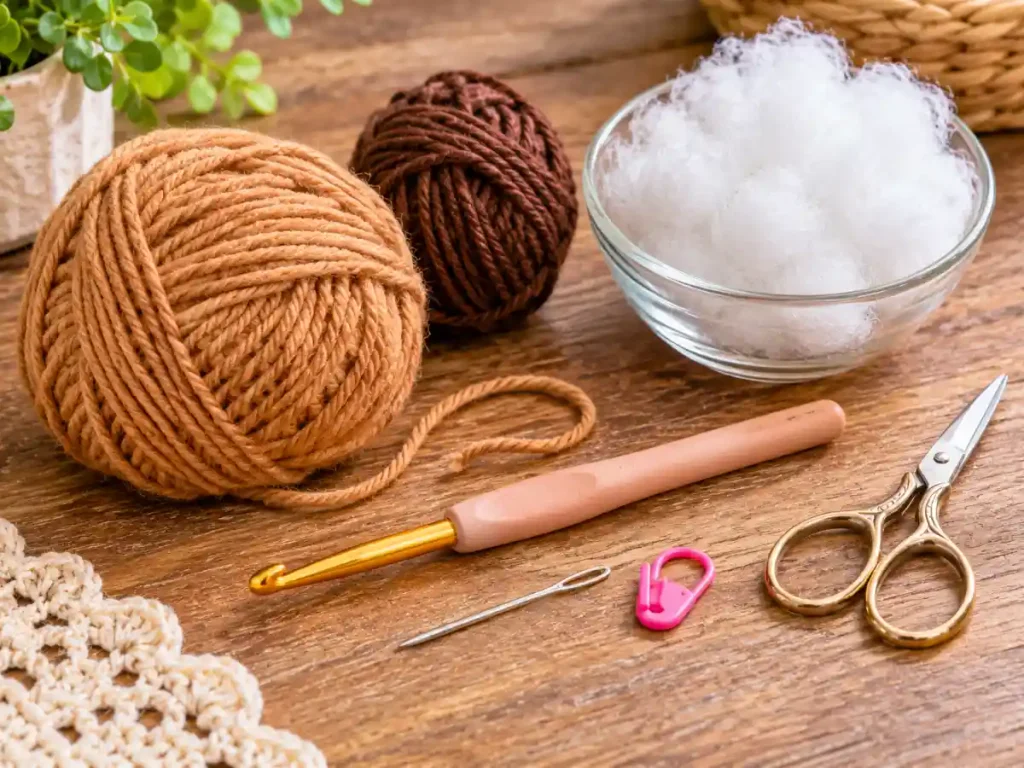
This pattern does not prescribe one yarn weight, hook size, gauge, yardage, or finished measurement. Different yarn and hook combinations will change the size, firmness, and appearance of the finished capybara.
Crochet Stitches and Abbreviations
This pattern uses US crochet terminology.
- MR — magic ring
- ch — chain
- sc — single crochet
- inc — increase: work 2 sc in the same stitch
- dec — single crochet decrease over the next 2 stitches
- dc — double crochet
- sl st — slip stitch
- st / sts — stitch / stitches
- EB — ear bobble
- LB — leg bobble
For a general terminology reference, see the Craft Yarn Council crochet abbreviations.
Important Round Rules
This pattern is worked in joined rounds and is not turned.
At the beginning of each new round, ch 1 unless otherwise stated.
The beginning ch 1 does not count as a stitch.
The joining slip stitch does not count as a stitch.
When the next round begins in the same stitch as the join, insert your hook into the actual stitch below the joining slip stitch, not into the slip stitch itself.
Keeping a stitch marker at the beginning of each round can help maintain the intended underside reference for the ears and legs.
Special Stitches
Ear Bobble — EB
Work all parts of the bobble into the same base stitch:
[Yo, insert hook in st, yo and pull up a loop, yo and pull through 2 loops] ×4.
You should now have 5 loops on your hook.
Yarn over and pull through all 5 loops.
Push the bobble toward the outside of the work.
One EB consumes 1 base stitch and counts as 1 completed stitch.
Leg Bobble — LB
Work all parts into the same base stitch:
[Yo, insert hook in st, yo and pull up a loop, yo and pull through 2 loops] ×5.
You should now have 6 loops on your hook.
Yarn over and pull through all 6 loops.
Push the bobble toward the outside.
One LB consumes 1 base stitch and counts as 1 completed stitch.
Important Bobble Rule
On the round immediately after an ear or leg bobble, work one sc into the top of that bobble.
Do not skip the bobble, and do not work more than one stitch into it. Each bobble still counts as one stitch in the round total.
Before You Start This Capybara Crochet Pattern
The construction moves from the front of the animal toward the rear.
The stitch structure is:
Muzzle:
6 → 12 → 12 → 12
Head:
18 → 18 → 18 → 18
Body:
24 stitches through the main body section
Rear shaping:
24 → 18 → 12 → 6
Three rounds contain the integrated features:
- Round 7: two ears
- Round 10: two front legs
- Round 14: two rear legs
The beginning of each round acts as the underside reference for feature placement. Try to keep your round joins aligned as consistently as possible.
The stitch counts and mathematical placement have been verified. The final visual proportions—including how strongly the ears and legs project and how long the muzzle appears—still need to be judged on a physical crocheted sample.
How to Crochet the Capybara
Step 1: Crochet the Muzzle
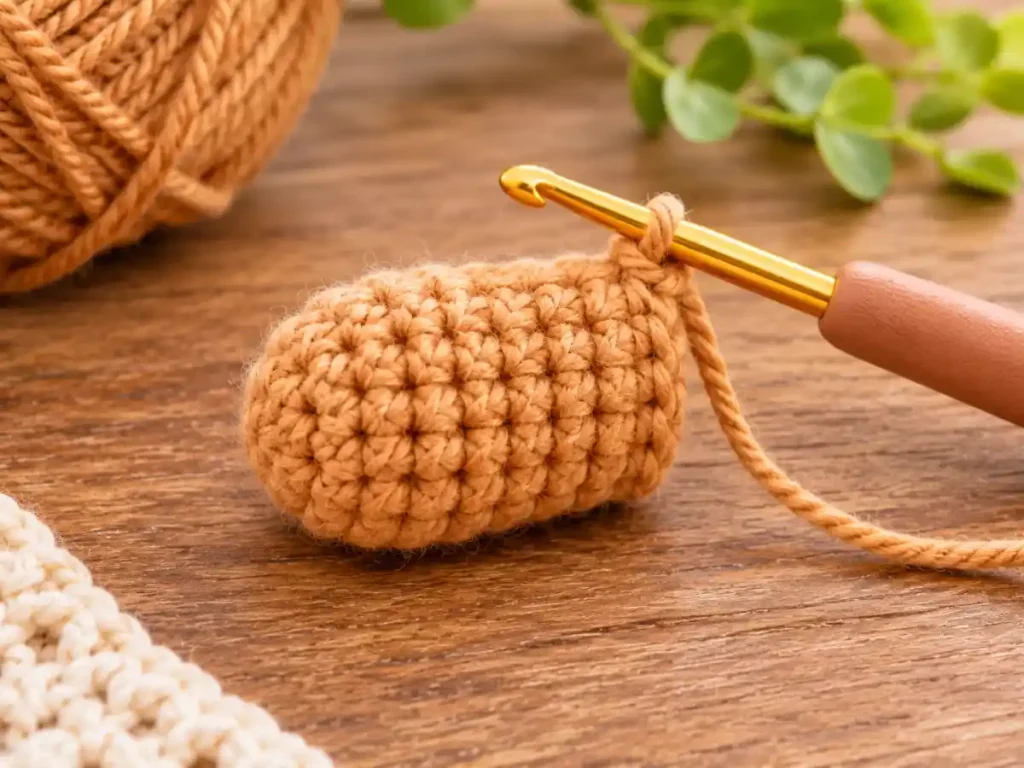
Round 1
Make a magic ring.
Work 6 sc into the MR.
Pull the ring closed.
Join with a sl st to the first sc.
[6]
Round 2
Ch 1.
Work 2 sc in the same stitch as the join.
Work 2 sc in each of the remaining 5 sts.
Join with a sl st to the first sc.
[12]
Stitch Check
Round 1 had 6 stitches.
Each stitch receives an increase:
6 × 2 = 12 sts
Round 3
Ch 1.
Sc in the same stitch as the join and in each remaining stitch around.
Join.
[12]
Round 4
Repeat Round 3.
[12]
These unchanged rounds add length to the front section before the head expands.
The exact muzzle proportion will depend on the finished physical sample and the yarn and hook combination used.
Step 2: Shape the Head
Round 5
Ch 1.
Repeat:
sc in next st, inc in next st
6 times.
Join.
[18]
Calculation:
6 × (1 sc + 2 sc) = 18 sts
Round 6
Ch 1.
Sc in each stitch around.
Join.
[18]
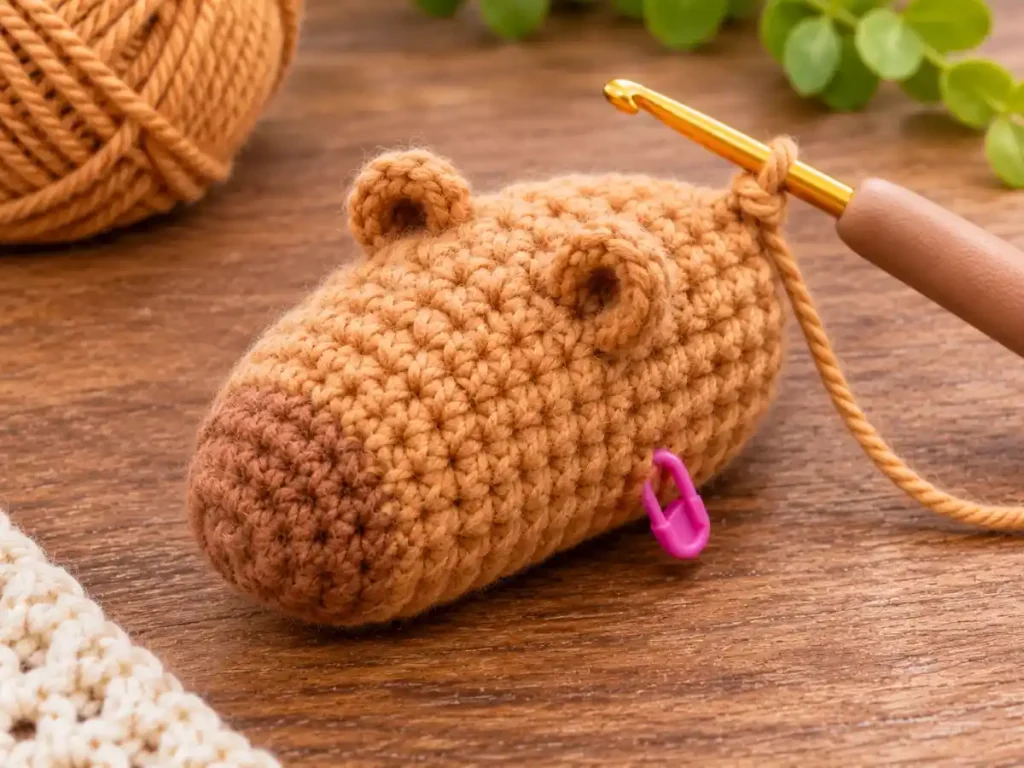
Step 3: Crochet the Ears Into the Head
Round 7
Ch 1.
Work:
sc in next 7 sts, EB in next st, sc in next 3 sts, EB in next st, sc in next 6 sts.
Join.
[18]
Stitch Check
The round consumes all 18 available stitch positions:
7 + 1 + 3 + 1 + 6 = 18
Each ear bobble uses one base stitch and still counts as one stitch.
Push both bobbles toward the outside of the head before continuing.
Round 8
Ch 1.
Sc in each stitch around, including one sc in the top of each EB.
Join.
[18]
There are no separate ears to attach later.
Step 4: Expand Into the Body
Round 9
Ch 1.
Repeat:
sc in next 2 sts, inc in next st
6 times.
Join.
[24]
This increases the circumference from 18 stitches to 24 stitches.
Step 5: Crochet the Front Legs
Round 10
Ch 1.
Work:
sc in next 2 sts, LB in next st, sc in next 18 sts, LB in next st, sc in next 2 sts.
Join.
[24]
Stitch Check
2 + 1 + 18 + 1 + 2 = 24
The two leg bobbles sit around the underside reference of the body.
Push both bobbles outward before continuing.
Step 6: Build the Body Length
Round 11
Ch 1.
Sc around, working one sc into the top of each leg bobble from the previous round.
Join.
[24]
Round 12
Ch 1.
Sc around.
Join.
[24]
Round 13
Ch 1.
Sc around.
Join.
[24]
These straight rounds create distance between the front and rear leg positions without changing the body circumference.
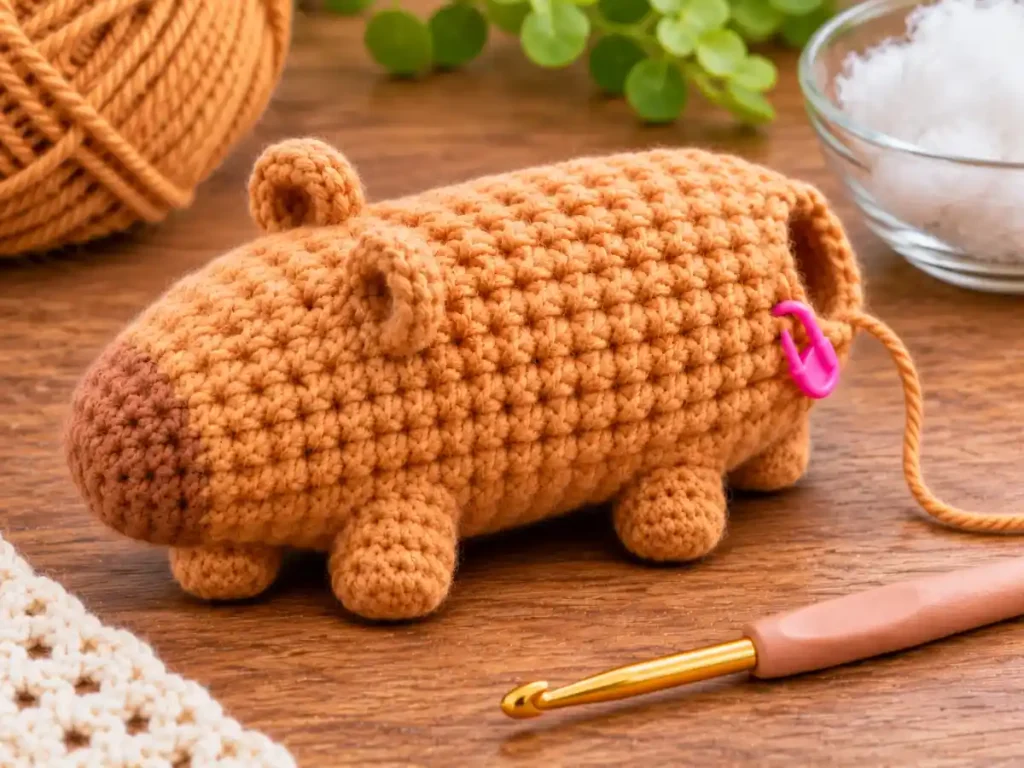
Step 7: Crochet the Rear Legs
Round 14
Ch 1.
Work:
sc in next 2 sts, LB in next st, sc in next 18 sts, LB in next st, sc in next 2 sts.
Join.
[24]
This uses the same circumferential placement as the front leg round, but farther back along the body.
Round 15
Ch 1.
Sc around, working one sc into the top of each leg bobble.
Join.
[24]
Step 8: Add the Stuffing
Begin adding polyester stuffing through the open rear section.
Distribute it gradually toward the muzzle, head, and body.
Avoid packing the stuffing too firmly directly behind the ear and leg bobbles, because excessive pressure may push them inward.
The ideal stuffing quantity and the most convenient exact stuffing timing can vary with yarn and hook choice, so adjust gradually rather than forcing the shape.
Step 9: Shape and Close the Rear
Round 16
Ch 1.
Repeat:
sc in next 2 sts, dec over next 2 sts
6 times.
Join.
[18]
Add or redistribute stuffing if needed while the opening is still accessible.
Round 17
Ch 1.
Repeat:
sc in next st, dec over next 2 sts
6 times.
Join.
[12]
Check the stuffing again before the final decrease round.
Round 18
Ch 1.
Work:
dec ×6
[6]
Fasten off, leaving enough yarn to close the remaining opening securely.
Use your yarn needle to close the final gap and weave in the end.
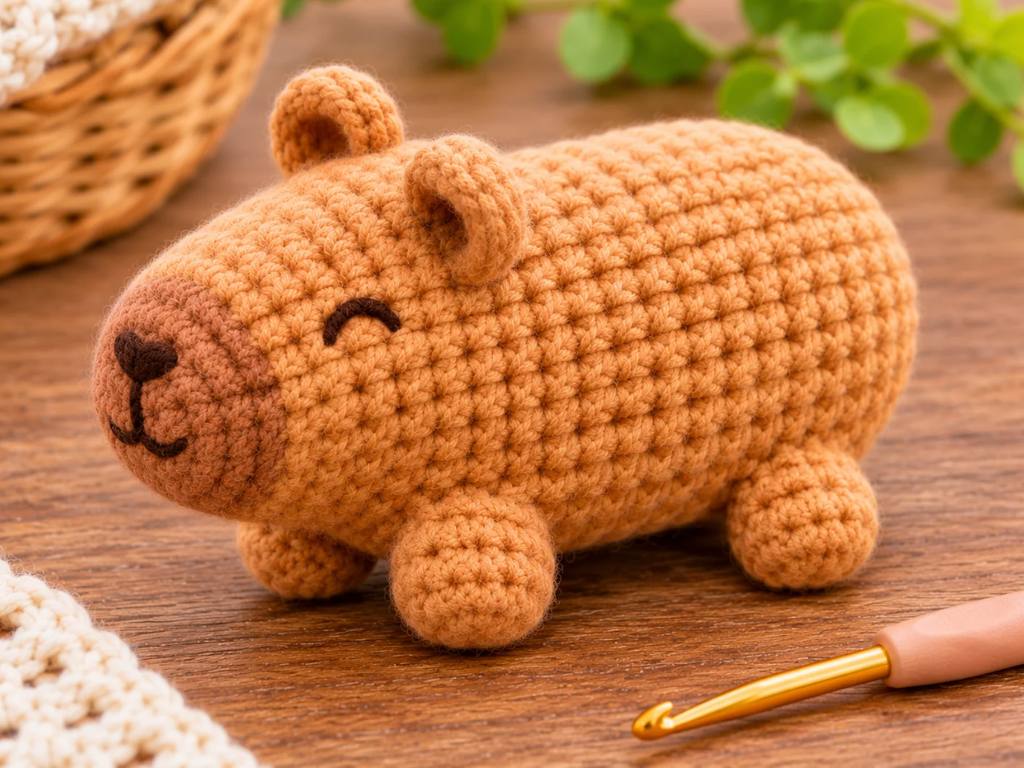
Add the Capybara Face
Use black or dark brown yarn or embroidery thread for the facial details.
Add:
- two small embroidered eyes;
- an embroidered nose;
- an optional short mouth line if it suits the finished shape.
Exact eye and nose coordinates are intentionally not fixed.
Face placement has a strong effect on whether the finished animal reads visually as a capybara rather than a bear, hamster, or guinea pig. Before securing the embroidery permanently, look at the capybara from both the front and the side.
The best final placement should be confirmed after evaluating a physical sample.
Capybara Shape Check
Once the body is stuffed and closed, check the overall construction.
You should have:
- one continuous muzzle, head, and body;
- two ear bobbles;
- two front leg bobbles;
- two rear leg bobbles;
- a wider 24-stitch body section;
- a closed rear end.
Check that you did not accidentally skip a bobble on the following round or work two stitches into its top.
The four legs should remain on the lower portion of the body, while the two ears should project from the head section.
The exact finished posture will depend on your yarn, hook, tension, stuffing, and how strongly the bobbles project.
Troubleshooting the Capybara Crochet Pattern
The Stitch Count Changed After a Bobble
Each EB and LB consumes one base stitch and counts as one completed stitch.
On the following round, work only one sc into the top of the bobble.
If you skip the bobble, you will lose a stitch. If you accidentally work multiple stitches into it, the stitch count will increase.
An Ear or Leg Is Sitting Inside the Body
Push each bobble toward the outside immediately after making it.
When stuffing, avoid forcing large amounts of stuffing directly behind that feature.
The Body Looks Too Round
Check the stitch counts before changing the construction.
Rounds 11–13 should remain at exactly 24 stitches with no increases.
An accidental increase during these rounds can make the body wider than intended.
One Pair of Legs Looks Uneven
Recheck the leg round:
2 sc + 1 LB + 18 sc + 1 LB + 2 sc = 24
The same sequence is used for both the front and rear pairs.
The Face Looks More Like a Bear
Do not immediately change the mathematically verified body stitch counts.
First experiment with the embroidery position while looking at the finished figure from the front and side. The placement of the eyes and nose can significantly change the expression and animal silhouette.
Why This Is a No-Sew Capybara Pattern
The muzzle, head, body, ears, and legs are all created during the main crochet construction.
You do not make four separate legs, two separate ears, or a separate muzzle that must later be sewn onto the body.
That removes assembly sewing from the body construction.
You may still need a yarn needle to:
- close the final rear opening;
- weave in yarn ends;
- embroider the eyes and nose.
So this is a no-assembly-sewing amigurumi pattern, not a project that requires no needle at all.
More Small Amigurumi Patterns
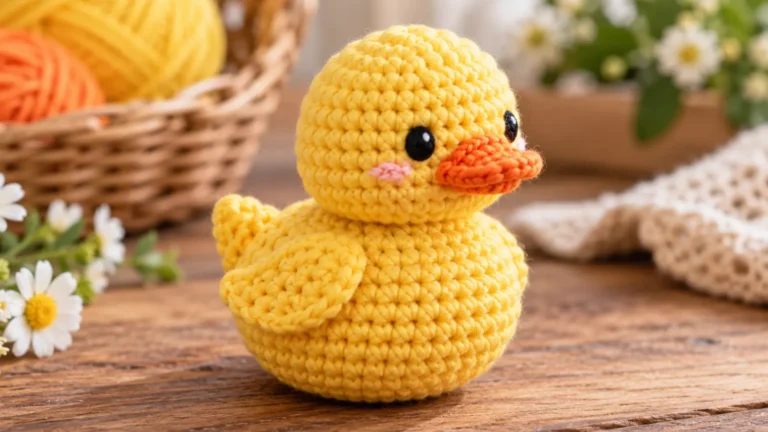
If you enjoy small animal projects with minimal assembly, try our crochet duck pattern next.
The duck is another small amigurumi project in our No-Sew Amigurumi collection and makes a natural follow-up after the capybara. For a small food-shaped amigurumi project, try our dumpling crochet pattern.
Frequently Asked Questions
Is This Capybara Crochet Pattern Free?
Yes. This free capybara crochet pattern includes the complete written construction for the muzzle, head, body, integrated ears, four integrated legs, rear shaping, and finishing.
Is This a No-Sew Capybara?
Yes, in the sense that there are no separate body pieces to assemble with sewing.
The ears and legs are crocheted directly into the body.
A yarn needle may still be needed for closing the final opening, weaving in ends, and embroidering the face.
How Many Rounds Are in the Pattern?
The main construction contains 18 rounds.
It starts with 6 stitches at the muzzle, expands through the head and body, and then decreases back to 6 stitches at the rear.
Are the Ears Sewn On?
No.
Both ears are made as ear bobbles directly in Round 7.
Are the Legs Separate Pieces?
No.
The front legs are worked directly into Round 10, and the rear legs are worked directly into Round 14.
Is This Capybara Pattern Suitable for Beginners?
The pattern uses a relatively compact stitch vocabulary and avoids separate-piece assembly, but it still requires careful stitch counting, joined rounds, increases, decreases, and bobble stitches.
For that reason, it is more appropriate for a confident beginner than for someone who has never crocheted in rounds before.
Real-world beginner usability should still be confirmed through physical sample testing.
What Yarn and Hook Should I Use?
Choose a yarn and hook combination that produces a firm crochet fabric suitable for holding stuffing.
This pattern does not currently prescribe a specific yarn weight or hook size because those specifications have not been physically validated.
How Big Will the Finished Capybara Be?
The finished size will depend on your yarn, hook, tension, and stuffing.
No exact finished measurement is claimed until the pattern has been tested with a physical sample.
Final Thoughts
This capybara crochet pattern uses an 18-round continuous construction to form the muzzle, head, body, two ears, and four legs without sewing separate body pieces together.
The pattern grows from 6 stitches at the muzzle to an 18-stitch head and 24-stitch body before decreasing to close the rear. Integrated bobbles form the ears and legs, while simple embroidery finishes the face.
The stitch counts and feature locations have been mathematically verified. Finished dimensions, exact facial placement, feature projection, stuffing behavior, and final visual proportions remain dependent on physical sample testing.