Easy crochet patterns, cute projects, and beginner-friendly ideas to inspire your next make.

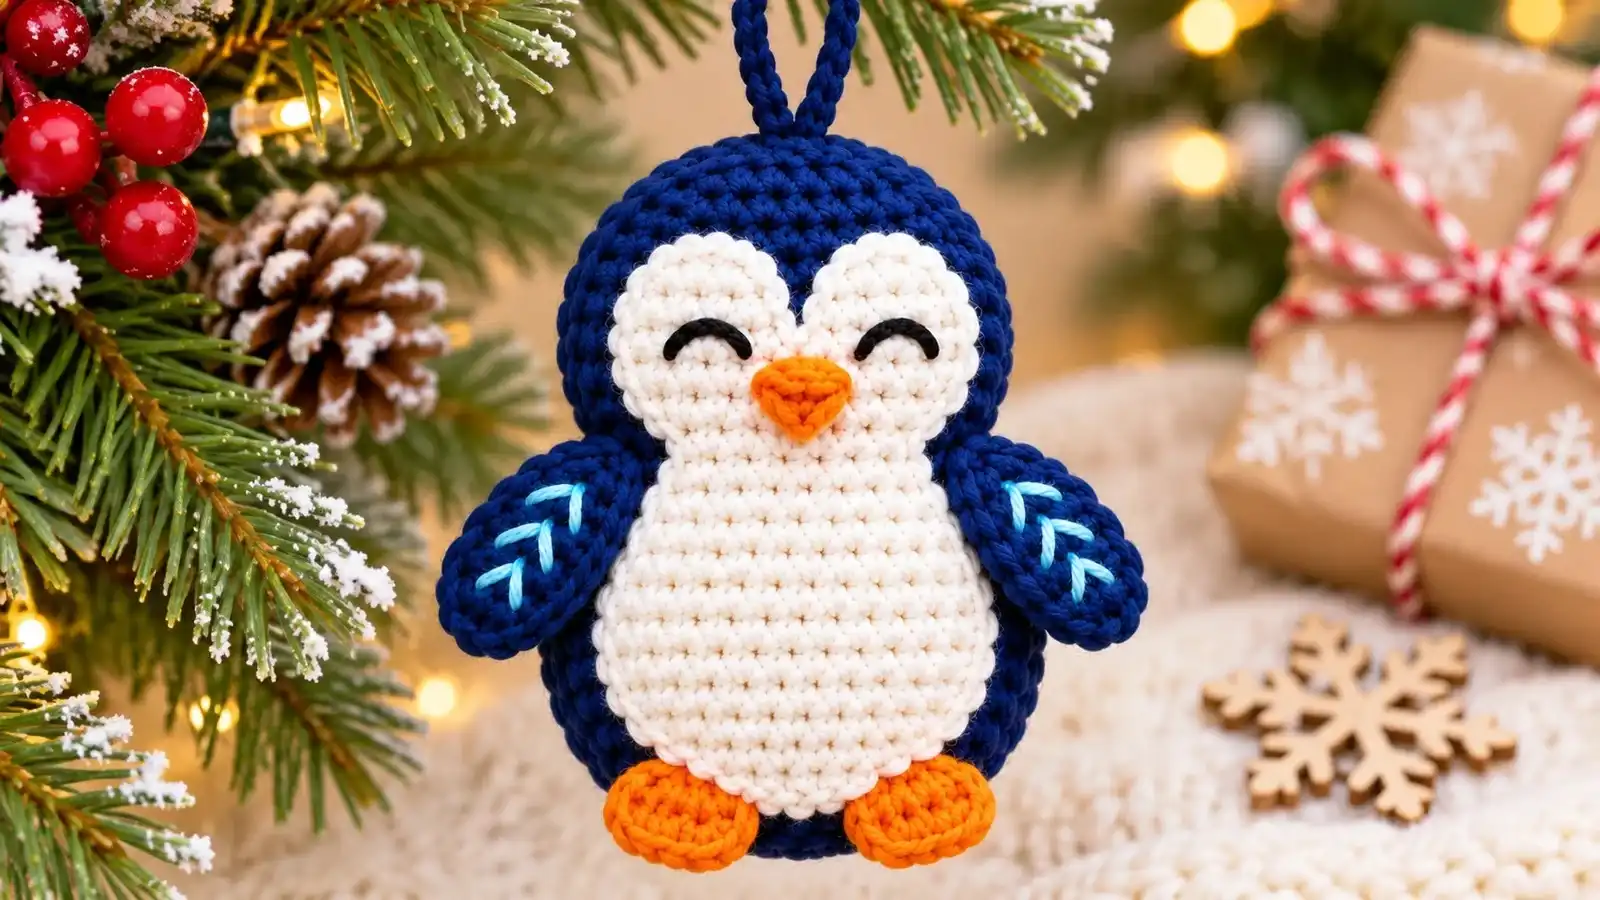
This crochet penguin ornament pattern makes a cute little Christmas decoration with a pear-shaped body, a white belly, embroidered features, and tiny flippers. Follow the instructions below to crochet the original Frost-Tip Penguin, complete with a hanging loop for your Christmas tree.
Table of Contents
Crochet Penguin Ornament Pattern at a Glance
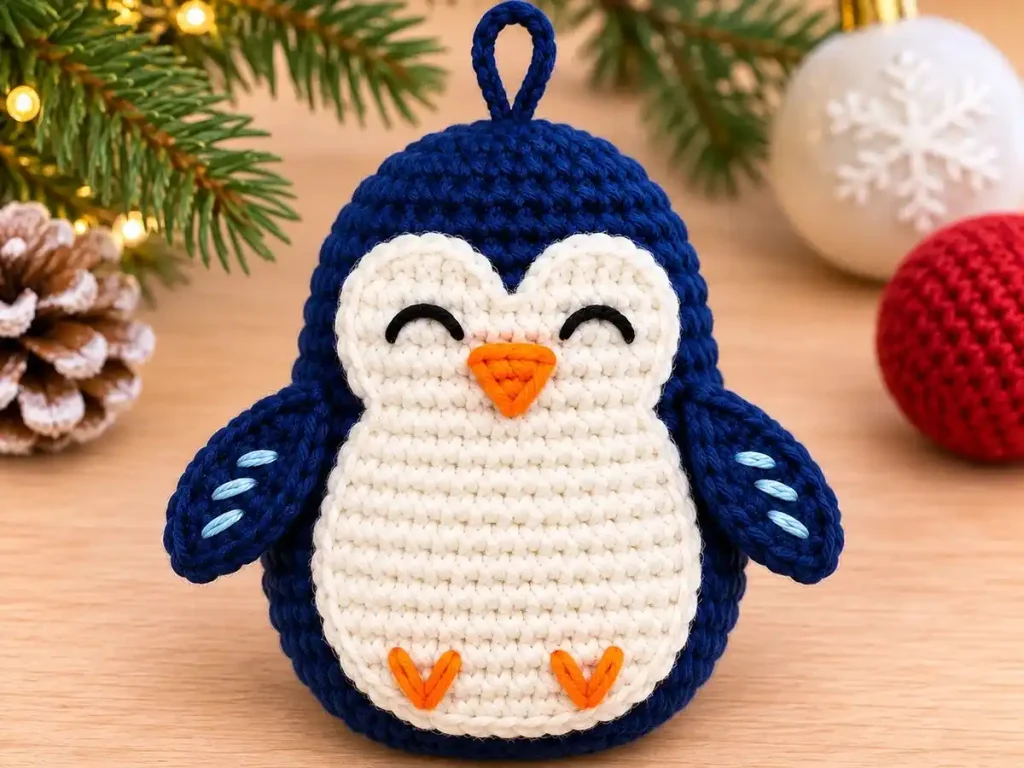
Meet the Frost-Tip Penguin, a small amigurumi Christmas ornament designed around one continuous crocheted body.
The midnight-blue body has a rounded upper section that widens into a fuller lower half. A separate ivory belly, two simple flippers, and embroidered details give the penguin its cheerful winter look.
The body is worked in continuous rounds, while the belly and flippers are made in flat rows and sewn into place.
| Pattern Detail | Information |
|---|---|
| Project | Frost-Tip Penguin Ornament |
| Pattern type | Free Christmas crochet ornament |
| Construction | One-piece stuffed body with separate details |
| Body | 20 continuous rounds |
| Belly panel | 10 flat rows |
| Flippers | 7 rows each; make 2 |
| Hanging loop | 24 chains |
| Stuffing | Polyester fiberfill |
| Eyes | Embroidered |
| Sewing | Required |
| Suggested yarn | Sport-weight cotton |
| Suggested hook | 2.5 mm, pending testing |
| Terminology | US crochet terms |
| Intended skill level | Confident beginner, provisional |
| Finished size | Not yet physically measured |
Pattern testing note: This original pattern has undergone mathematical stitch-count and technical review, but physical sample testing is still pending. Finished measurements, assembly positions, and the suggested yarn-and-hook combination have not yet been verified on a completed sample.
Materials You’ll Need
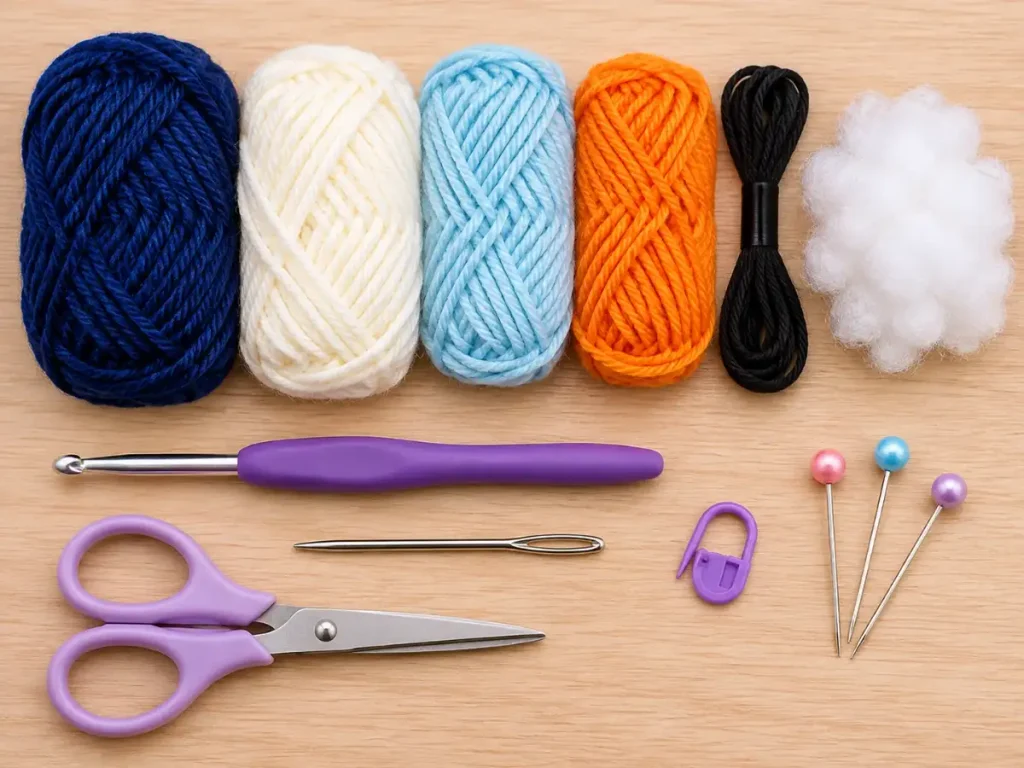
Gather these supplies before starting your mini crochet penguin ornament:
- Midnight-blue cotton yarn: For the main body and flippers.
- Ivory cotton yarn: For the belly panel.
- Icy-blue yarn: For the decorative flipper tips.
- Orange yarn: For the beak and feet.
- Black embroidery thread or fine yarn: For the eyes.
- 2.5 mm crochet hook: Proposed starting size for testing.
- Polyester fiberfill: For stuffing the body.
- Tapestry needle: For sewing and embroidery.
- Stitch marker: To track continuous rounds.
- Scissors: For cutting yarn.
- Removable pins: For positioning the belly and flippers before sewing.
Sport-weight cotton is the proposed yarn for this design. Keep the yarn thickness consistent between pieces so the finished details work together.
Use a hook that creates a firm crochet fabric without large gaps between stitches. The final hook size and yarn requirements will need confirmation through physical testing.
Crochet Stitches and Abbreviations
This pattern uses US crochet terminology.
| Abbreviation | Meaning |
|---|---|
| MR | Magic ring |
| ch | Chain |
| sc | Single crochet |
| inc | Increase: 2 sc in the same stitch |
| invdec | Invisible single crochet decrease |
| sc2tog | Single crochet 2 stitches together |
| st / sts | Stitch / stitches |
| Rnd | Round |
| Row | Flat crochet row |
| FO | Fasten off |
You can check standard US stitch terminology in the Craft Yarn Council’s crochet abbreviations guide.
How to Work an Invisible Decrease
The body uses invisible decreases to help the surface look smoother as the penguin narrows.
To make an invisible decrease:
- Insert your hook through the front loop of the next stitch.
- Without completing a stitch, insert the hook through the front loop of the following stitch.
- Yarn over and pull through both front loops.
- Yarn over again and pull through the two remaining loops on your hook.
The two original stitches become one stitch.
For the flat belly and flippers, use a standard sc2tog decrease instead: draw up a loop in each of the next two stitches, then yarn over and pull through all three loops.
Both methods decrease the stitch count by one.
Before You Start Your Crochet Penguin Ornament
A few construction details will help you keep the pieces organized.
Work the body in continuous rounds. Do not join rounds with a slip stitch or turn your work. Move your stitch marker to the first stitch of each new round.
Keep your stitch counts accurate. The body increases from six stitches to a maximum of 42, then gradually decreases to close the base.
Turn the flat pieces correctly. The belly and flippers are crocheted in rows. Chain one and turn before every new row after Row 1. The turning chain does not count as a stitch.
Complete the face before closing the body. The eyes, beak, and hanging loop are attached while the body is still accessible from the inside.
Check the placement before sewing. The belly and flippers are separate pieces. Pin them in position before securing them with a tapestry needle.
This is a stuffed amigurumi ornament, not a no-sew crochet pattern.
The face and attachment positions below are provisional until a physical prototype confirms the final proportions.
How to Crochet a Penguin Ornament – Step by Step
The Frost-Tip Penguin is made in seven main steps.
Start with the continuous body, add the embroidered face and hanging loop, then finish the separate belly, flippers, and decorative details.
Step 1: Crochet the Penguin’s Head
Yarn color: Midnight blue
Begin at the top of the penguin’s head and work downward in continuous spiral rounds.
Rnd 1: Make 6 sc in a magic ring. (6)
Pull the ring closed and place a stitch marker in the first stitch.
Rnd 2: Inc in each stitch around. (12)
Rnd 3: (1 sc, inc) × 6. (18)
Rnd 4: (2 sc, inc) × 6. (24)
Rnd 5: Sc in each stitch around. (24)
Rnd 6: Sc in each stitch around. (24)
Rnd 7: Sc in each stitch around. (24)
Head Stitch Check
Your stitch counts should follow this progression:
6 → 12 → 18 → 24 → 24 → 24 → 24
After Round 7, you should have exactly 24 stitches.
The first four rounds expand the top of the head. Rounds 5–7 add height without increasing its circumference.
Keep your tension consistent and check that you have not accidentally worked into the stitch marker position twice.
Step 2: Shape the Penguin’s Body
Continue using midnight-blue yarn.
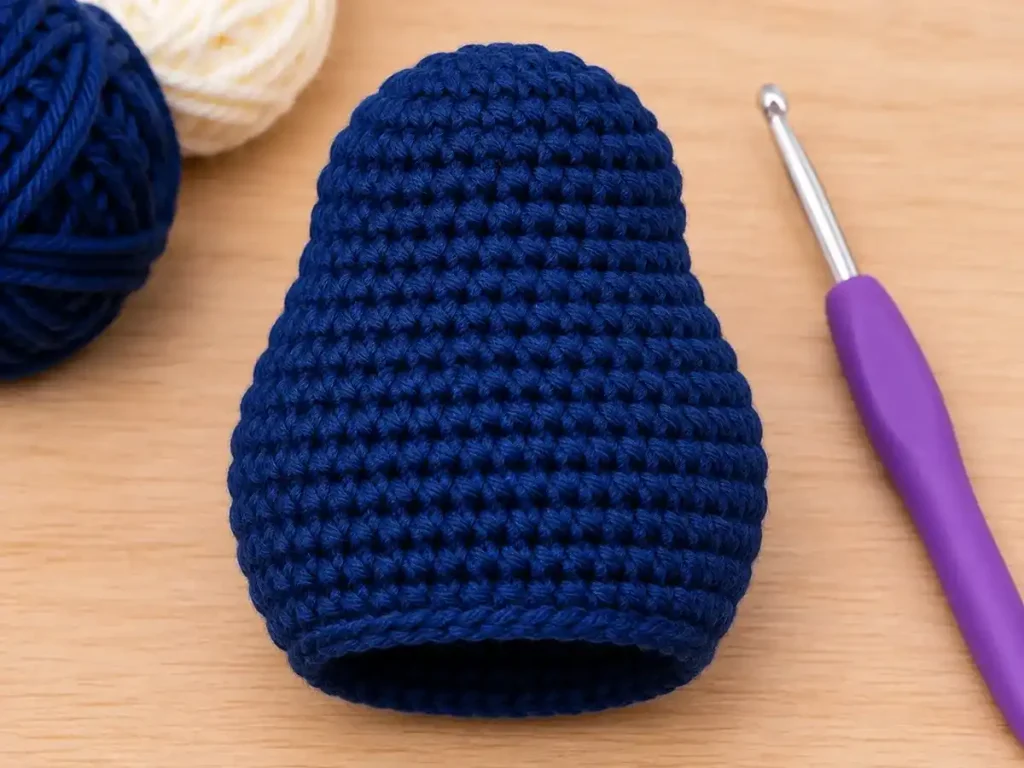
The next rounds expand the shape below the head, creating the fuller lower section of the penguin.
Rnd 8: (3 sc, inc) × 6. (30)
Rnd 9: (4 sc, inc) × 6. (36)
Rnd 10: (5 sc, inc) × 6. (42)
Rnd 11: Sc in each stitch around. (42)
Rnd 12: Sc in each stitch around. (42)
Rnd 13: Sc in each stitch around. (42)
Rnd 14: Sc in each stitch around. (42)
Now begin narrowing the lower body.
Use invisible decreases for the remaining body-shaping rounds.
Rnd 15: (5 sc, invdec) × 6. (36)
Rnd 16: (4 sc, invdec) × 6. (30)
Pause after Round 16. Do not fasten off or close the body.
Body Shaping Check
The stitch counts for Rounds 8–16 are:
30 → 36 → 42 → 42 → 42 → 42 → 42 → 36 → 30
Round 10 establishes the maximum circumference of 42 stitches.
Rounds 11–14 maintain that width, while Rounds 15–16 begin the lower taper.
The intended result is a smaller upper head above a fuller body. The exact pear-shaped silhouette will need to be assessed during sample testing.
Step 3: Embroider the Eyes and Beak
Before you finish the body, add the penguin’s embroidered facial features.
First, insert a little temporary stuffing to help you judge the shape.
Find the most symmetrical front-facing side and mark the vertical center. Do not rely on your round marker to identify the center front, because spiral crochet can shift the apparent stitch alignment.
Embroider the Eyes
Use black embroidery thread or fine black yarn.
- Identify the area around Rounds 5–6.
- Place the first eye approximately three stitch positions to one side of the front center.
- Position the second eye at a matching distance on the opposite side.
- Make a short embroidered stitch for each eye.
- Compare the spacing before tightening and securing the ends.
Keep the eyes small enough to leave space for the beak between them.
Embroider the Beak
Switch to orange yarn.
- Find the center beneath the eyes, around Rounds 7–8.
- Work a few short stitches to create a small triangular beak.
- Keep the triangle centered.
- Check that the beak does not overlap the intended top of the belly panel.
- Secure the yarn tail inside the open body.
These round positions are starting guides, not physically verified attachment measurements.
If the embroidery pulls the fabric inward, loosen the tension before securing the yarn.
Step 4: Add the Hanging Loop, Stuff and Close the Body
The hanging loop is easier to secure while you can still reach the inside of the penguin.
Crochet the Hanging Loop
Using midnight-blue yarn:
- Leave a long starting tail.
- Ch 24.
- Fasten off, leaving another long tail.
- Fold the chain into a loop.
- Position both ends near the crown, provisionally around Rounds 2–3.
- Insert the tails through separate nearby attachment points.
- Secure both ends firmly inside the body using your tapestry needle.
The goal is a stable loop positioned close to the top center.
The precise attachment points must be confirmed by checking how the finished penguin hangs.
Stuff the Penguin
Add polyester fiberfill gradually.
Start with small amounts and distribute the stuffing gently through the head and lower body.
Avoid packing the stuffing too tightly. Excess filling can distort the shape or make gaps between stitches more noticeable.
Once the body has a little structure, continue crocheting.
Finish the Body
Rnd 17: (3 sc, invdec) × 6. (24)
Rnd 18: (2 sc, invdec) × 6. (18)
Check the stuffing and add more if needed.
Rnd 19: (1 sc, invdec) × 6. (12)
Add the final small amount of stuffing before the opening becomes too narrow.
Rnd 20: Invdec × 6. (6)
Fasten off, leaving a yarn tail.
Using your tapestry needle, pass the tail through the front loops of the remaining six stitches.
Pull gently to close the opening, secure the yarn, and hide the end inside the body.
Your penguin’s stuffed body is now complete according to the written construction.
Check the crown, lower closure, and overall shape before attaching the remaining pieces.
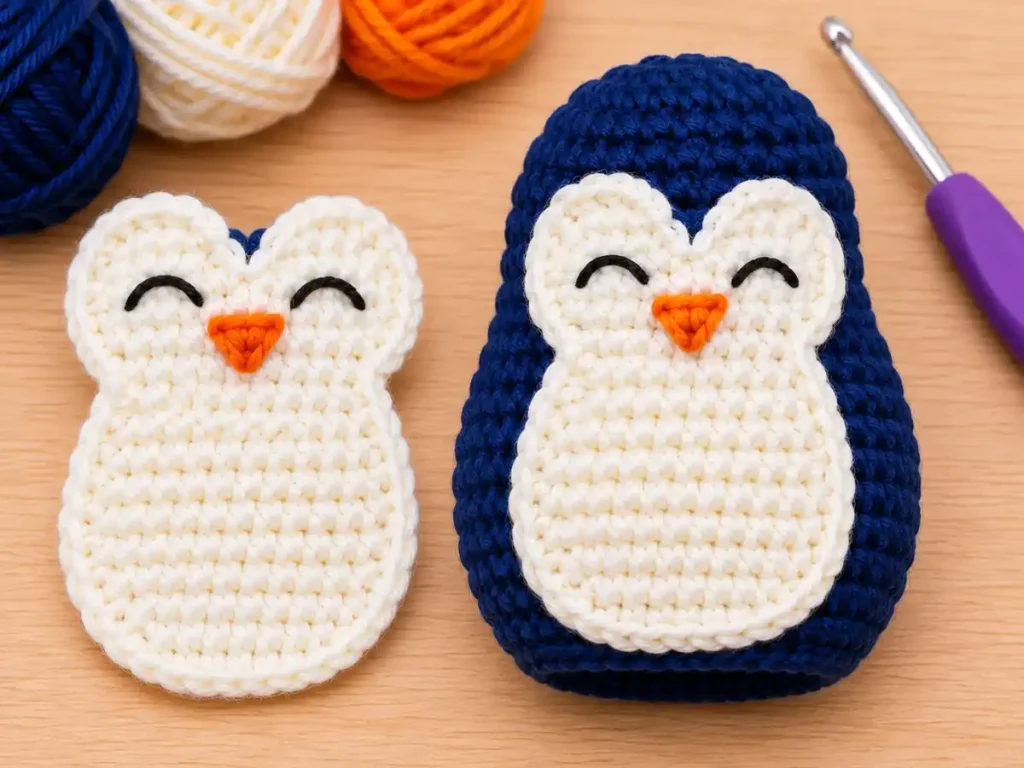
Step 5: Crochet the Ivory Belly Panel
The ivory belly is worked separately in flat rows.
It starts narrow, widens through the middle, and tapers again toward the bottom.
Yarn color: Ivory
Begin with ch 5.
Row 1: Starting in the second chain from the hook, work 4 sc. (4)
Ch 1 and turn.
Row 2: Inc, 2 sc, inc. (6)
Ch 1 and turn.
Row 3: Inc, 4 sc, inc. (8)
Ch 1 and turn.
Row 4: Sc across. (8)
Ch 1 and turn.
Row 5: Sc across. (8)
Ch 1 and turn.
Row 6: Sc across. (8)
Ch 1 and turn.
Row 7: Sc across. (8)
Ch 1 and turn.
Row 8: Sc2tog, 4 sc, sc2tog. (6)
Ch 1 and turn.
Row 9: Sc2tog, 2 sc, sc2tog. (4)
Ch 1 and turn.
Row 10: Sc2tog twice. (2)
Fasten off, leaving a long tail for sewing.
Belly Panel Stitch Check
The row counts should be:
4 → 6 → 8 → 8 → 8 → 8 → 8 → 6 → 4 → 2
You should have ten completed rows.
The panel has no additional edging round in V1.0.
Attach the Belly Panel
Position the ivory panel on the front of the stuffed penguin.
Use Row 1 as the upper end and place it below the beak. The provisional attachment area extends approximately from body Round 9 toward Round 18.
Pin the panel before sewing.
Check that it:
- Sits directly below the beak.
- Follows the centerline of the body.
- Lies smoothly without large folds.
- Leaves room for the small feet near the bottom.
- Does not stretch or pull the surrounding body stitches.
If the panel sits correctly, use the long ivory tail to sew around its edges.
Take small, even stitches and avoid pulling the seam too tightly.
Testing note: Ten flat crochet rows do not necessarily cover the height of ten spiral body rounds. The final placement and fit must be checked on a physical sample.
Step 6: Crochet and Attach the Flippers
The small flippers are worked in flat rows and attached to the sides of the penguin.
Yarn color: Midnight blue
Make two identical pieces.
Crochet the First Flipper
Begin with ch 4.
Row 1: Starting in the second chain from the hook, work 3 sc. (3)
Ch 1 and turn.
Row 2: Inc, 1 sc, inc. (5)
Ch 1 and turn.
Row 3: Sc across. (5)
Ch 1 and turn.
Row 4: Sc across. (5)
Ch 1 and turn.
Row 5: Sc across. (5)
Ch 1 and turn.
Row 6: Sc2tog, 1 sc, sc2tog. (3)
Ch 1 and turn.
Row 7: Sc across. (3)
Fasten off, leaving a long sewing tail.
Make the Second Flipper
Repeat Rows 1–7 using the same instructions.
Both pieces should have this stitch-count sequence:
3 → 5 → 5 → 5 → 5 → 3 → 3
Before sewing, lay the flippers side by side and check that they have matching shapes.
Attach the Flippers
Position one flipper on each side of the penguin.
Use the Row 1 foundation edge as the upper attachment area.
Start by placing the flippers near body Round 10, with their narrow lower tips pointing downward.
Pin both pieces in place and check the front and side views.
The upper portion of each flipper, provisionally the first three rows, should be sewn securely to the body. Leave the lower tips free if they maintain their intended shape.
Make sure the two flippers:
- Sit at approximately the same height.
- Point in corresponding directions.
- Do not cover the ivory belly.
- Are attached firmly without distorting the body.
Add the Frost-Tip Details
Using icy-blue yarn, embroider a small decorative accent near the lower tip of each flipper.
Repeat the same small stitch arrangement on both sides.
These accents provide the Frost-Tip Penguin with its subtle winter detail without requiring additional crocheted pieces.
Step 7: Add the Feet and Finish Your Penguin Ornament
The final details are two small embroidered feet.
Using orange yarn:
- Find the lower front area of the penguin, approximately around Rounds 17–18.
- Position one foot beside the lower belly area.
- Embroider a small V-shaped accent.
- Repeat on the opposite side.
- Check that both feet are balanced and visible.
- Secure the remaining yarn ends.
Now inspect the finished ornament.
Look at the penguin from the front and both sides to see whether the flippers and belly are centered.
Hold the ornament by its hanging loop and check whether it hangs upright.
If the loop tilts, review its attachment position and security before considering the ornament ready for decorative use.
Weave in any remaining loose yarn ends.
The Frost-Tip Penguin’s written construction is complete.
Crochet Penguin Ornament Stitch Count Check
Accurate stitch counts are especially important when working a small stuffed amigurumi design.
Use this table to review the major components.
| Component | Construction | Final Stitch Count |
|---|---|---|
| Main body | 20 continuous rounds | 6 sts before closure |
| Belly panel | 10 flat rows | 2 sts |
| Left flipper | 7 flat rows | 3 sts |
| Right flipper | 7 flat rows | 3 sts |
| Hanging loop | 24 chains | Ch 24 |
The main body reaches its maximum circumference of 42 stitches at Round 10 and maintains that count through Round 14.
If your stitch count differs from the instructions, check the last completed round or row before continuing.
Remember that increases add stitches, while decreases reduce them.
The written formulas have been checked mathematically. This does not replace testing the actual shape, fit, and assembly with yarn.
Common Crochet Penguin Ornament Problems
Small amigurumi projects can be sensitive to tension, stitch placement, and assembly. Here are a few things to check if your penguin doesn’t look as expected.
Why Does My Penguin Look Pointed?
First, check the stitch counts in Rounds 1–7.
The head should reach 24 stitches by Round 4 and maintain that count through Round 7.
Missing increases can make the upper section narrower than intended.
Check your tension as well. Tight stitches may affect the shape, but don’t change the approved round counts without confirming the cause.
Why Is My Belly Panel Wrinkling?
The ivory panel may be under too much tension when attached, or its dimensions may not match the stuffed body’s curvature.
Before sewing, make sure the panel lies naturally against the body.
Use removable pins to adjust its position. Avoid pulling the sewing yarn so tightly that the edges bunch together.
If the panel still doesn’t fit, record the problem rather than adding or removing stitches without testing.
Why Are My Penguin’s Flippers Uneven?
Both flippers should follow the same seven-row pattern.
Check that each piece has the stitch sequence:
3 → 5 → 5 → 5 → 5 → 3 → 3
Then compare their orientation before sewing.
Because the flippers are attached on opposite sides, their placement should be mirrored.
Pinning both pieces first makes it easier to spot uneven positioning.
Why Does My Penguin Hang Sideways?
A hanging ornament may tilt if the loop is attached away from its balance point.
Check whether the two ends of the loop are positioned close to the crown’s center.
Also inspect the attachments to make sure they are secure.
The final balance of the 24-chain loop still requires physical testing.
How Do I Keep Stuffing From Showing?
Visible stuffing usually means that the fabric has gaps or has been stretched too much.
Check your hook size, yarn tension, and decreases.
The invisible decrease method can help reduce visible gaps on the outer surface.
Stuff the body gradually rather than forcing a large amount of filling through the opening.
If the fabric remains too open, test a hook-and-yarn combination that creates a firmer fabric.
Ways to Use Your Crochet Penguin Ornament
This little amigurumi penguin is designed as a seasonal decoration.
Here are a few ways to enjoy the finished project once its construction has been tested:
- Christmas tree decoration: Hang it from a sturdy branch using its crocheted loop.
- Handmade gift topper: Add it to wrapped presents for a personal touch.
- Mini winter display: Combine it with other small seasonal crochet decorations.
- Coordinated Christmas collection: Make additional ornaments in complementary winter colors after confirming the original design.
Because this project includes stuffing and a hanging cord, treat it as a decorative ornament rather than a toy for babies or young children.
More Small Christmas Crochet Patterns
Want to add another handmade decoration to your Christmas collection? These small crochet projects offer different shapes and construction techniques.
Crochet Snowman Ornament Pattern
Try another stuffed winter character with an embroidered face, colorful scarf, and hanging loop. The snowman’s head and body are crocheted continuously.
Crochet Christmas Tree Ornament Pattern
Prefer a flat project without stuffing? This little Christmas tree is worked in six widening rows, with a brown trunk and optional yarn decorations.
Crochet Gingerbread Man Pattern
Make another festive mini amigurumi character with joined legs, bobble-stitch arms, and embroidered icing details.
For a different kind of Christmas decoration, this five-point star is made in joined rounds without stuffing or sewing separate star pieces.
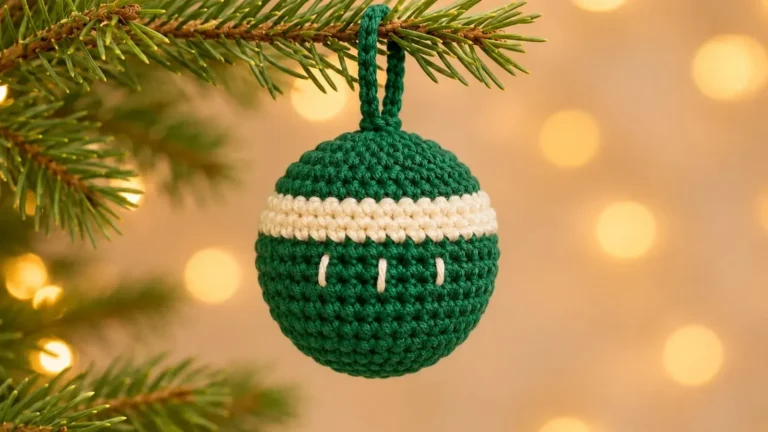
For a striped bauble to pair with your penguin, try this crochet Christmas ball ornament pattern.
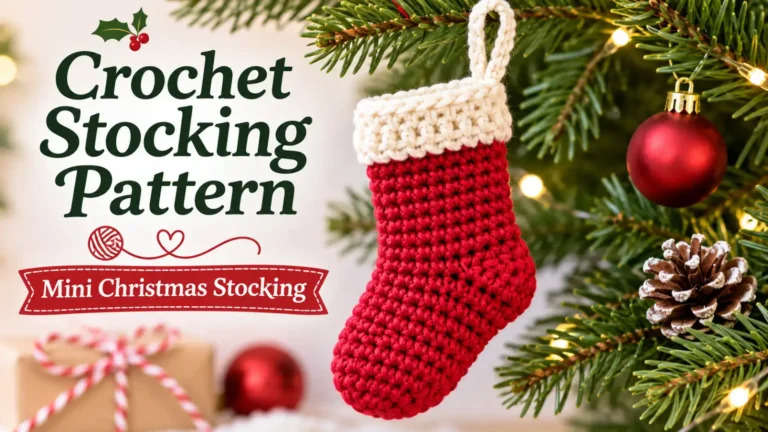
Add another shape to your holiday collection with this crochet stocking pattern.
Each pattern offers a different way to practice small crochet projects while creating handmade decorations for the season.
Frequently Asked Questions
Is This Crochet Penguin Ornament Pattern Free?
Yes. This free crochet penguin ornament pattern includes the written instructions for the stuffed body, belly panel, flippers, embroidered features, and hanging loop.
Is This Crochet Penguin Ornament Suitable for Beginners?
The pattern is intended for confident beginners who already know basic single crochet stitches, increases, decreases, and working in rounds.
It also requires sewing and embroidery.
The intended skill level remains provisional until the complete construction has been physically tested.
Is This a No-Sew Crochet Penguin Pattern?
No. The main body is worked continuously, but the separate ivory belly and two flippers require sewing.
The face, feet, and decorative accents are embroidered.
What Yarn Should I Use for a Small Crochet Penguin?
The proposed materials use sport-weight cotton yarn with a 2.5 mm hook.
Choose yarn and a hook that produce firm, even stitches with minimal gaps.
This combination is a starting recommendation and has not yet been confirmed through physical sample testing.
Does This Crochet Penguin Need Stuffing?
Yes. The main body is stuffed with polyester fiberfill.
Add the stuffing gradually before closing the bottom of the body.
The belly panel and flippers are flat pieces and do not require stuffing.
Can I Make This Penguin Ornament in Different Colors?
Yes. You can experiment with different color combinations while keeping the written stitch structure the same.
For example, try charcoal gray instead of midnight blue, or use a contrasting color for the flipper-tip accents.
Keep the yarn thickness consistent so the separate pieces remain proportionate.
How Do I Attach the Penguin’s Hanging Loop?
The pattern uses a 24-chain crocheted cord.
Both ends are attached near the crown and secured inside the body before closing it.
Check the attachment points and whether the ornament hangs upright.
The exact attachment placement and durability must be verified through physical testing.
Final Thoughts
This crochet penguin ornament pattern combines a one-piece stuffed body with a tapered belly, small flippers, and simple embroidered details. The Frost-Tip design is intended to become a cute addition to a handmade Christmas collection.
Follow the stitch counts carefully, check the placement of each piece, and keep the physical-testing status in mind as you work through the instructions.
For another festive character, explore the Crochet Snowman Ornament Pattern.