Easy crochet patterns, cute projects, and beginner-friendly ideas to inspire your next make.

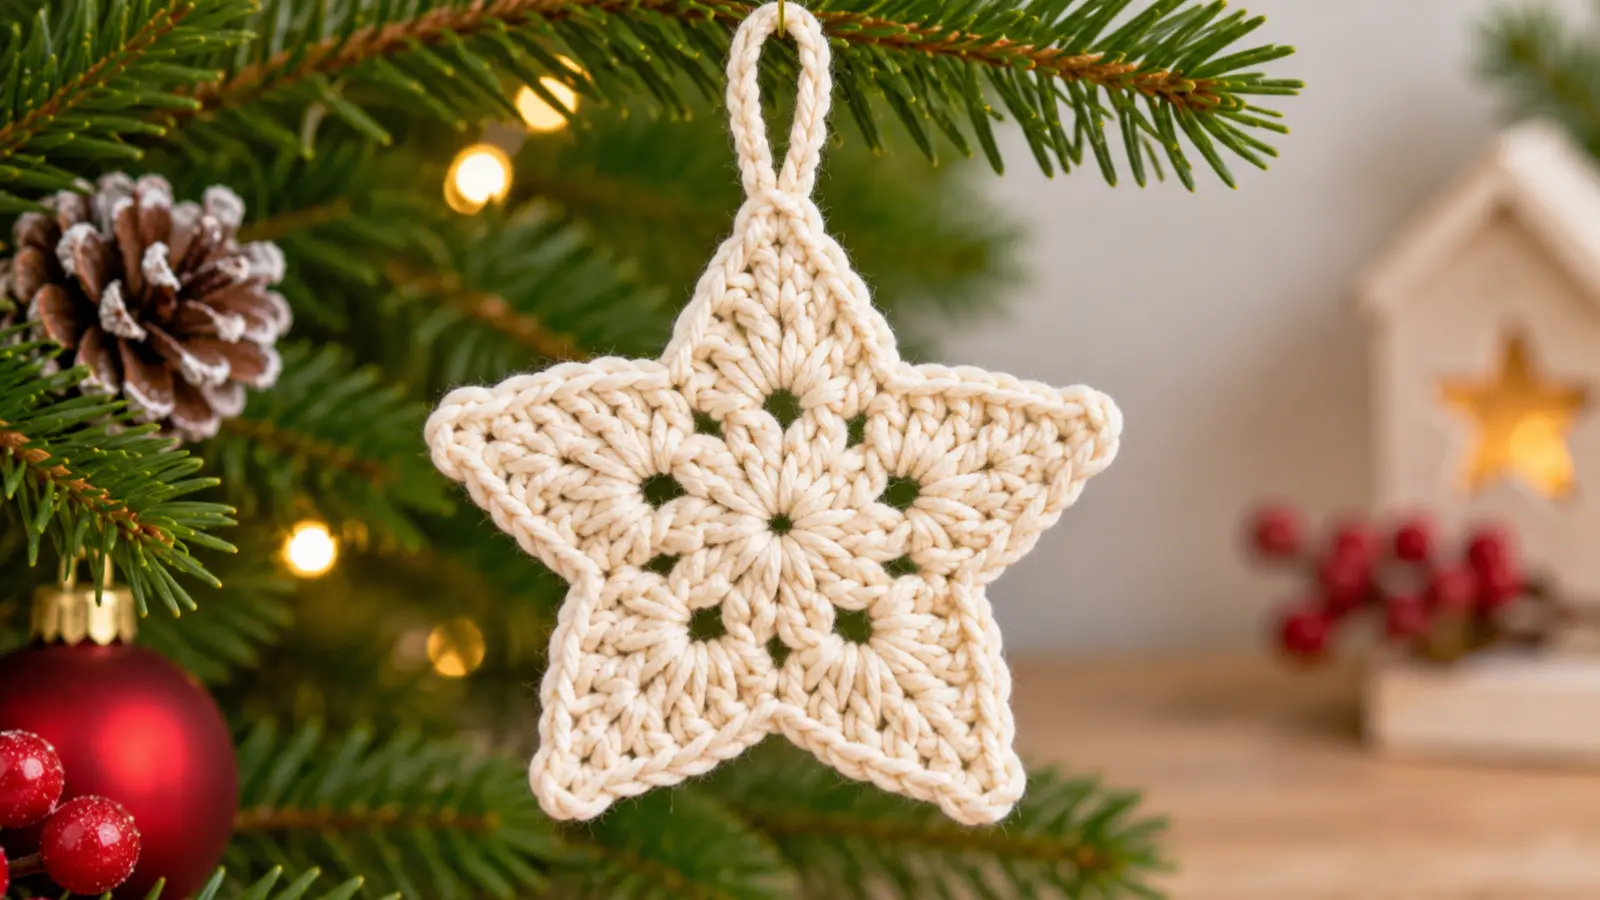
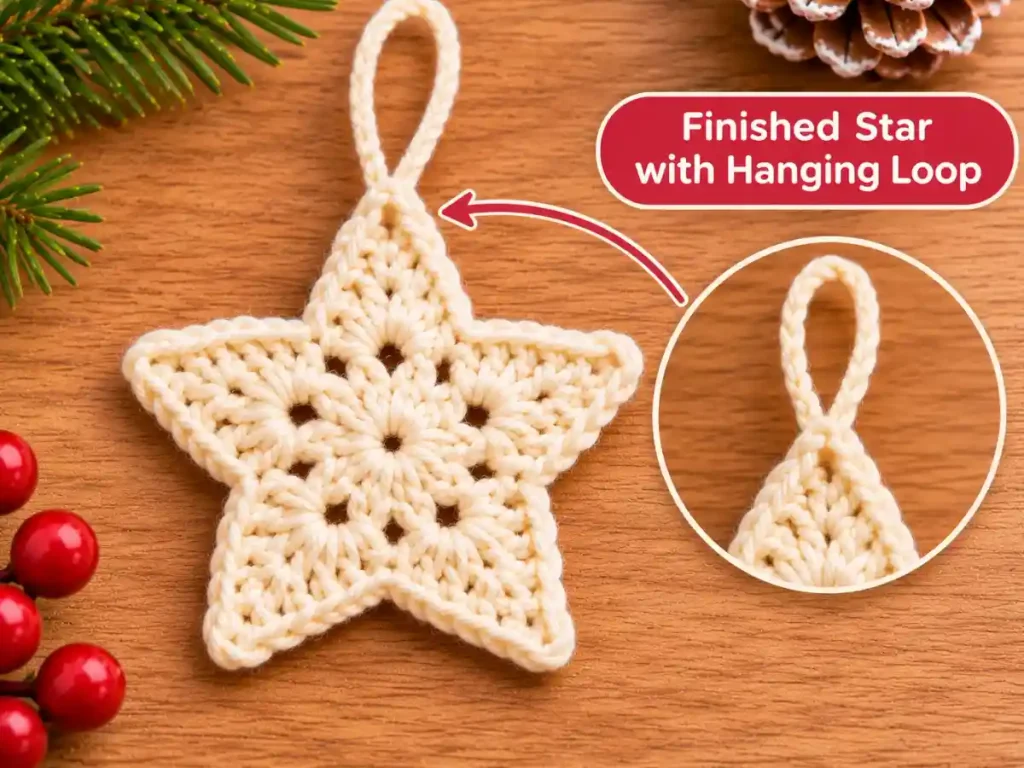
This crochet star ornament pattern creates a simple five-point motif worked from the center outward in joined rounds. The star itself is made as one continuous piece, so there are no separate panels to sew together and no stuffing to add.
A carefully divided setup round creates five identical sections for the star points, and an optional crochet loop turns the finished motif into a Christmas tree ornament.
Finished size and the exact appearance of the points will vary depending on your yarn, hook, and tension.
Table of Contents
Crochet Star Ornament Pattern at a Glance
| Detail | Pattern |
|---|---|
| Shape | 5-point star |
| Construction | Center-out joined rounds |
| Center | 5 sc → 10 sc |
| Point setup | 10 sc + 10 ch-1 spaces |
| Number of points | 5 |
| Stuffing | None |
| Separate star pieces | None |
| Assembly sewing | None |
| Hanging loop | Optional |
| Terminology | US crochet terms |
What You’ll Need
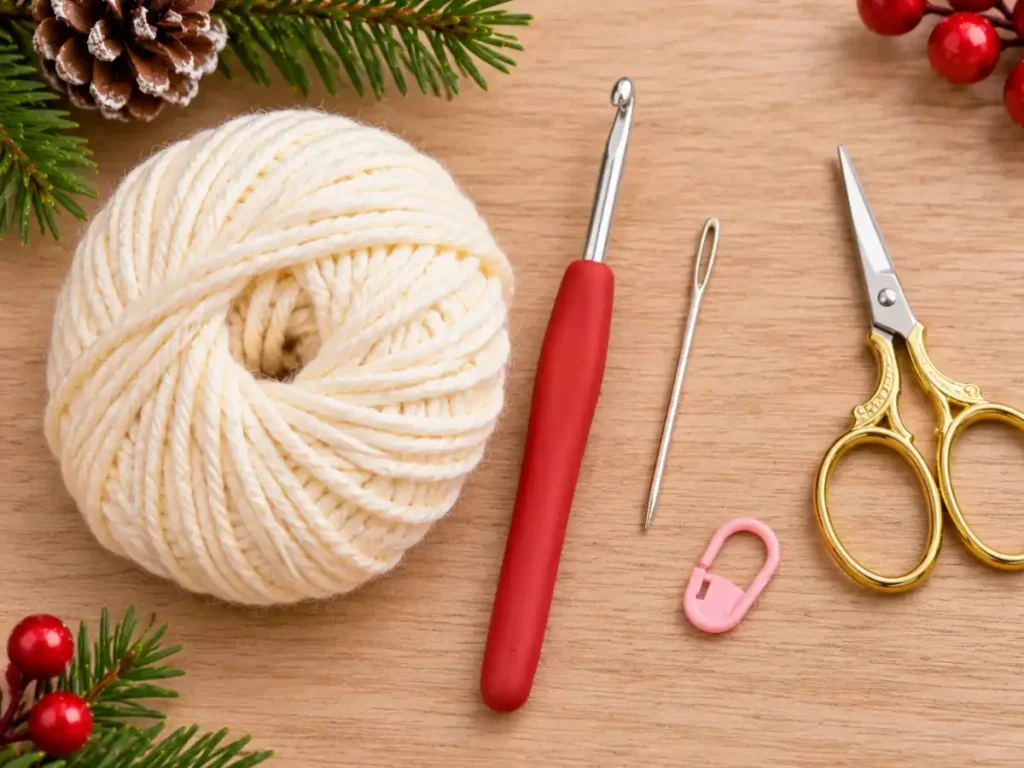
- yarn for the star;
- crochet hook suitable for your chosen yarn;
- yarn needle;
- scissors;
- stitch marker;
- optional matching yarn for the hanging loop.
This pattern does not prescribe a fixed yarn weight, hook size, gauge, or finished measurement. Different yarn and hook combinations will produce different finished sizes and fabric behavior.
Crochet Stitches and Abbreviations
This pattern uses US crochet terminology.
- MR — magic ring
- ch — chain
- sc — single crochet
- dc — double crochet
- tr — treble crochet
- sl st — slip stitch
- st / sts — stitch / stitches
- sp — space
For a general reference, see the Craft Yarn Council crochet abbreviations.
Important Pattern Notes
Rounds 1–4 do not use beginning chains for height.
Joining slip stitches do not count as stitches.
When the instructions say to work in the same stitch as the join, insert your hook into the actual stitch below the joining slip stitch rather than into the slip stitch itself.
Before You Start This Crochet Star Ornament Pattern
The first two rounds form the center of the star.
Round 3 creates the exact working locations needed for the five points. It ends with:
10 sc + 10 ch-1 spaces
Each star point uses exactly:
2 sc + 2 ch-1 spaces
Five identical point repeats therefore use all 10 sc and all 10 ch-1 spaces.
Keep a stitch marker in the first sc of Round 3. This marked stitch becomes the starting valley and the final valley when the fifth point is completed.
The stitch-count structure has been checked mathematically. Finished size, point definition, and whether the motif benefits from shaping will still depend on the materials and tension you use.
How to Crochet the Star Ornament
Step 1: Crochet the Center
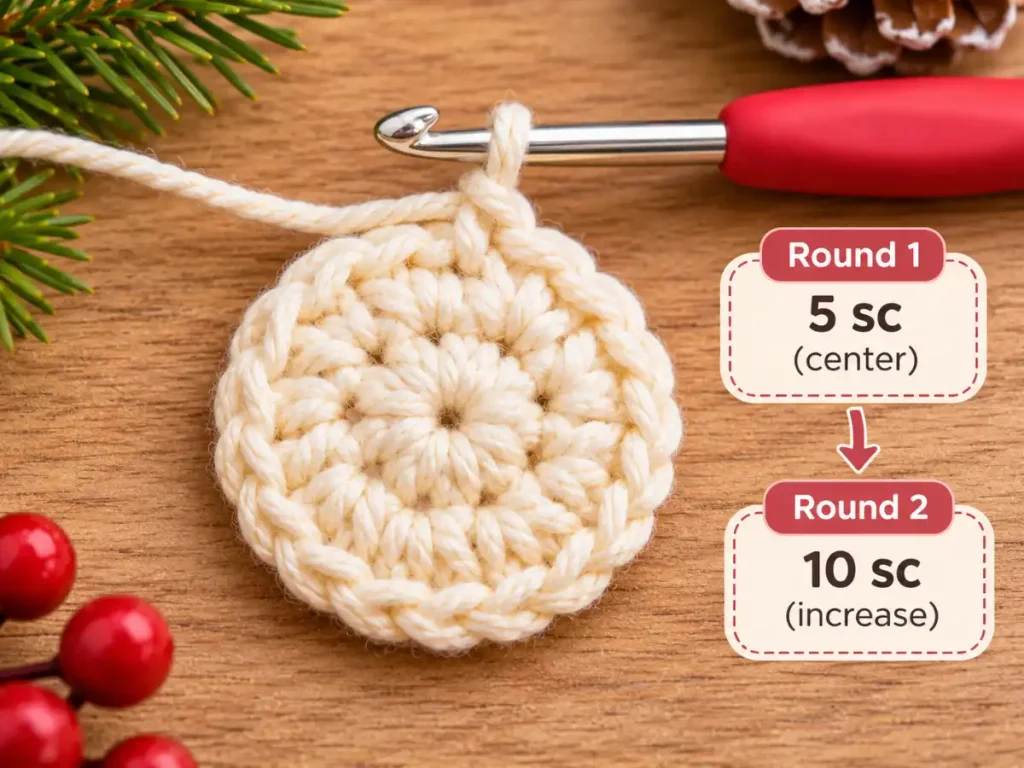
Make a magic ring.
Round 1
Work 5 sc into the MR.
Pull the ring closed.
Join with a sl st to the first sc.
[5 sc]
The joining slip stitch does not count as a stitch.
Step 2: Expand the Center
Round 2
Work 2 sc in the same stitch as the join.
Work 2 sc in each of the remaining 4 sts.
Join with a sl st to the first sc of the round.
[10 sc]
Stitch Check
Round 1 had 5 stitches.
Each stitch receives 2 sc:
5 × 2 = 10 sc
You should now have exactly 10 sc around the center.
Step 3: Create the Five-Point Setup
Round 3
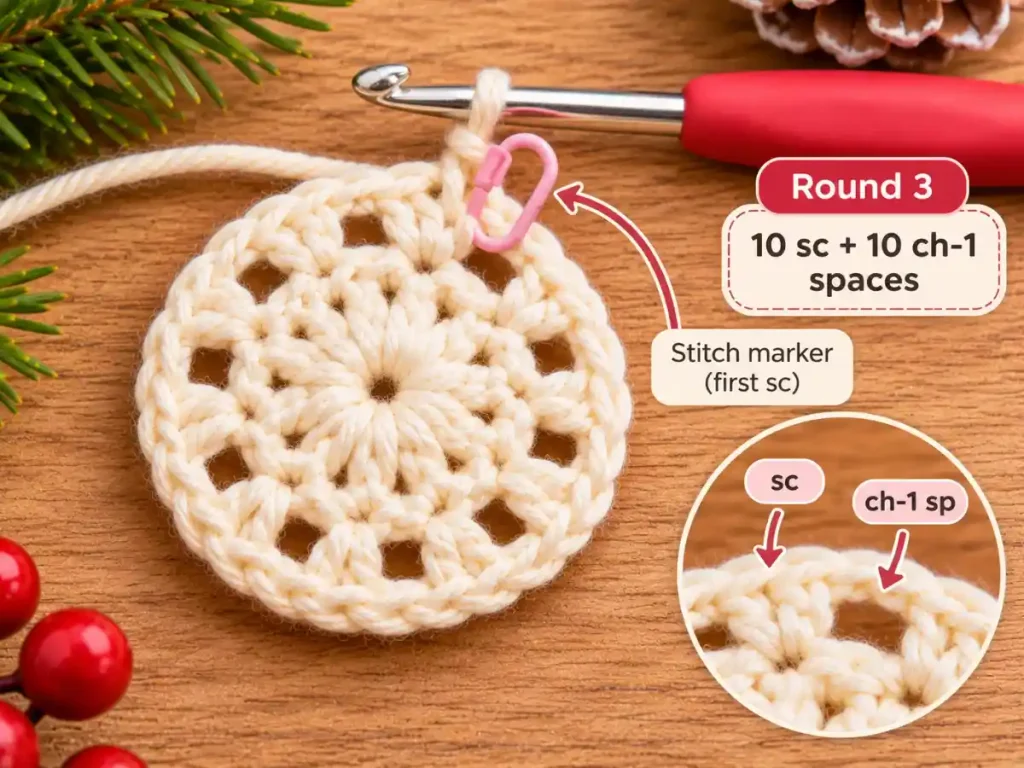
Place a stitch marker in the first sc you work in this round.
Work:
Sc in the same stitch as the join, ch 1.
Then repeat in each of the remaining 9 stitches:
Sc in next st, ch 1.
Join with a sl st to the first sc.
You should now have:
10 sc + 10 ch-1 spaces
The chain spaces are working locations for the next round. They are not counted as single crochet stitches.
Keep the stitch marker in the first sc.
Setup Checkpoint
Around the motif, you should see an alternating sequence:
sc → ch-1 sp → sc → ch-1 sp
This setup divides the outside of the motif into five equal point sections.
Step 4: Crochet the Five Star Points
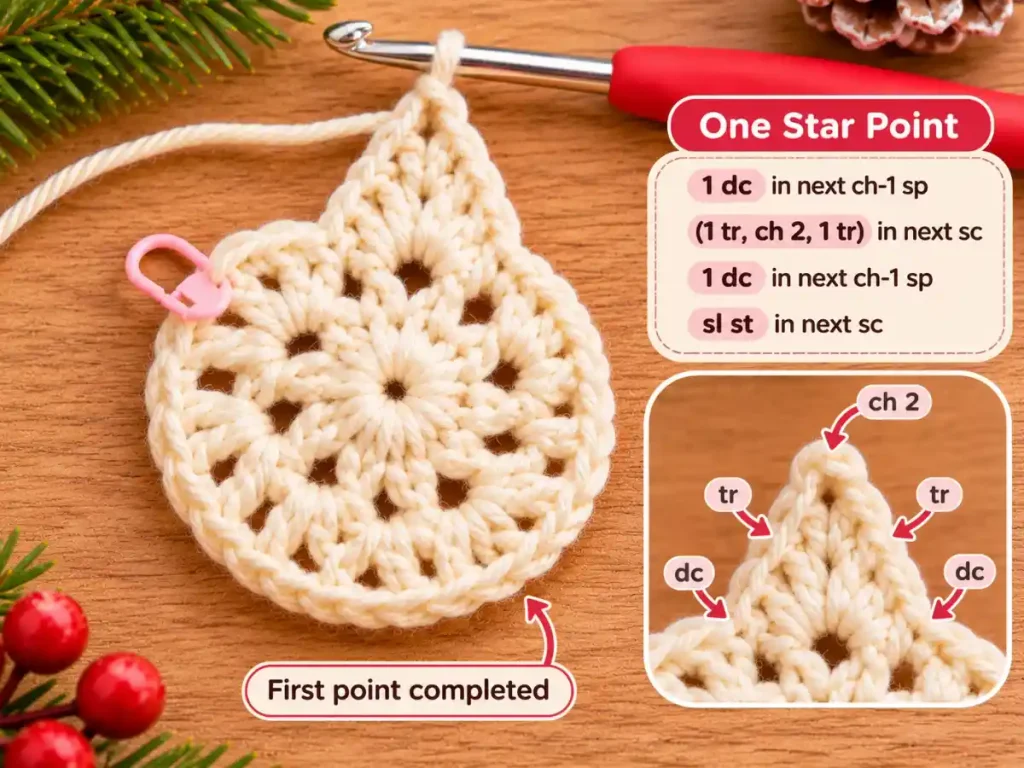
Begin at the marked first sc from Round 3.
That marked stitch is the first valley.
Do not work into it at the beginning of the point round.
One Star Point
Work:
1 dc in the next ch-1 sp
(1 tr, ch 2, 1 tr) in the next sc
1 dc in the next ch-1 sp
sl st in the next sc
You have completed one point.
Repeat the same sequence 5 times total.
After the fifth repeat, the final slip stitch should land in the same marked sc where the point round began.
Fasten off.
Final Point Count
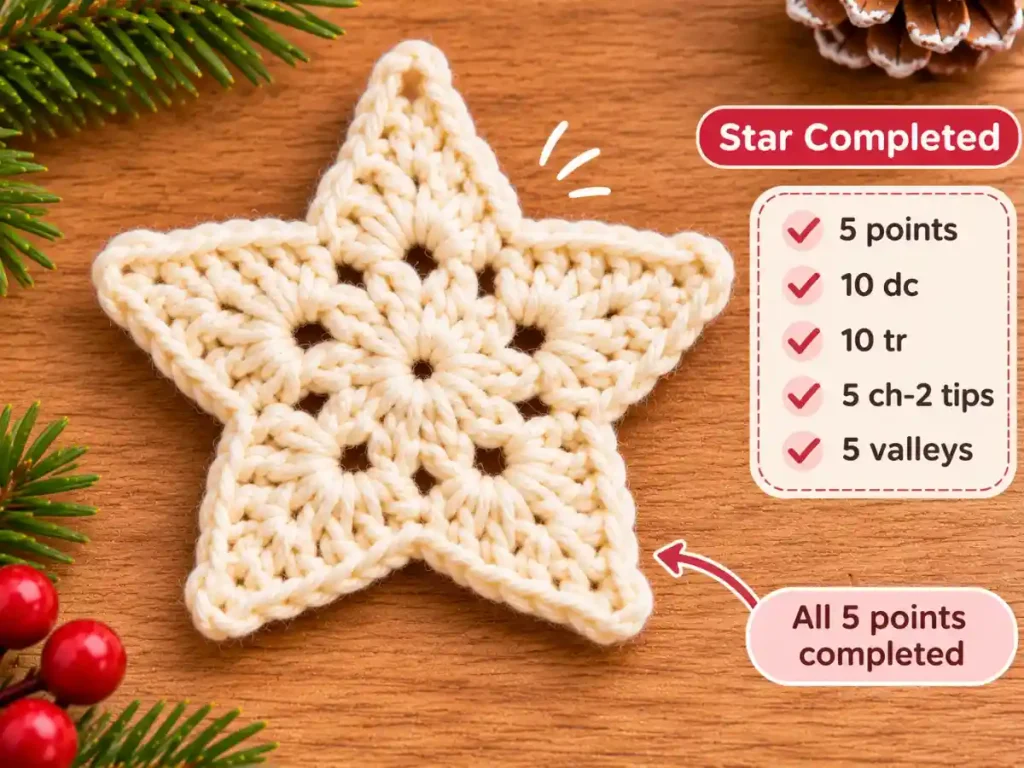
The completed construction contains:
- 5 points;
- 10 dc;
- 10 tr;
- 5 ch-2 tip spaces;
- 5 valley slip stitches.
Every point uses the same stitch sequence.
Add the Optional Hanging Loop
Choose one of the five ch-2 tip spaces.
Join yarn securely into that tip space.
Ch 12.
Sl st back into the same ch-2 tip space.
Fasten off and weave in the yarn ends securely.
You can adjust the number of chains if you prefer a shorter or longer hanging loop for your chosen yarn and ornament placement.
Five-Point Star Shape Check
Before finishing, confirm that your star has exactly five points.
Each point uses:
- one ch-1 space for the first shoulder;
- one sc for the center of the point;
- one ch-1 space for the second shoulder;
- one sc for the valley.
The 10 sc from Round 3 divide into:
5 point-center stitches + 5 valley stitches
The 10 ch-1 spaces divide into:
2 shoulder spaces × 5 points
This means every Round 3 stitch and chain space is used exactly once.
The construction is mathematically symmetrical. Yarn, hook choice, and tension can still affect point definition and how the finished motif sits.
If Your Crochet Star Needs Shaping
If the Points Look Rounded
Check that the center of every point was worked as:
(1 tr, ch 2, 1 tr)
in the designated sc.
The treble stitches create the taller sides of the point, while the ch-2 space forms the tip.
If One Point Looks Different
Recount the Round 3 setup.
Every point must use exactly two ch-1 spaces and two sc.
Skipping a location or accidentally using one twice will make the point spacing uneven.
If the Star Cups or Ruffles
Check the stitch counts before changing anything else.
Make sure you did not accidentally work into a joining slip stitch or add an extra stitch during Round 3.
Yarn, hook size, and tension can also affect how a crochet motif behaves. Do not rely on blocking to correct a stitch-count mistake.
If the Valleys Look Too Shallow
Check that every point ends with a sl st in the designated valley sc.
The slip stitch creates the lower section between two neighboring points.
Ways to Use the Crochet Star
Use the finished motif as:
- a Christmas tree ornament;
- a handmade gift topper;
- part of a seasonal garland;
- a small Christmas appliqué.
Adding the crochet loop turns the motif into a simple crochet Christmas star ornament pattern without requiring a separate ribbon hanger.
More Seasonal Crochet Patterns
If you’re making a collection of handmade Christmas ornaments, pair this star with our crochet Christmas tree ornament pattern and crochet snowman ornament pattern.
Together, the three designs create a simple Seasonal Crochet collection with different Christmas shapes while keeping each pattern focused on one project.
Frequently Asked Questions
Is This Crochet Star Ornament Pattern Free?
Yes. This free crochet star ornament pattern includes the complete written instructions for the center, point setup, five star points, and optional hanging loop.
Does This Pattern Make Exactly Five Points?
Yes.
Round 3 creates 10 sc and 10 ch-1 spaces. Each point uses two sc and two ch-1 spaces, so five identical repeats use the entire setup.
Is This Pattern Suitable for Beginners?
The pattern uses a relatively short stitch vocabulary and does not require sewing separate star pieces together.
It is best suited to confident beginners who are comfortable working joined rounds, identifying chain spaces, counting stitches, and making double and treble crochet stitches.
Does the Star Need Stuffing?
No.
The star is designed as a single-layer crochet motif rather than a stuffed ornament.
Do I Need Fabric Stiffener?
Fabric stiffener is not required to follow the written pattern.
After finishing your star, assess how it sits with your chosen yarn and tension before deciding whether any additional shaping is useful.
Can I Use Different Yarn?
Yes, but changing the yarn or hook will change the finished size and can also affect the firmness and definition of the points.
Can I Make the Hanging Loop Longer?
Yes.
The pattern uses ch 12 for the hanging loop, but you can adjust the number of chains to suit your yarn and preferred hanging length.
Final Thoughts
This crochet star ornament pattern uses a small center and an evenly divided setup round to create five identical star points without stuffing or sewing separate star pieces together.
The construction uses exactly 10 sc and 10 chain spaces to support five equal point sections, followed by an optional crocheted hanging loop.
Use it as a Christmas ornament, gift topper, or part of a handmade seasonal garland.
