Easy crochet patterns, cute projects, and beginner-friendly ideas to inspire your next make.

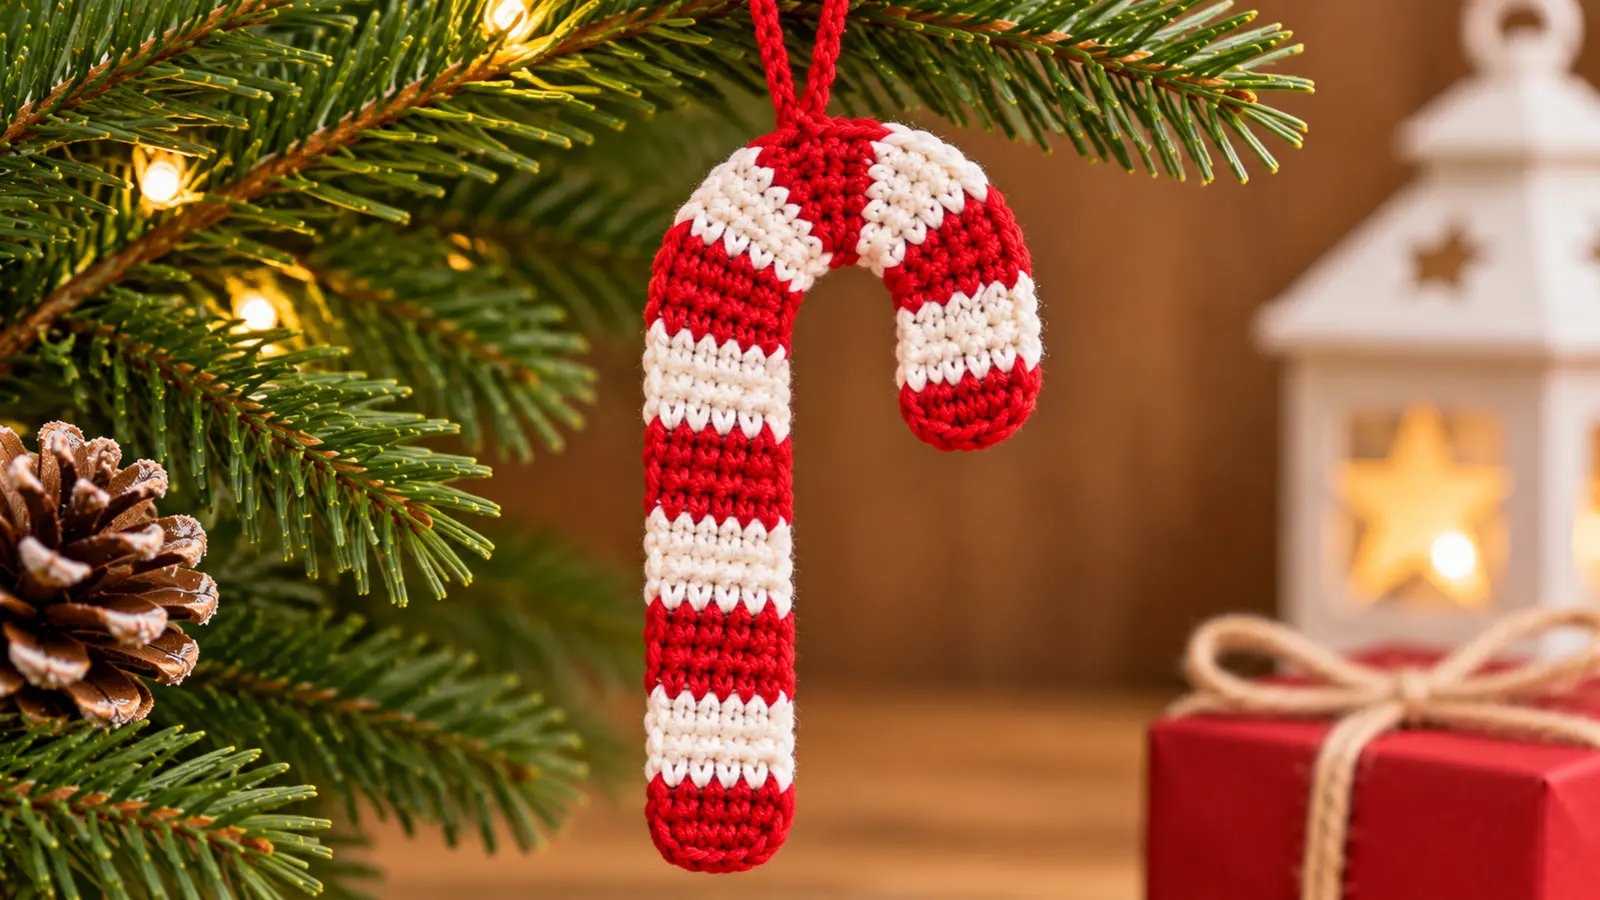
This free crochet candy cane pattern creates a small red-and-white Christmas ornament worked flat in short rows. The design uses a narrow five-stitch strip, two-row color bands, and built-in shaping to form the candy cane crook without stuffing or an internal wire. The pattern is written in US crochet terms and keeps the stitch count at five throughout the body, making it easy to check your progress as you work.
Table of Contents
Crochet Candy Cane Pattern at a Glance
| Detail | Current pattern information |
|---|---|
| Pattern type | Small Christmas ornament |
| Construction | Flat rows |
| Crochet terms | US |
| Main stitches | ch, sc, inc, dec, sl st |
| Colors | Red and white |
| Main pieces | One |
| Stuffing | None |
| Internal wire | Not used in Pattern V1.1 |
| Skill level | Pending physical usability testing |
| Finished size | Pending Sample A |
| Crochet time | Pending Sample A |
Materials You’ll Need
For the current Pattern V1.1 test version, use:
- Smooth DK / #3 yarn in red
- Smooth DK / #3 yarn in white
- 3.25 mm crochet hook
- Stitch marker
- Yarn needle
- Scissors
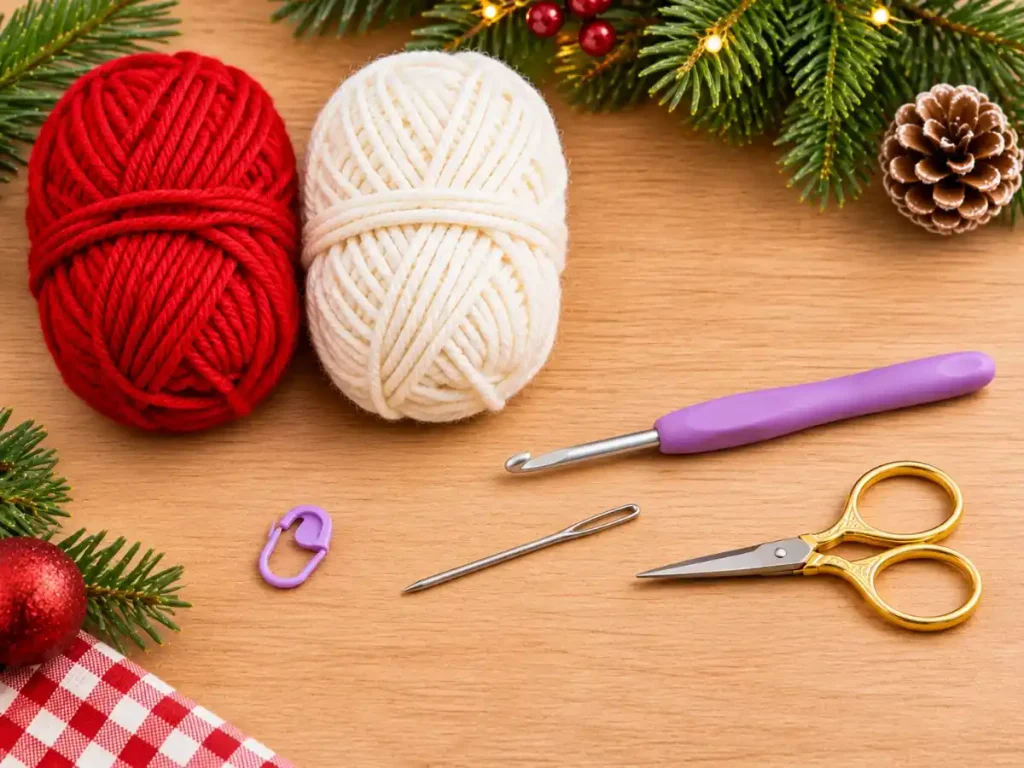
The yarn weight and hook size above are prototype specifications for the current test version. Exact yarn brand, fiber, yardage, gauge, and finished measurements should not be considered final until the physical sample is completed.
Size and Gauge
Finished measurements are still pending physical testing.
Gauge has not yet been established for this crochet candy cane pattern. For this design, consistent tension matters most around the shaped crook and along the edge where the unused yarn is carried.
Crochet Abbreviations
This pattern uses standard US crochet terminology:
- ch – chain
- sc – single crochet
- inc – work 2 sc in the same stitch
- dec – single crochet decrease over the next 2 stitches
- sl st – slip stitch
- st / sts – stitch / stitches
If you need a refresher on standard crochet abbreviations, see the Craft Yarn Council crochet abbreviations guide.
Important Pattern Notes
Before you begin, keep these rules in mind:
- Ch 1 at the beginning of a row does not count as a stitch.
- Every completed body row ends with 5 stitches.
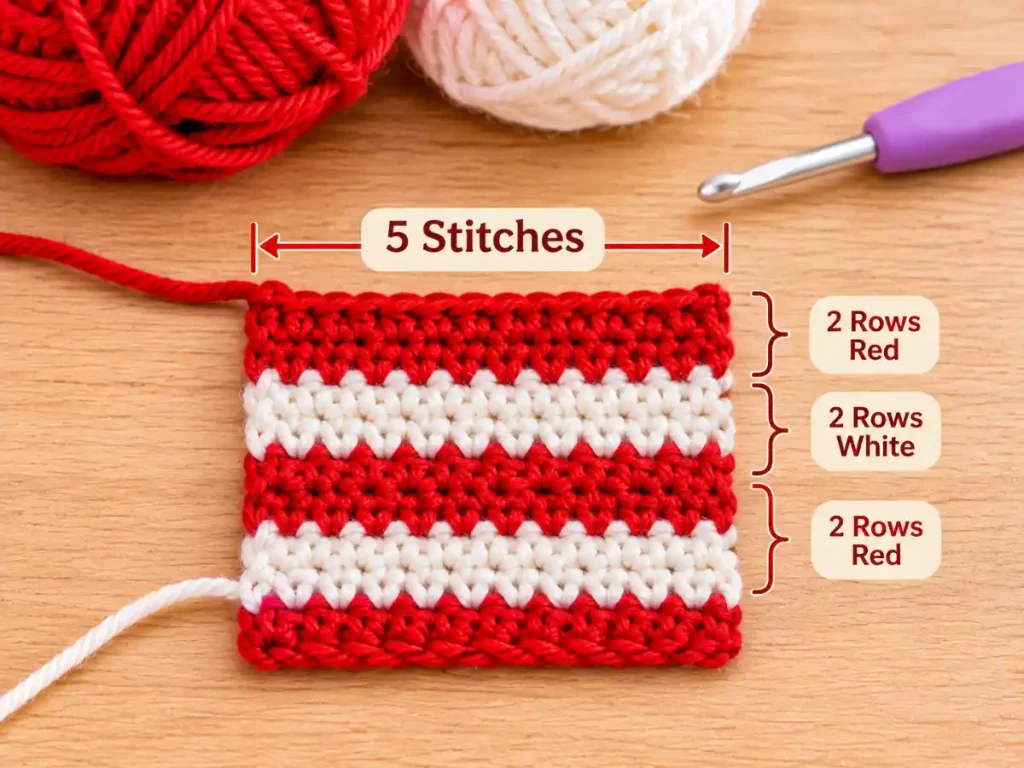
- Each red or white stripe is worked for 2 rows.
- The unused color stays attached and is carried loosely up the inner curve edge.
- During the crook section, the inner edge receives decreases and the outer edge receives increases.
- Keep the inner and outer edges consistent through Rows 13–20.
The entire pattern depends on that last point. Marking the inner edge before the shaping section can make the directions much easier to follow.
How to Crochet the Candy Cane
Step 1: Crochet the Foundation
With red yarn:
Ch 6.
R1: Starting in the second chain from the hook, sc across. [5]
Ch 1, turn.
R2: Sc across. [5]
Leave the red yarn attached.
The candy cane body will remain five stitches wide throughout the pattern.
Step 2: Crochet the Straight Candy Cane Stem
Pick up white yarn and continue in two-row stripes.
| Rows | Color | Instructions | Stitch count |
|---|---|---|---|
| R3–R4 | White | sc across | 5 |
| R5–R6 | Red | sc across | 5 |
| R7–R8 | White | sc across | 5 |
| R9–R10 | Red | sc across | 5 |
| R11–R12 | White | sc across | 5 |
At the end of each two-row stripe, leave the current color attached and pick up the waiting color at the same side edge.
Keep the unused yarn loose as it travels up that edge. A tight carry can pull the edge shorter and change the shape of the finished piece.
How the Candy Cane Curve Works
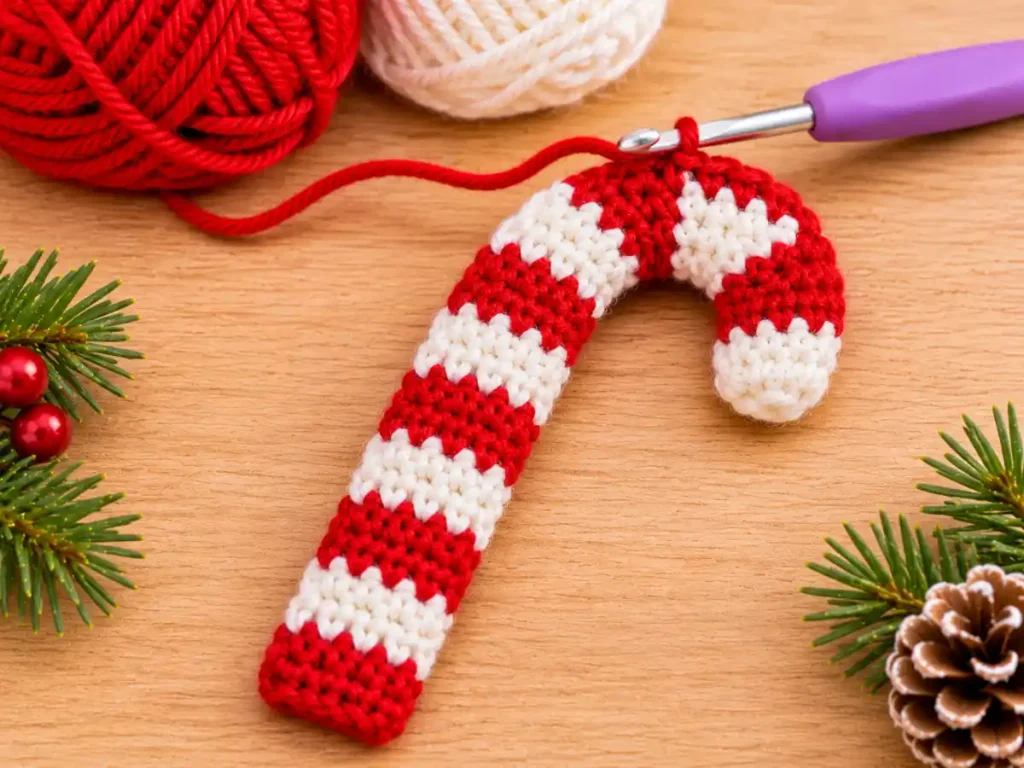
The crook is created by changing where fabric is added and removed while keeping the total stitch count unchanged.
On the inner curve edge, a decrease shortens the edge.
On the outer curve edge, an increase adds extra fabric.
Each shaping row still ends with five stitches:
dec + sc + sc + inc = 5 completed stitches
or, when working in the opposite direction:
inc + sc + sc + dec = 5 completed stitches
This is the shaping method used in Pattern V1.1. Its final unsupported curve is still being evaluated through physical testing.
Step 3: Mark the Inner and Outer Curve Edges
After R12, identify the side edge where your red and white yarns are waiting.
Mark this side as the:
Inner Curve Edge
The opposite side becomes the:
Outer Curve Edge
Keep these two edges consistent through the entire crook section.
Step 4: Shape the Candy Cane Crook
Switch to red yarn.
| Row | Color | Direction | Instructions | Count |
|---|---|---|---|---|
| R13 | Red | Inner → Outer | dec, sc in next 2 sts, inc in final st | 5 |
| R14 | Red | Outer → Inner | inc in first st, sc in next 2 sts, dec over final 2 sts | 5 |
| R15 | White | Inner → Outer | dec, sc in next 2 sts, inc in final st | 5 |
| R16 | White | Outer → Inner | inc in first st, sc in next 2 sts, dec over final 2 sts | 5 |
| R17 | Red | Inner → Outer | dec, sc in next 2 sts, inc in final st | 5 |
| R18 | Red | Outer → Inner | inc in first st, sc in next 2 sts, dec over final 2 sts | 5 |
| R19 | White | Inner → Outer | dec, sc in next 2 sts, inc in final st | 5 |
| R20 | White | Outer → Inner | inc in first st, sc in next 2 sts, dec over final 2 sts | 5 |
The stitch count remains five after every shaping row.
Step 5: Crochet the Hook Tip
Switch back to red.
R21: Sc across. [5]
R22: Sc across. [5]
These two rows extend the short tip after the curved section.
Step 6: Add the Hanging Loop
Do not fasten off yet.
Ch 12.
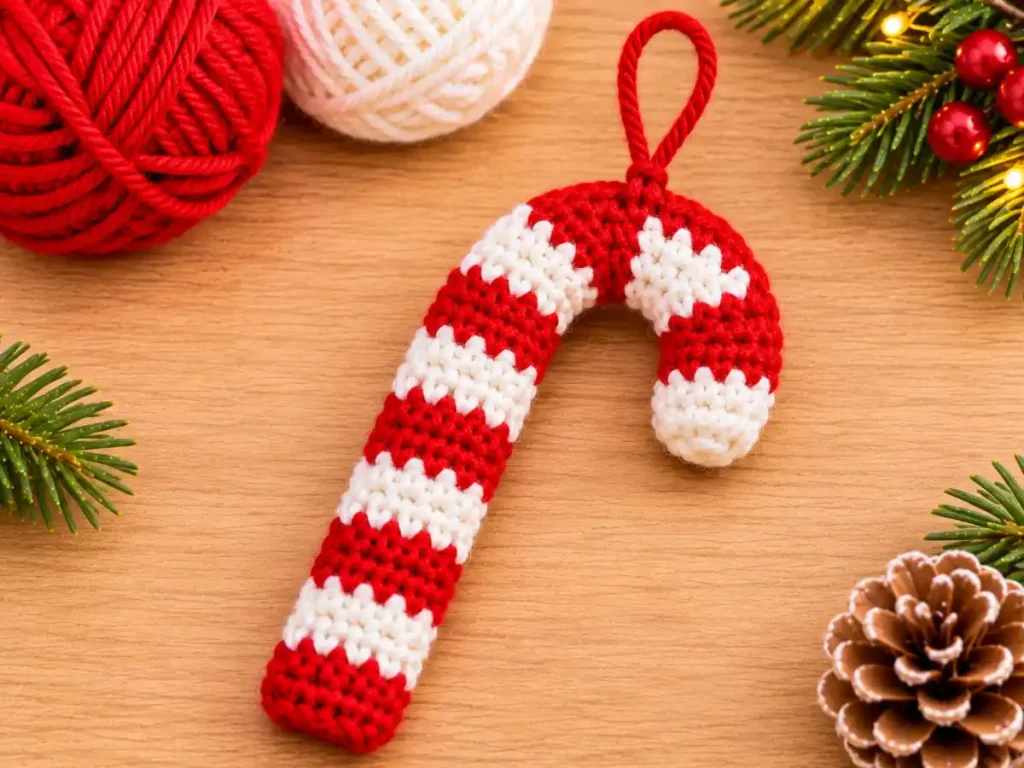
Sl st into the final corner stitch to create the provisional hanging loop.
Fasten off and weave in the ends.
The ch-12 loop and its exact anchor point are still part of the physical testing stage, so the final published loop may need adjustment if the ornament does not hang evenly.
Why Work the Stripes in Two-Row Sections?
Working each color for two rows brings the yarn back to the same side of the candy cane before the next color change.
That means the red and white yarns can remain attached instead of being cut after every stripe. The unused color simply waits at the inner edge until it is needed again.
This reduces the number of yarn ends and keeps the striped construction more streamlined.
The important detail is tension: carry the waiting yarn loosely enough that it does not pull the inner edge shorter than intended.
Finishing the Crochet Candy Cane Ornament
After the last row and hanging loop:
- Fasten off securely.
- Weave in the remaining yarn tails.
- Lay the candy cane naturally on a flat surface without forcing the crook into position.
- Check that the inner and outer edges are not twisted.
- Check the hanging loop before trimming any final ends.
Pattern V1.1 does not use stuffing, pipe cleaners, floral wire, or another internal support.
Crochet Candy Cane Troubleshooting
My candy cane is not curving
First check the shaping orientation.
The inner edge must receive the decreases, and the outer edge must receive the increases. If these switch sides during Rows 13–20, the shaping will not work as intended.
Also confirm that every shaping row still ends with five stitches.
The inner edge is puckering
Check the unused yarn carried along the inner edge. If it is pulled too tightly, it can shorten the edge more than the crochet decreases already do.
Keep the carried yarn relaxed.
The outer curve is flaring
Check the increases carefully. Each shaping row uses only one increase on the outer edge.
Uneven tension around the increases can also make that edge look more pronounced.
My stripes are uneven
Each stripe should contain exactly two rows.
The sequence is:
2 red rows → 2 white rows → repeat
Keeping that rhythm consistent also keeps both yarn colors waiting at the same edge.
My candy cane is twisting
Double-check the inner and outer curve markers and make sure the increase and decrease stay on their assigned physical edges.
If the tested Pattern V1.1 itself develops significant twisting, the shaping architecture will need revision rather than treating the twist as a reader error.
Ways to Use a Crochet Candy Cane Ornament
A small crochet candy cane can work well as part of a handmade Christmas decorating set. Possible uses include:
- Christmas tree ornament
- Gift topper
- Garland decoration
- Wreath accent
- Stocking decoration
- Small handmade holiday embellishment
If you are building a coordinated set, pair it with my crochet Christmas tree ornament or this crochet star ornament pattern.
You can also add a mini crochet Christmas stocking or a crochet gingerbread man pattern to the same seasonal collection.
Frequently Asked Questions
Is this crochet candy cane pattern free?
Yes. The complete written crochet candy cane pattern is included above and can be followed directly from this page.
How do you crochet a candy cane shape?
This pattern starts with a narrow five-stitch strip. The straight stem is worked first. During the crook section, decreases shorten the inner edge while increases add length to the outer edge. The total stitch count stays at five throughout the shaping rows.
Does this crochet candy cane need wire?
Pattern V1.1 is designed without wire, pipe cleaners, or another internal support. Physical testing is still being used to confirm how well the unsupported crook holds its final shape.
Does the candy cane need stuffing?
No. This version is worked flat and does not use stuffing.
How do I change colors for the red and white stripes?
Work each color for two rows. Leave the unused yarn attached at the inner curve edge and pick it up again after the next two-row stripe. Keep the carried yarn loose enough that it does not tighten the edge.
Can beginners make this crochet candy cane?
The pattern uses a short stitch vocabulary—chains, single crochet, increases, decreases, and slip stitches—but beginner usability has not yet been physically validated.
How big is the finished crochet candy cane?
The final measurements are pending Sample A testing. They should be added only after the completed physical sample has been measured.
How long does one candy cane take to crochet?
A tested completion time is not available yet. No timing estimate should be treated as confirmed until the physical sample is completed.
More Small Christmas Crochet Patterns
If you want to continue your handmade holiday set, try another small seasonal project:
- Crochet Christmas Tree Ornament Pattern
- Crochet Star Ornament Pattern
- Mini Crochet Christmas Stocking
- Crochet Gingerbread Man Pattern
Final Thoughts
This crochet candy cane pattern uses a narrow five-stitch strip, red-and-white two-row stripes, and deliberate inner-edge decreases with outer-edge increases to create the crook. The construction stays flat, uses one main piece, and does not include stuffing or internal wire.
Once the physical sample is completed, the final measurements, gauge, hanging-loop behavior, and unsupported curve performance should be added before the pattern is treated as fully validated.