Easy crochet patterns, cute projects, and beginner-friendly ideas to inspire your next make.

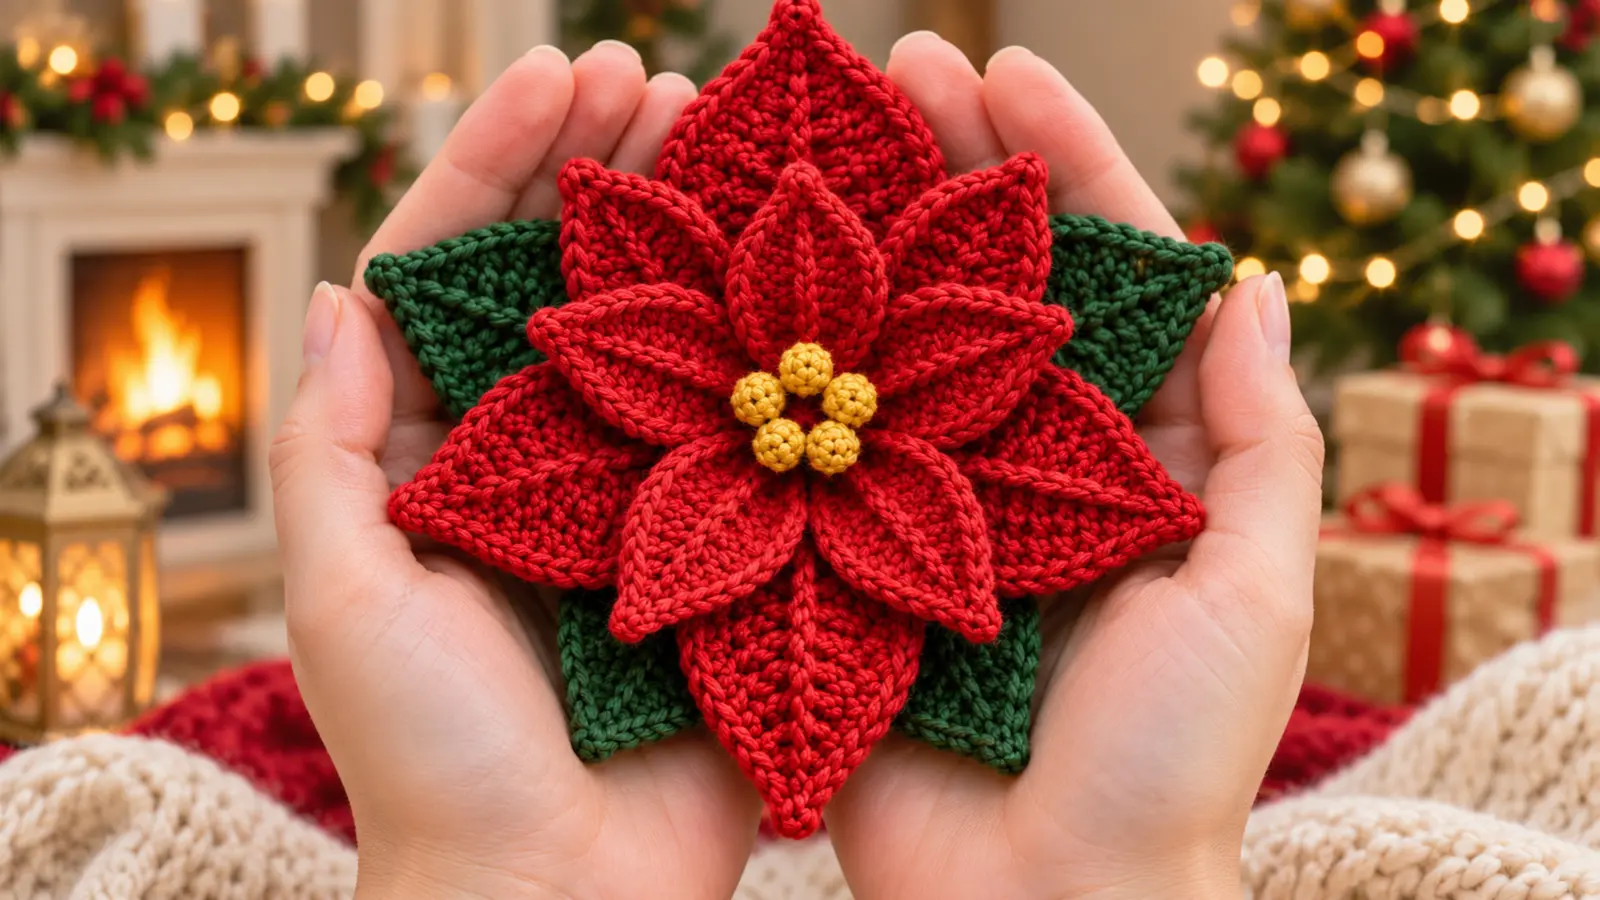
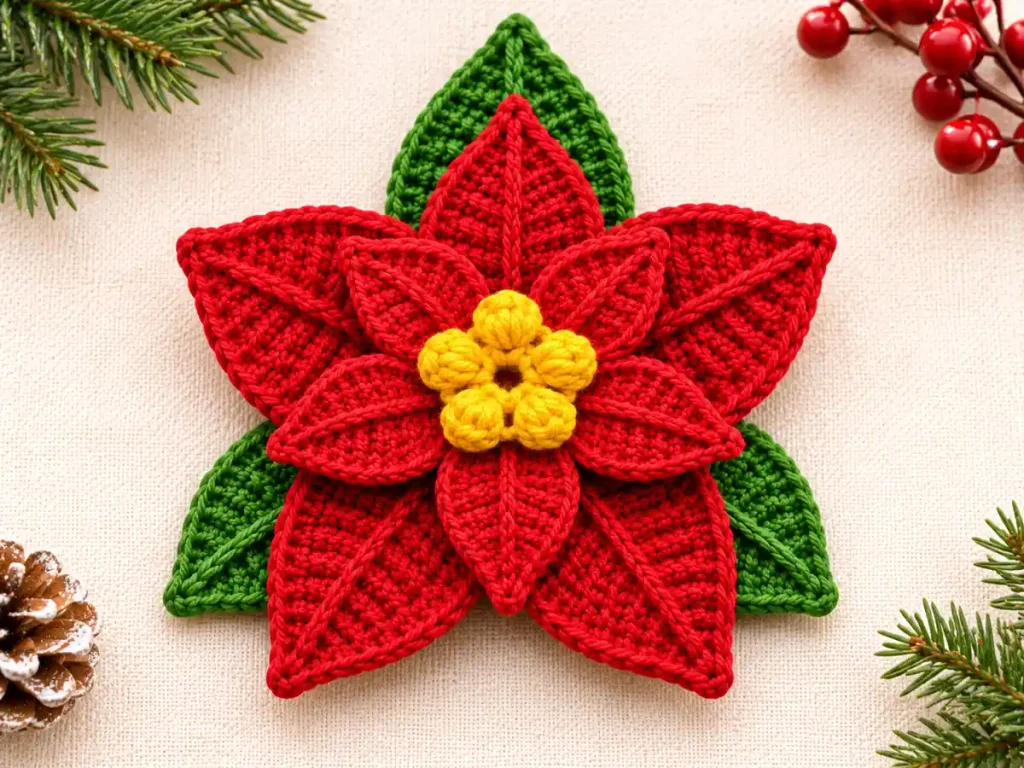
This free crochet poinsettia pattern shows you how to make a beautiful Christmas flower with layered red bracts, green leaves, and a textured yellow center. Follow the step-by-step instructions to crochet each piece, add delicate veins, and assemble them into a festive handmade decoration.
Table of Contents
Crochet Poinsettia Pattern at a Glance
This crochet poinsettia pattern uses separate red bracts, green leaves, and a textured yellow center to create a layered Christmas flower.
A crochet poinsettia is a lovely way to bring Christmas colors into a small handmade project.
This design uses five large red bracts for the bottom layer, five smaller red bracts for the upper layer, three green leaves, and a cluster of yellow bobbles in the center.
Each bract and leaf is worked along both sides of a foundation chain. The separate pieces are then arranged and sewn together to create the layered flower.
| Pattern Detail | Information |
|---|---|
| Project | Layered crochet poinsettia flower |
| Skill level | Confident beginner to intermediate (provisional) |
| Crochet terminology | US terms |
| Yarn | DK-weight cotton |
| Crochet hook | 3.5 mm |
| Large red bracts | 5 |
| Small red bracts | 5 |
| Green leaves | 3 |
| Yellow center | 5 bobble stitches |
| Construction | Separate crocheted pieces, sewn together |
| Main techniques | Working around chains, treble crochet, bobbles, surface slip stitches |
| Stuffing | Not required |
| Finished size | Not yet measured |
| Yarn quantity | Not yet measured |
| Completion time | Not yet verified |
| Pattern status | Mathematical review complete; sample testing pending |
You may notice that this tutorial uses the word bracts instead of petals. On a real poinsettia, the colorful red parts are modified leaves called bracts. They’re often described as petals in crochet patterns, but both names refer to the red pieces you’ll be making here.
Materials and Tools You’ll Need
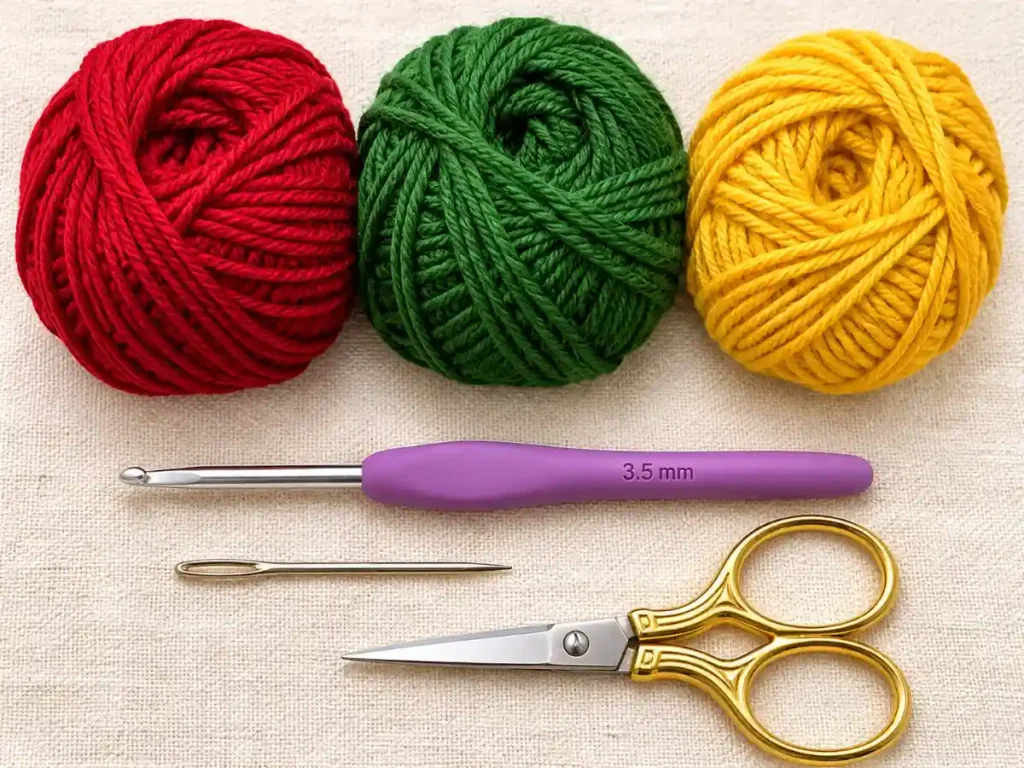
Gather your supplies before beginning:
- Red DK-weight cotton yarn: For the large and small red bracts.
- Green DK-weight cotton yarn: For the three leaves.
- Gold or yellow DK-weight cotton yarn: For the raised bobble center.
- 3.5 mm crochet hook: The hook size specified in the reference tutorial.
- Yarn needle: For sewing the separate pieces together and weaving in ends.
- Scissors: For cutting your yarn.
Using yarn of a similar thickness for all three colors will help you maintain consistent proportions between the different pieces.
You don’t need stuffing, wire, beads, or a separate flower stem for the core design.
The 3.5 mm hook is the reference specification, but the finished dimensions and fabric tension still need to be confirmed through sample testing.
Crochet Stitches and Abbreviations
This pattern uses US crochet terminology throughout.
| Abbreviation | Meaning |
|---|---|
| ch | Chain |
| sc | Single crochet |
| hdc | Half double crochet |
| dc | Double crochet |
| tr | Treble crochet |
| sl st | Slip stitch |
| MR | Magic ring |
| bo | Bobble stitch |
| st / sts | Stitch / stitches |
| FO | Fasten off |
If you’re new to reading crochet instructions, the Craft Yarn Council’s crochet abbreviations guide is a useful reference.
How to Make a Treble Crochet
Treble crochet creates a taller stitch than double crochet. In this pattern, treble stitches are used in the wider sections of the red bracts and green leaves.
To make a US treble crochet:
- Yarn over your hook twice.
- Insert the hook into the next stitch.
- Yarn over and pull up a loop. You should have four loops on your hook.
- Yarn over and pull through the first two loops.
- Yarn over and pull through the next two loops.
- Yarn over once more and pull through the remaining two loops.
You now have one treble crochet stitch.
Try to keep your treble stitches consistent so the two sides of each bract have similar tension.
How to Crochet Along Both Sides of a Foundation Chain
The red bracts and green leaves are made by crocheting along both sides of the same foundation chain.
First, work the stitches into one side of the chain.
When you reach the far end, make the chain-two tip specified in the pattern.
Then rotate your work so you can crochet into the unused loops on the opposite side of the foundation chain.
This creates two shaped sides around one central chain.
Important: The chain-two tip does not count toward the shaping stitch totals.
The exact turning point and final tip shape in this prototype still require physical testing. If the stitches don’t sit as intended, the turning method must be reviewed before changing the pattern.
How to Make a 5-Double-Crochet Bobble
The yellow center uses five raised bobble stitches.
Each bobble is made from five partially completed double crochets worked together.
To make one:
- Yarn over and insert your hook into the indicated stitch or magic ring.
- Yarn over and pull up a loop.
- Yarn over and pull through two loops, leaving the double crochet unfinished.
- Repeat this partially completed double crochet four more times in the same place.
- You should now have six loops on your hook.
- Yarn over and pull through all six loops.
This completes one 5-dc bobble.
Each completed bobble forms one raised cluster.
Before You Start Your Crochet Poinsettia
This flower is made from separate crocheted pieces, so it’s helpful to understand the construction before starting.
You’ll make:
- Five large red bracts.
- Five smaller red bracts.
- Three green leaves.
- One yellow center containing five bobbles.
The bracts and leaves begin with foundation chains and use different stitch heights to create their shapes.
A chain-two tip is added before crocheting back along the opposite side.
Afterward, loose surface slip stitches create a decorative vein along the middle of the pieces.
Finally, everything is sewn together in layers.
A note about the stitch counts: The shaping sequences below are mathematically consistent, but that doesn’t guarantee the finished pieces will have the intended pointed shape. The large-bract tip, opposite-side turn, and final assembly remain important sample-testing checkpoints.
How to Crochet a Poinsettia Flower – Step by Step
We’ll make the large red bracts first, followed by the smaller bracts, green leaves, and yellow center.
Then we’ll assemble the pieces into one layered Christmas flower.
To begin this crochet poinsettia pattern, we’ll make the five large red bracts that form the flower’s lower layer.
Step 1: Crochet the Large Red Bracts (Make 5)
Using red yarn and your 3.5 mm crochet hook, make a slip knot.
Foundation Chain: Ch 13.
Starting in the second chain from your hook, work along the first side of the foundation chain.
Side 1:
- Sc in the first available chain.
- Hdc in the next chain.
- Dc in the next 2 chains.
- Tr in the next 3 chains.
- Dc in the next 2 chains.
- Hdc in the next chain.
- Sc in the last 2 chains.
You should have 12 stitches along the first side.
The stitch sequence is:
1 sc, 1 hdc, 2 dc, 3 tr, 2 dc, 1 hdc, 2 sc
Pointed Tip:
Ch 2 at the far end.
These two chains are intended to help shape the bract tip. They are not counted as part of the 12 shaping stitches.
Side 2:
Rotate your work without turning it over. Continue along the unused loops on the opposite side of the foundation chain.
Work:
- Sc in the next 2 available chain positions.
- Hdc in the next chain.
- Dc in the next 2 chains.
- Tr in the next 3 chains.
- Dc in the next 2 chains.
- Hdc in the next chain.
- Sc in the final chain.
The second-side sequence is:
2 sc, 1 hdc, 2 dc, 3 tr, 2 dc, 1 hdc, 1 sc
You should have 12 stitches along the second side.
Join with a slip stitch at the base if the closing point aligns correctly, then fasten off, leaving a sewing tail.
Stitch Check:
| Section | Count |
|---|---|
| First side | 12 |
| Second side | 12 |
| Total shaping stitches | 24 |
| Pointed tip | Ch 2, excluded |
Repeat the instructions until you have five large red bracts.
Construction note: This proposed sequence places the tallest stitches toward the middle of the foundation chain. It may create a rounded or oval shape rather than the sharper pointed tip shown in the reference video. This difference must be tested before treating the final bract shape as verified.
Step 2: Crochet the Small Red Bracts (Make 5)
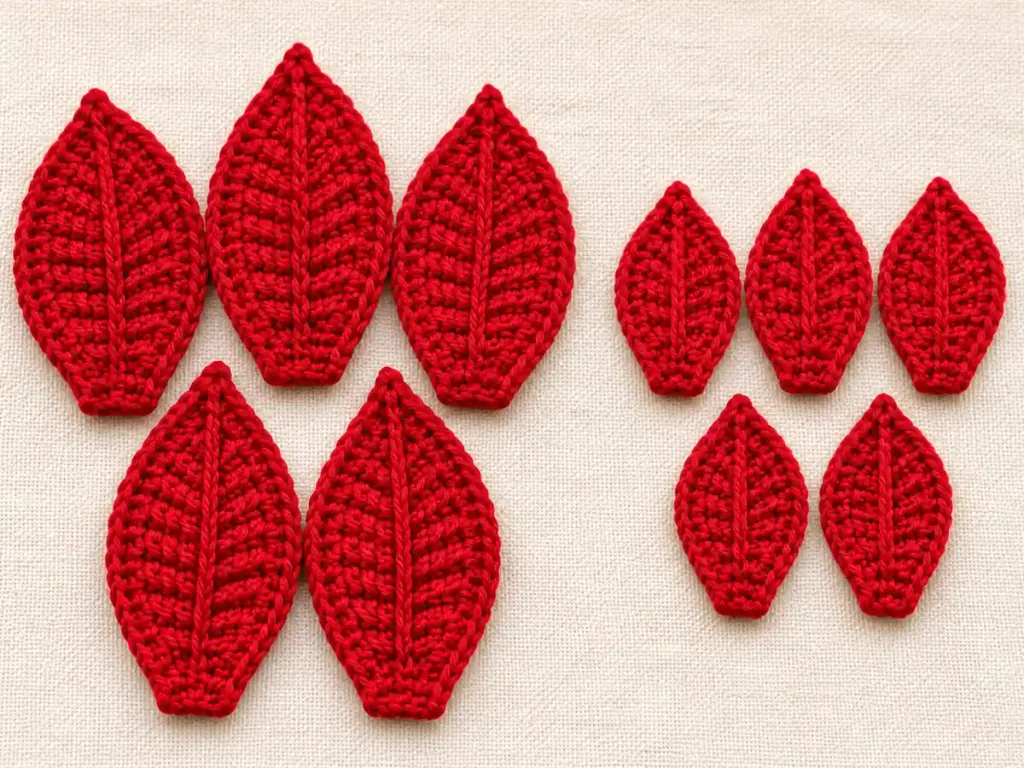
The small red bracts form the upper layer of the flower.
They use the same general construction method as the large bracts, but begin with a shorter foundation chain.
Using red yarn:
Foundation Chain: Ch 9.
Start in the second chain from your hook.
Side 1:
Work:
1 sc, 1 hdc, 1 dc, 2 tr, 1 dc, 1 hdc, 1 sc
You should have 8 stitches.
Pointed Tip:
Ch 2.
Rotate your work and continue along the unused loops of the foundation chain.
Side 2:
Work:
1 sc, 1 hdc, 1 dc, 2 tr, 1 dc, 1 hdc, 1 sc
You should have another 8 stitches.
Join with a slip stitch at the base, provided the closing point aligns correctly.
Fasten off, leaving a sewing tail.
Stitch Check:
- Side 1: 8 stitches.
- Side 2: 8 stitches.
- Total: 16 shaping stitches.
- Tip: Ch 2, excluded from the count.
Repeat until you have five small red bracts.
These smaller pieces are intended to sit above the large red bracts, creating a second layer around the flower’s center.
Keep the pieces together so you can compare their proportions before assembly.
Step 3: Crochet the Green Leaves (Make 3)
The green leaves will sit behind the red bracts.
Using green yarn:
Foundation Chain: Ch 11.
Starting in the second chain from the hook, work along the first side.
Side 1:
1 sc, 1 hdc, 2 dc, 2 tr, 2 dc, 1 hdc, 1 sc
Count: 10 stitches.
Pointed Tip:
Ch 2 at the far end.
Rotate your work and continue along the unused foundation-chain loops.
Side 2:
1 sc, 1 hdc, 2 dc, 2 tr, 2 dc, 1 hdc, 1 sc
Count: 10 stitches.
Join with a slip stitch at the base if the final joining point aligns correctly.
Fasten off, leaving a sewing tail.
Stitch Check:
| Section | Count |
|---|---|
| Side 1 | 10 |
| Side 2 | 10 |
| Total shaping stitches | 20 |
| Tip | Ch 2, excluded |
Repeat until you have three green leaves.
The leaf construction is designed to resemble the red bracts while creating a slightly different-sized green layer behind the flower.
Step 4: Add Surface Slip-Stitch Veins
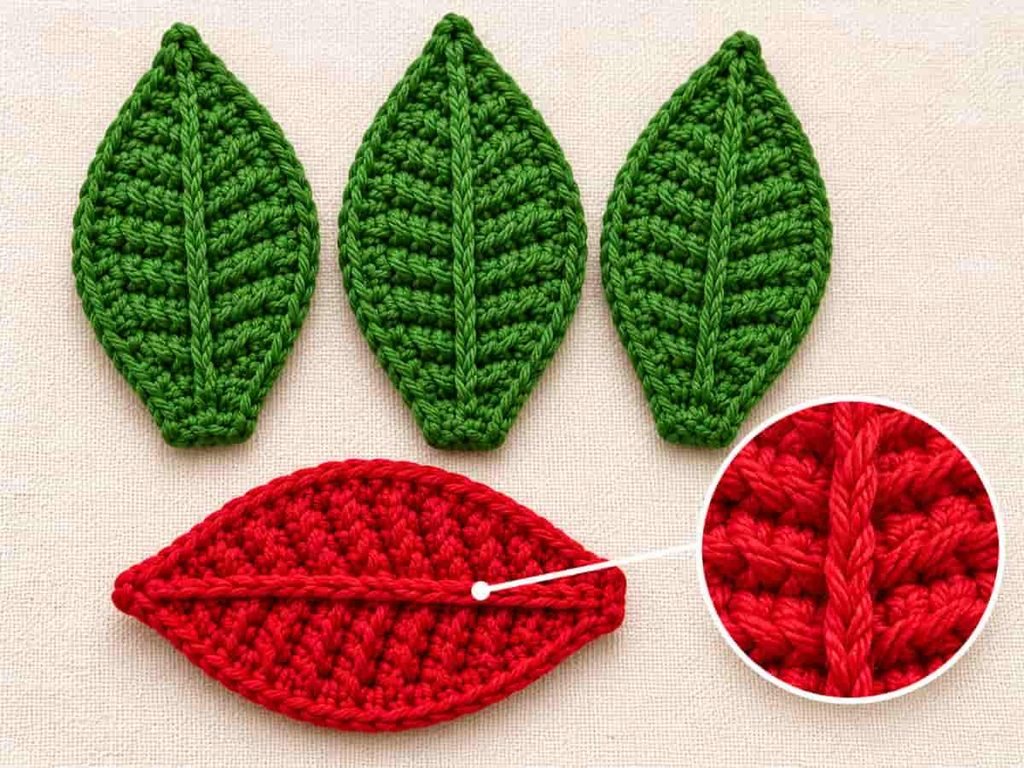
The central vein gives each bract and leaf an extra decorative detail.
The reference tutorial uses surface slip stitches worked along the foundation-chain ridge.
For the proposed method:
- Take the matching yarn color for your bract or leaf.
- Bring a loop through the central foundation-chain ridge near the base.
- Insert your hook into the next position along the ridge.
- Pull up a loop and draw it through the loop already on your hook to form a surface slip stitch.
- Continue along the central ridge toward the tip.
- Fasten off and secure the remaining yarn ends.
Beginner Tip: Keep your surface slip stitches loose.
If you pull the yarn too tightly, the center of the bract may pucker or pull inward.
Work slowly and keep an eye on the shape as you add the vein.
The exact number and placement of surface slip stitches have not yet been established for Pattern V1.1, so these details must be checked during physical sample testing.
Step 5: Crochet the Yellow Bobble Center
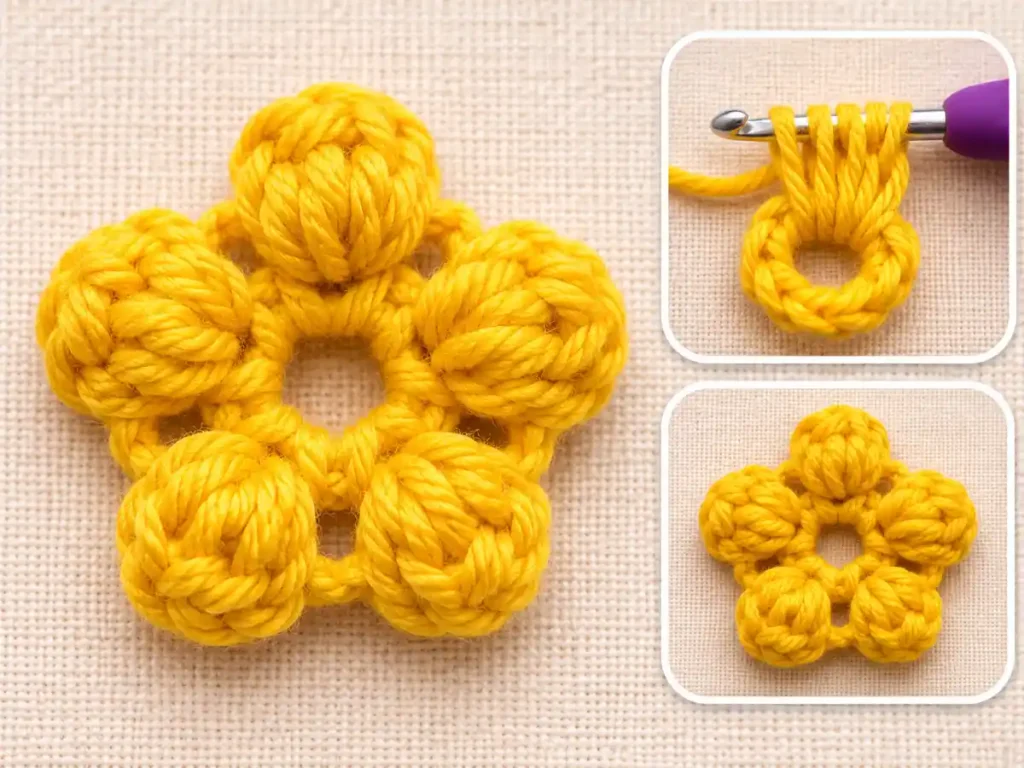
The raised yellow center brings the red and green layers together visually.
Using gold or yellow yarn, make a magic ring.
Work the following sequence into the ring:
[5-dc bobble, ch 2] × 5
To make the center:
- Work one 5-dc bobble into the magic ring.
- Ch 2.
- Work a second 5-dc bobble into the same ring.
- Ch 2.
- Repeat until you have five bobbles, each followed by ch 2.
Stitch Check:
- Five completed bobble clusters.
- Five chain-two spaces.
- Ten separating chains in total.
Gently tighten the magic ring to bring the bobbles together.
The proposed V1.1 finishing method is to join with a slip stitch to the first bobble if the closure aligns neatly, then fasten off and leave a sewing tail.
Important: The exact center closure, final chain-two alignment, and the stability of the tightened ring have not been physically tested.
Don’t treat the bobble cluster as a verified finished component until its shape and closure have been checked.
How to Assemble Your Crochet Poinsettia
Now it’s time to arrange the separate pieces into one flower.
The assembly follows the layering order described in the reference tutorial.
Step 6: Join the Five Large Red Bracts
Lay your five large red bracts on a flat surface.
Arrange them around a shared center with their pointed ends facing outward.
Bring their inner bases together.
Using a yarn needle and the available sewing tails, join the bases securely to create the first red layer.
Try to maintain even spacing between the pieces.
Check that the bracts haven’t twisted and that the center remains accessible for the remaining layers.
Assembly Check: You should have five large red bracts arranged around one central meeting point.
The precise overlap and amount of sewing required to achieve a stable base still need sample testing.
Step 7: Attach the Three Green Leaves
Turn the large-bract arrangement over so the back faces you.
Place the three green leaves behind the red layer.
Space them around the center so portions of the green leaves are visible beyond the red bracts when the flower is viewed from the front.
Use their sewing tails to attach them to the back of the existing flower base.
Secure the yarn ends neatly.
Turn the assembly right side up and check the placement.
Assembly Check: Three green leaves should sit behind the five large red bracts.
Step 8: Add the Five Small Red Bracts
Place the smaller red bracts on top of the first red layer.
Position them between the larger bracts rather than directly covering each one.
This offset arrangement is intended to create the layered appearance of a poinsettia.
Bring their inner bases toward the center.
Using your yarn needle, sew the small bracts into place without pulling the lower layer out of alignment.
Check the flower from above before securing all remaining ends.
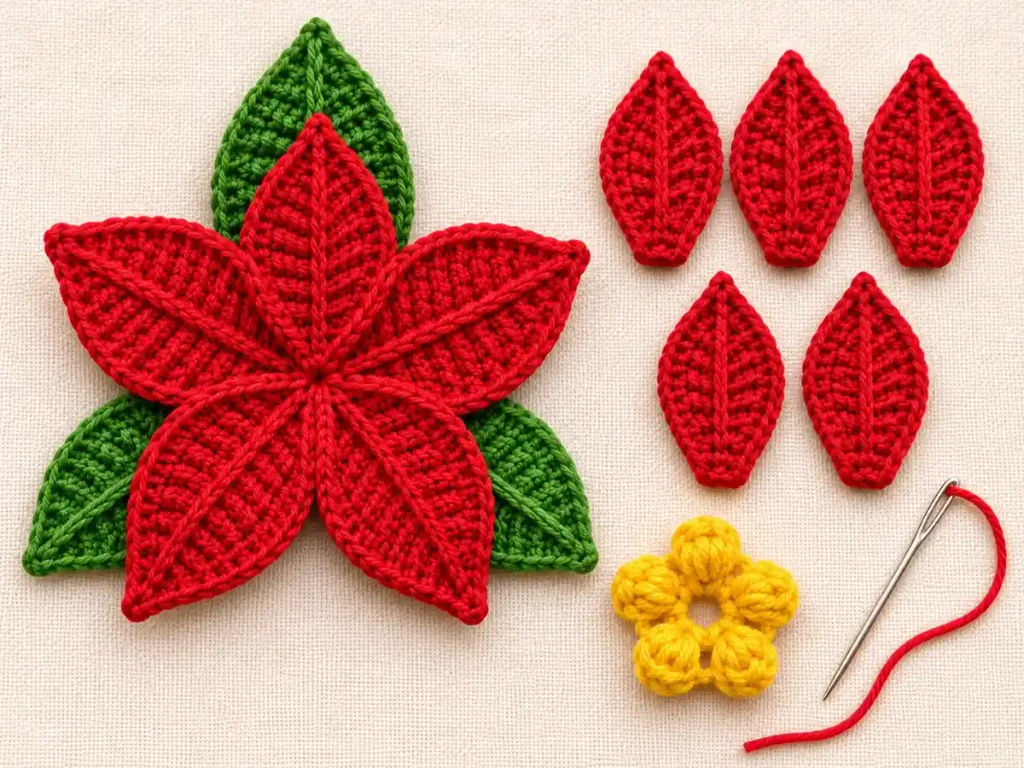
Assembly Check: You should have five small red bracts arranged above the five larger red bracts.
Step 9: Attach the Yellow Bobble Center
Take the yellow bobble cluster and position it over the central meeting point of the flower.
The raised bobbles are intended to create the textured yellow center.
Thread the sewing tail onto your yarn needle.
Sew the center onto the flower, passing through the layered bases to connect the components.
Make additional securing passes as needed, without pulling the flower out of shape.
Fasten off and conceal the remaining tail on the back.
Assembly Check: The yellow cluster should sit over the central opening and connect securely to the surrounding layers.
The exact fastening tension and durability of this assembly still require physical validation.
Step 10: Shape and Finish Your Crochet Poinsettia
Lay your flower flat and review the arrangement.
You should have:
- Five large red bracts.
- Five small red bracts.
- Three green leaves.
- One yellow center containing five bobbles.
Gently arrange the red and green pieces so the layers remain visible.
Check that all sewing tails are secured and that the central cluster is attached to the assembled flower.
Look closely at the tips and the central surface veins.
If the fabric curls excessively, the tips appear rounded, or the layers don’t sit securely, record the problem rather than changing stitch counts without checking the construction.
The finished flower’s dimensions, shape retention, and stability have not yet been confirmed by a physical sample.
Crochet Poinsettia Stitch-Count Checkpoints
Before considering the prototype complete, review the mathematical counts.
| Component | Quantity | Shaping Stitches per Piece | Combined |
|---|---|---|---|
| Large red bracts | 5 | 24 | 120 |
| Small red bracts | 5 | 16 | 80 |
| Green leaves | 3 | 20 | 60 |
| Total | 13 | — | 260 |
The yellow center contains five bobbles, with five chain-two spaces.
The total of 260 shaping stitches excludes foundation chains, tip chains, closing slip stitches, surface veins, and the yellow center.
These counts are mathematically consistent. They do not establish that the proposed bract shaping, pointed tips, or full flower assembly will work exactly as intended.
Common Crochet Poinsettia Problems and How to Check Them
If your crochet poinsettia pattern isn’t shaping as expected, check your stitch counts, foundation-chain tension, and assembly before making adjustments.
Even when your stitch counts are correct, the shape of a crocheted flower can be affected by tension, stitch height, and the way separate pieces are joined.
Here are the most important points to check with this prototype.
Why Is My Crochet Poinsettia Bract Curling?
Start by checking your foundation chain.
If the chain is much tighter than the stitches worked into it, the fabric may pull inward or curve.
Check that you’ve worked the intended number of stitches along both sides.
You can also compare the tension of the taller double and treble crochet stitches.
Don’t automatically add stitches to correct the shape. The proposed bract construction still needs testing.
Why Doesn’t My Petal Have a Sharp Point?
The current pattern uses a chain-two tip.
However, the exact turning method hasn’t been physically validated.
The height and arrangement of the surrounding stitches may also affect the finished shape.
The large-bract sequence places the tallest stitches near the middle of the piece, which could produce a more rounded shape than the reference design.
If the bract doesn’t form a suitable point, that result should inform a later pattern revision rather than being treated as a reader error.
Why Are My Surface Slip-Stitch Veins Puckering?
Surface slip stitches can pull the underlying crochet fabric inward when they’re worked too tightly.
Try keeping the surface loops relaxed and check the shape as you work along the foundation-chain ridge.
If the piece begins to gather, stop and review the tension before adding more stitches.
Why Won’t My Yellow Bobbles Sit Evenly?
First, count the bobbles.
You should have five completed clusters, with a chain-two space after each one.
Check that every bobble is made from five partially completed double crochets worked together.
The magic ring should bring the clusters toward the center.
However, the final joining and closure method remains untested, so uneven spacing may require a technical correction to the prototype.
Why Is My Finished Poinsettia Floppy?
A layered flower can lose its shape if the pieces aren’t held together securely.
Check the attachment points between the large bracts, green leaves, small bracts, and yellow center.
Also check whether the fabric is very loose or the layers are pulling against one another.
The pattern hasn’t yet been tested for shape retention, so no particular stiffening method is currently recommended as a verified solution.
Why Are My Red Layers Uneven?
Start by counting the pieces.
You need five large red bracts and five small red bracts.
Check that the smaller bracts are arranged between the larger ones.
Before securing the final sewing stitches, compare the spacing around the flower.
Uneven tension or placement may affect the appearance, but the finished arrangement still needs validation.
Crochet Poinsettia Color Ideas
The traditional red-and-green combination is a natural choice for a Christmas poinsettia.
You can also try different color combinations while keeping the same proposed construction.
Classic Christmas Red: Red bracts, green leaves, and a gold center create the familiar poinsettia look.
Deep Burgundy: Burgundy bracts with green leaves offer a richer holiday color combination.
White Poinsettia: Cream or white bracts with green leaves and a yellow center give the flower a softer appearance.
Changing colors doesn’t require changing the written stitch counts.
However, changing yarn thickness or fiber may affect the finished proportions and texture.
Ways to Use Your Crochet Poinsettia
Once the flower has been successfully made and its assembly has been checked, it may be suitable for several Christmas decorating projects.
Christmas Tree Decoration
A crochet poinsettia could make a lovely handmade addition to a Christmas tree.
A secure hanging loop would need to be developed and attached separately.
The current V1.1 instructions don’t include a tested hanging-loop attachment.
Handmade Gift Topper
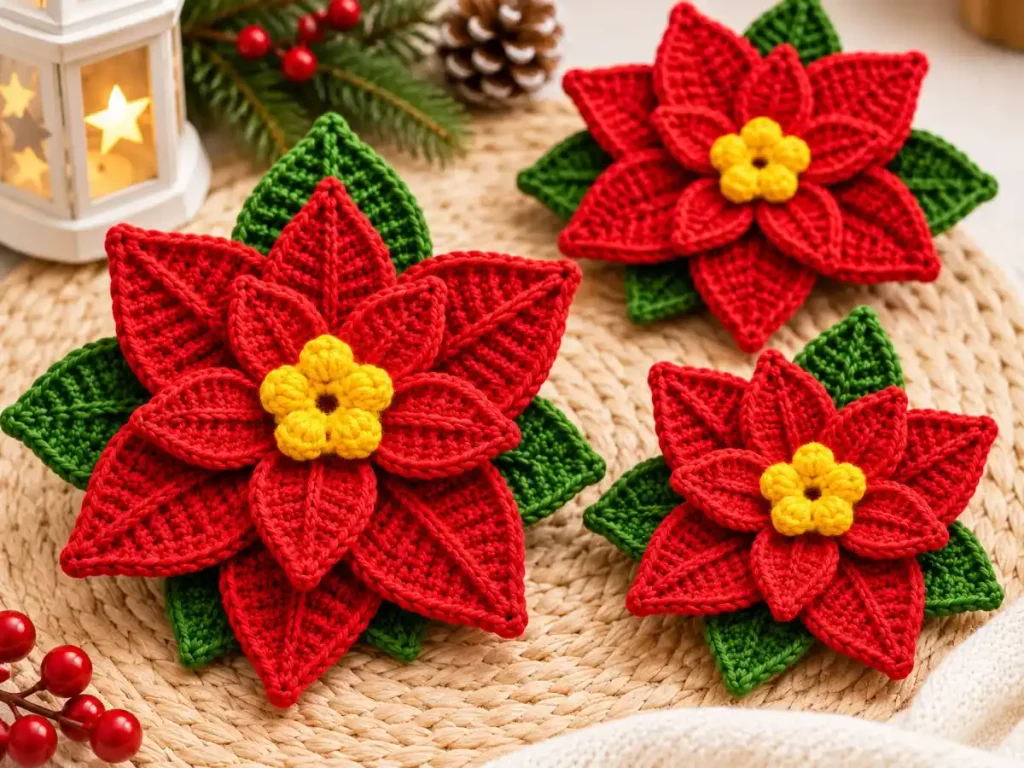
A layered crochet poinsettia could be used as a decorative accent on wrapped Christmas gifts.
Its red, green, and yellow colors work naturally with seasonal gift wrapping.
Make sure the flower is securely assembled before attaching it to a package.
Christmas Table Decoration
A small poinsettia may also work as a decorative accent for a Christmas table setting.
The reference tutorial suggests adapting the flower into a napkin ring, but this V1.1 pattern does not include instructions for a separate napkin-ring band.
Any additional attachment or backing would need its own construction instructions and testing.
Frequently Asked Questions
Is This Crochet Poinsettia Pattern Free?
Yes. The written V1.1 crochet poinsettia prototype is provided here without payment.
The pattern is still awaiting physical validation, so the instructions may need technical corrections before being approved as a tested pattern.
Is This Crochet Poinsettia Suitable for Beginners?
The design uses basic crochet stitches alongside treble crochet, surface slip stitches, bobbles, and sewing.
It’s intended for crocheters who already understand the basic stitches and feel comfortable following multi-part instructions.
The final difficulty level remains provisional until a complete physical sample has been made.
How Many Petals Does This Crochet Poinsettia Have?
This design contains five large red bracts and five smaller red bracts, giving you ten red pieces altogether.
It also includes three green leaves and a yellow center containing five bobbles.
The red pieces are often called petals in crochet tutorials, although poinsettia’s colorful structures are botanically bracts.
Can I Use Different Yarn?
You can experiment with other yarns, but different weights and fibers may change the texture, size, and overall shape of the finished flower.
DK-weight cotton and a 3.5 mm hook are the reference materials for this prototype.
No alternative yarn combination has been independently tested with Pattern V1.1.
Do I Need to Sew the Pieces Together?
Yes.
The red bracts, green leaves, and yellow center are made separately and joined using a yarn needle.
This is a layered, sewn construction rather than a no-sew crochet pattern.
Can I Turn This Crochet Flower Into a Christmas Ornament?
The flower could potentially be adapted into a hanging decoration.
However, a secure hanging loop and its attachment method are not included in the current prototype.
Those details need to be developed and tested separately before using the flower as a hanging ornament.
More Free Crochet Flower Patterns
If you enjoy making crochet flowers, there are several other floral projects to explore on Small Crochet Ideas.
Our Sunflower Crochet Pattern shows you how to make a dimensional sunflower with pointed yellow petals, a dark center, and green details.
For a smaller floral project with a contrasting center, try the Crochet Daisy Pattern, which uses a different petal construction.
You might also enjoy our Crochet Rose Pattern, where a continuous strip of petals is rolled and secured to create a dimensional flower.
Each design offers a different way to practice crochet flower shaping.
A Handmade Christmas Flower to Enjoy
This layered crochet poinsettia combines festive colors, shaped crochet pieces, and a textured yellow center in one Christmas flower design.
Take your time counting the stitches, keep the surface veins relaxed, and pay attention to how the separate layers fit together.
Happy crocheting!
Pattern note: This is a V1.1 prototype with mathematically checked stitch counts. The petal shapes, pointed tips, center closure, and finished assembly have not yet been physically tested.