Easy crochet patterns, cute projects, and beginner-friendly ideas to inspire your next make.

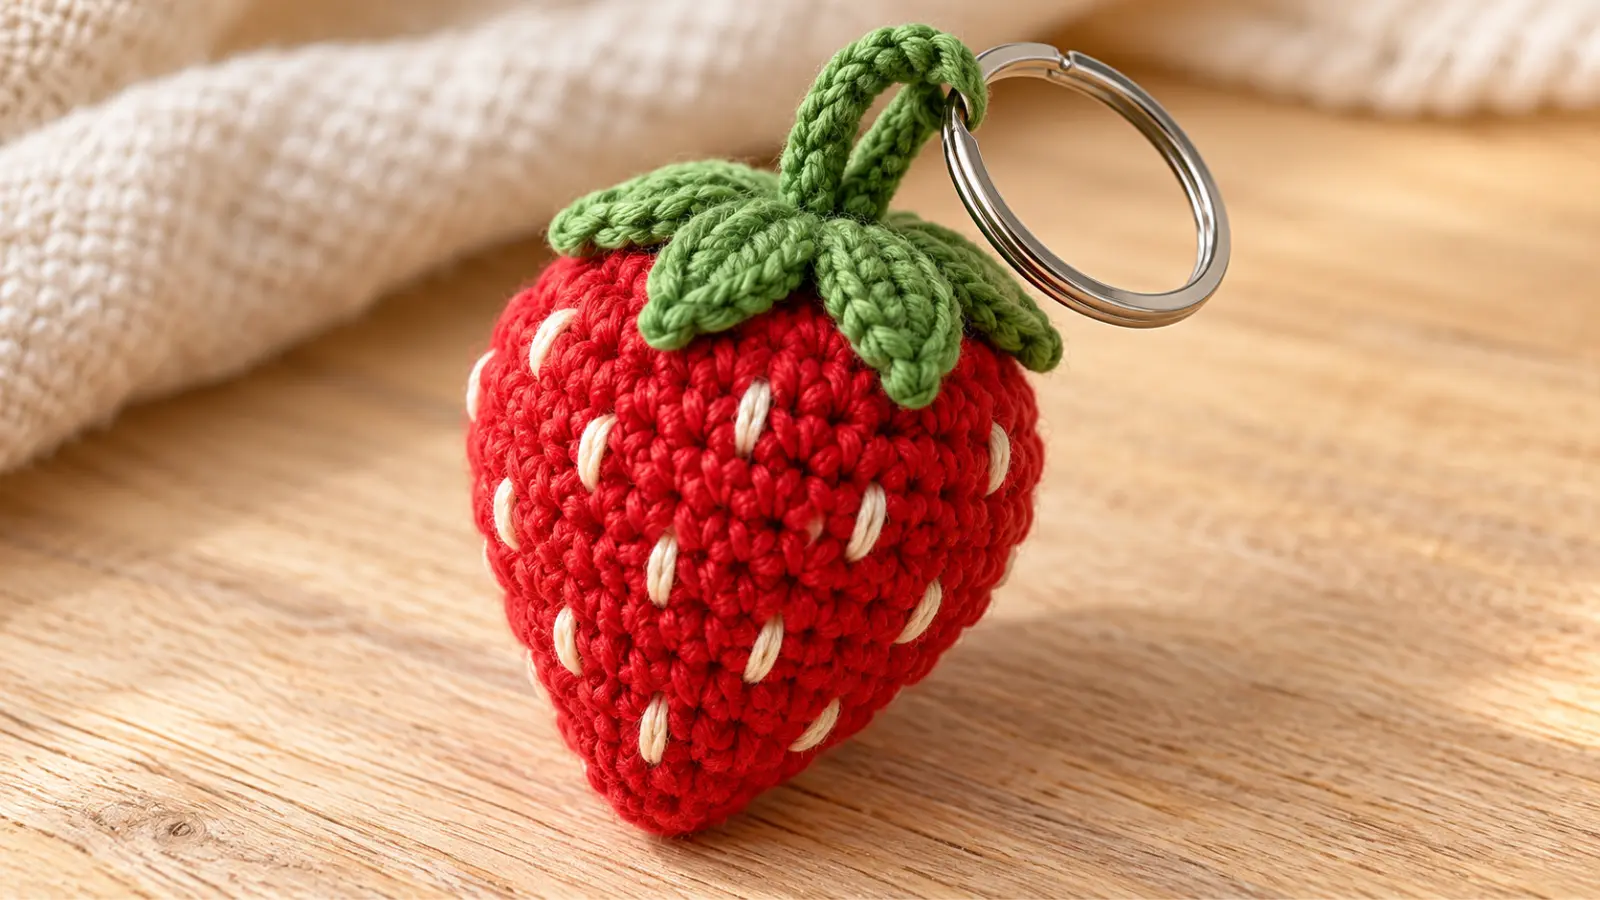
This crochet keychain pattern turns a small amount of yarn into a cute 3D strawberry that you can attach to keys, a backpack, a tote, or a handbag. This easy crochet keychain project is designed around one compact strawberry rather than multiple separate pieces. The strawberry is worked as one tapered amigurumi-style body, finished with embroidered seeds and a separate green leafy cap, then connected to the hardware with a reinforced crochet hanging loop.
The project uses simple stitches and a compact construction, but careful counting matters because the gradual increases create the strawberry shape. The reinforced loop is also designed to spread the pull across several stitches instead of relying on one crochet stitch to hold the key ring.
Use a split key ring for a traditional keychain or a lobster/swivel clasp if you want the strawberry to work as a removable bag charm. The same crochet strawberry keychain construction works for either option.
Table of Contents
Crochet Keychain Pattern at a Glance
| Pattern detail | What to expect |
|---|---|
| Project | 3D strawberry crochet keychain |
| Construction | One-piece strawberry body worked in continuous rounds |
| Strawberry top | Separate 5-point green leafy cap |
| Seeds | Embroidered before the body is fully closed |
| Hanging loop | Reinforced crochet cord |
| Hardware | Split key ring or lobster/swivel clasp |
| Main stitches | ch, sl st, sc, inc, dec |
| Terminology | US crochet terms |
| Main challenge | Counting rounds, shaping, and securing the hanging loop |
| Finished size | Depends on yarn, hook, tension, and hardware |
The exact size will change with your materials, so this free crochet keychain pattern focuses on stitch counts and visual checkpoints rather than a fixed finished measurement.
What You’ll Need
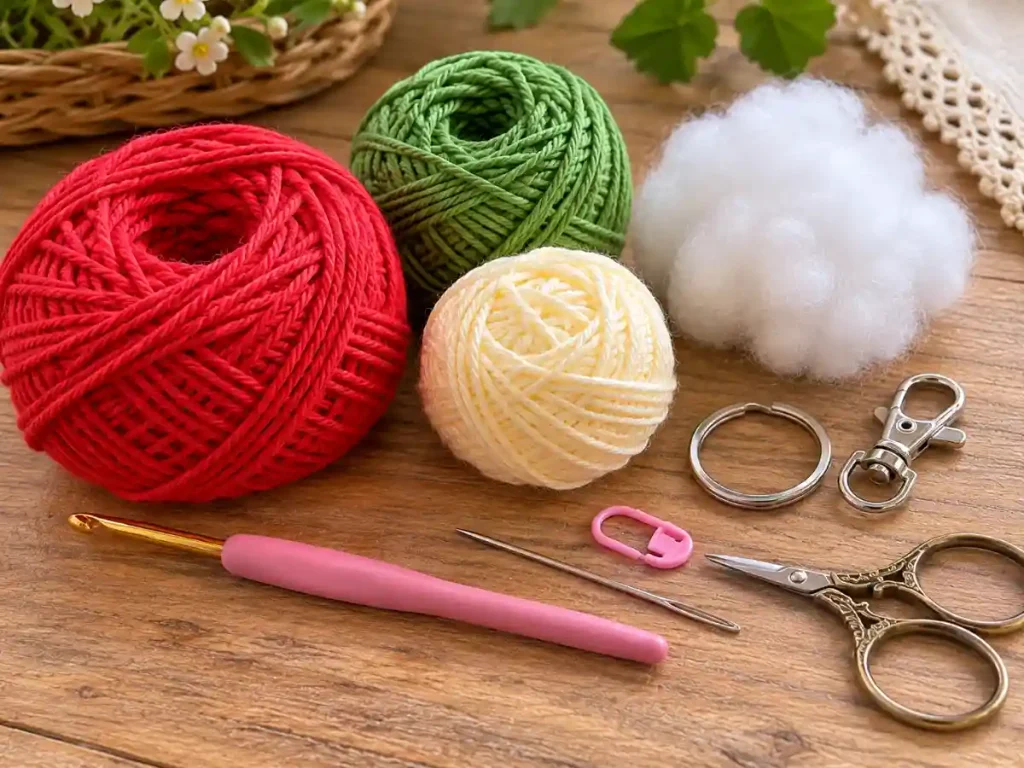
For one strawberry keychain, prepare:
- smooth red or strawberry-pink yarn;
- a small amount of green yarn;
- cream, pale yellow, or similar yarn or embroidery thread for the seeds;
- a crochet hook that gives you a dense amigurumi fabric with your chosen yarn;
- polyester stuffing;
- a yarn needle;
- scissors;
- a stitch marker;
- a split key ring or lobster/swivel clasp.
A smooth cotton or cotton-blend yarn is a practical choice for a first version because the stitches are easy to see and the embroidered seeds stay clear against the surface. You can use another yarn if you prefer, but choose a hook that keeps the fabric tight enough that the stuffing does not show through.
Crochet Stitches and Abbreviations
This pattern uses US crochet terminology.
For a broader reference, see the Craft Yarn Council’s standard crochet abbreviations.
- ch — chain
- sl st — slip stitch
- sc — single crochet
- inc — work 2 single crochets in the same stitch
- dec — single crochet decrease, working two stitches together
- st / sts — stitch / stitches
The strawberry body is worked in continuous rounds. Do not join at the end of each round unless you intentionally prefer a different method. Move your stitch marker to the first stitch of each new round so you can keep the count accurate.
Before You Start
This crochet keychain pattern is designed from the narrow bottom of the strawberry upward.
The body starts with only a few stitches, widens gradually, stays full for two rounds, and then decreases to close at the top. That slow expansion is what helps the finished piece look more like a strawberry and less like a round ball.
The main construction order is:
- crochet the strawberry body;
- embroider the seeds while the top is still open;
- decrease and add stuffing;
- close the body;
- crochet the green leafy cap;
- make a reinforced hanging loop;
- anchor the loop through several body stitches;
- sew the cap over the attachment;
- add the metal hardware.
Keep your tension consistent and count every round. A missed increase or decrease can change the silhouette noticeably on a project this small.
How to Crochet a Strawberry Keychain Step by Step
Step 1: Start the Strawberry Bottom
With red or strawberry-pink yarn, make a magic ring.
Round 1: Work 6 sc into the magic ring. [6]
Pull the ring closed.
Place a stitch marker in the first stitch of the round.
Bottom checkpoint
At this stage you should have a small, tight circle.
This will become the narrow bottom tip of the strawberry, so avoid stuffing or stretching it open.
Step 2: Begin Widening the Strawberry
Continue in continuous rounds.
Round 2: (sc, inc) ×3. [9]
Round 3: (2 sc, inc) ×3. [12]
Round 4: (3 sc, inc) ×3. [15]
Move the stitch marker at the beginning of each round.
Shape checkpoint after Round 4
The piece should still look relatively narrow.
You are not trying to create a wide flat circle. The gradual increases should begin building a small tapered cone.
If the work starts to flare sharply outward, recount the round before continuing.
Step 3: Build the Full Strawberry Shape
Continue increasing at the same gradual pace.
Round 5: (4 sc, inc) ×3. [18]
Round 6: (5 sc, inc) ×3. [21]
Round 7: (6 sc, inc) ×3. [24]
Shape checkpoint after Round 7
The strawberry body should now be noticeably wider than the starting tip.
Look at it from the side. The lower section should taper toward the bottom rather than forming a straight cylinder.
Do not add stuffing yet. Keeping the body empty makes the next rounds and seed embroidery easier.
Step 4: Crochet the Fullest Section
Now stop increasing.
Round 8: Sc in each stitch around. [24]
Round 9: Sc in each stitch around. [24]
At the end of Round 9, pause before beginning the decreases.
Full-body checkpoint
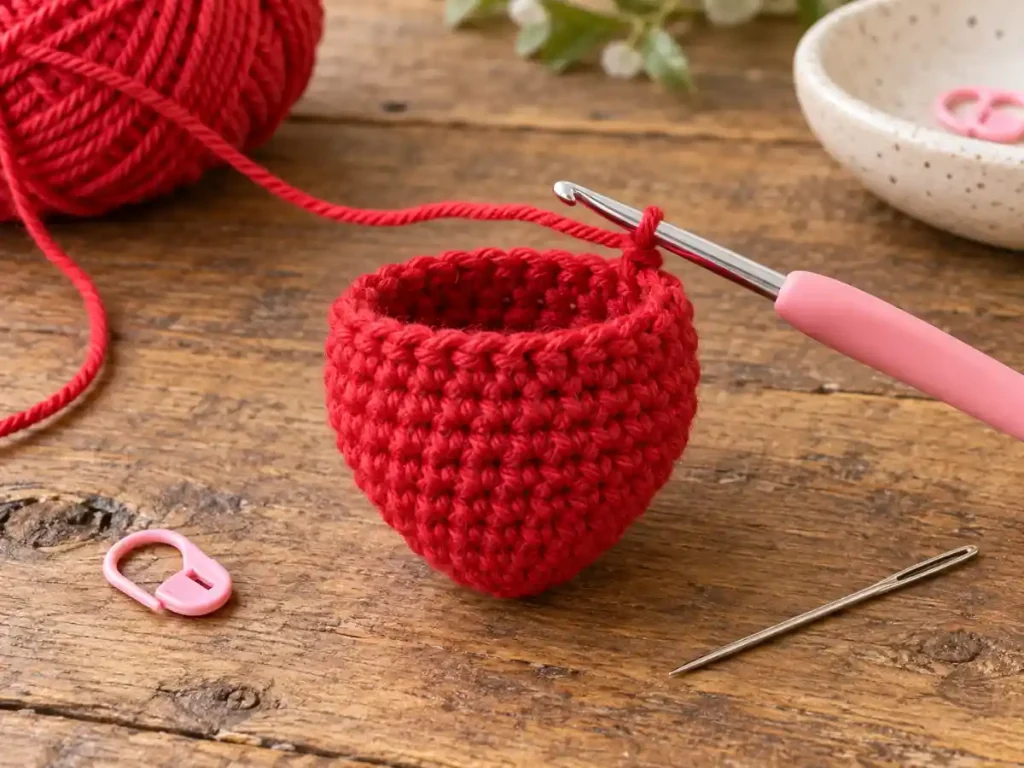
You should have an open strawberry shape with:
- a narrow lower tip;
- gradually widening sides;
- a fuller upper section;
- 24 stitches around the open top.
This is the best time to check the shape before adding the seeds.
If the body looks very round instead of tapered, gently reshape it with your fingers and check that the earlier increase counts were correct.
Step 5: Embroider the Strawberry Seeds
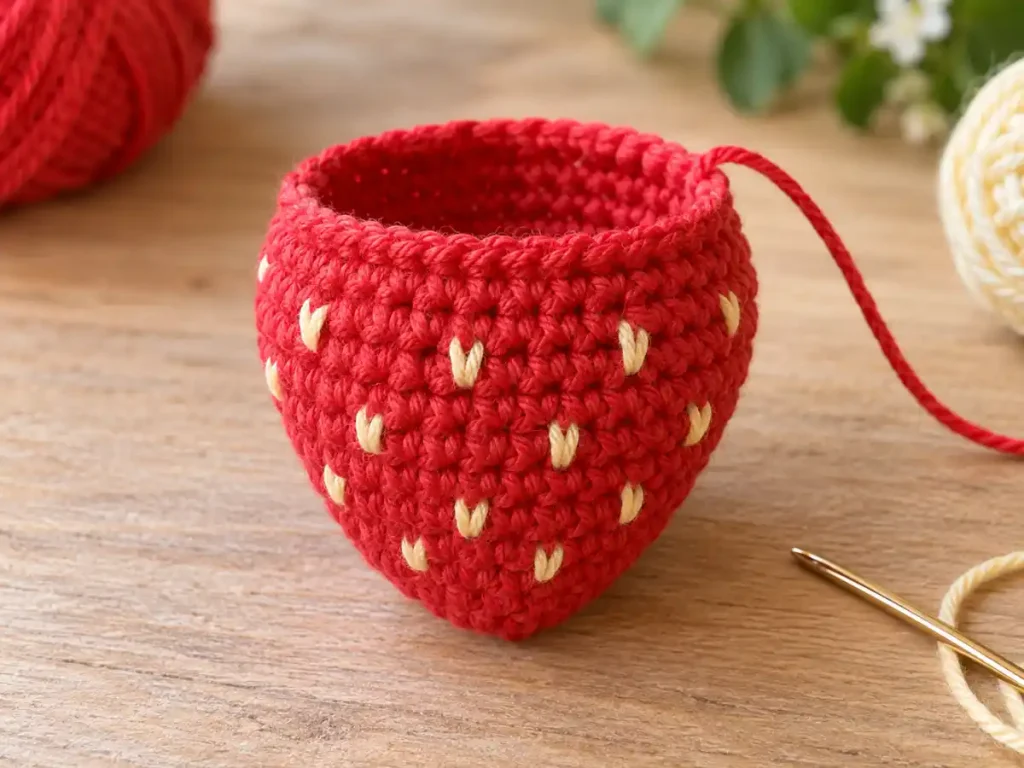
Before you close and stuff the strawberry completely, add the seed details.
Thread a yarn needle with cream or pale yellow yarn or embroidery thread.
Work short stitches across the red surface, spacing them visually around the strawberry.
There is no required seed count. The goal is a balanced distribution rather than a specific number.
Keep each seed stitch short and do not pull the embroidery yarn tightly. Pulling too hard can draw the crochet fabric inward and create dents.
Because the top is still open, you can hide the embroidery tails inside the strawberry.
When the seeds look balanced from all sides, secure the yarn on the inside and trim any excess.
Step 6: Begin Decreasing
Return to the red yarn.
Round 10: (2 sc, dec) ×6. [18]
The top should begin narrowing.
After completing Round 10, add most of the stuffing.
Use small amounts at a time and push the stuffing down toward the bottom tip first.
The strawberry should feel firm enough to hold its shape, but the stitches should not stretch open.
Stuffing checkpoint
Check the lower half of the strawberry.
The bottom should still look tapered.
If stuffing has made the bottom round or blunt, remove a little and reshape the piece before continuing.
Step 7: Finish Stuffing and Close the Top
Round 11: (sc, dec) ×6. [12]
Add a small final amount of stuffing if the top feels hollow.
Do not force stuffing into the opening if the body already feels firm.
Round 12: Dec around. [6]
Fasten off, leaving a tail.
Thread the tail through the remaining front loops or through the final stitches using your preferred closure method, then pull the opening closed securely.
Weave the tail into the body.
Closed-body checkpoint
The finished strawberry body should have:
- a tapered lower end;
- a fuller upper section;
- a smooth stuffed surface;
- no visible stuffing between stitches;
- a completely closed top.
Set the strawberry aside while you make the green cap.
Step 8: Crochet the Green Leafy Cap
With green yarn, make a magic ring.
Round 1: Work 5 sc into the ring. [5]
Pull the ring closed.
Round 2: Inc in each stitch around. [10]
You will now turn those 10 base stitches into 5 pointed leaves.
For each point:
Sl st in the next base st. Ch 4.
Starting in the second chain from the hook, work:
- sl st;
- sc;
- hdc.
Then:
Sl st in the following base st.
Repeat the same sequence around until you have 5 pointed leaves.
Fasten off, leaving a long green tail for sewing.
Leafy-cap checkpoint
The cap should have:
- a small green center;
- 5 distinct pointed leaves;
- a compact shape that can sit over the closed strawberry top.
The five points use the 10 base stitches evenly, with two base stitches involved in each point.
Do not sew the cap on yet. The reinforced hanging loop needs to be positioned first.
Step 9: Make the Reinforced Hanging Loop
The hanging loop is an important part of this crochet keychain pattern because it carries the pull from the key ring or bag clasp. A reinforced loop also makes the finished crochet strawberry keychain more suitable for regular handling.
Instead of connecting the metal hardware directly through one crochet stitch, make a small reinforced cord.
With green yarn, chain until the cord is long enough to fold into a loop that fits comfortably through your chosen hardware.
Starting in the second chain from the hook, work slip stitches back along the chain.
This creates a thicker cord than a plain chain.
Fasten off, leaving enough yarn at the end for sewing.
Fold the cord so the two ends meet.
The loop should be large enough for your hardware to move freely but short enough that the strawberry does not hang from an unnecessarily long string.
Because yarn and hardware sizes vary, adjust the loop length to the materials you are actually using rather than relying on one fixed chain count.
Step 10: Anchor the Hanging Loop
Place the folded loop at the center of the closed strawberry top.
The loop itself should point upward while the two ends sit against the crochet body.
Using green yarn and a yarn needle, sew both ends of the loop through several stitches at the top of the strawberry.
Work across more than one body stitch so the pull is distributed over a wider area.
Do not attach the loop through a single surface stitch.
Gently pull upward on the loop with your fingers.
The attachment should feel stable, and you should not see one red stitch being stretched sharply out of shape.
Loop checkpoint
Before covering the attachment with the leafy cap, check that:
- the loop sits near the center;
- both ends are secured;
- several strawberry stitches share the load;
- the strawberry hangs reasonably upright when lifted by the loop.
If it tilts strongly to one side, reposition the loop before sewing on the cap.
Step 11: Attach the Green Leafy Cap
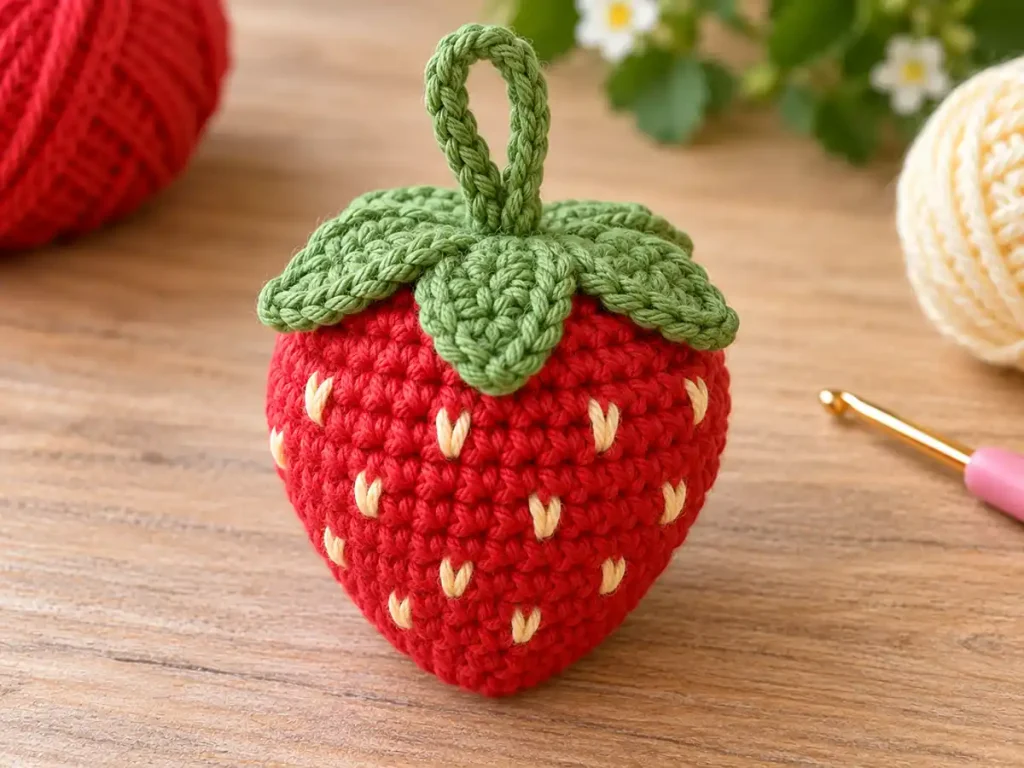
Place the green cap over the closed strawberry top and the base of the hanging loop.
Center the cap so the 5 pointed leaves spread around the strawberry.
Using the long green yarn tail, sew the cap securely to the body.
Pass the needle through the cap and into several strawberry stitches around the top.
As you sew, work around the reinforced loop ends so the cap helps stabilize and cover the attachment area.
Keep the pointed leaves free rather than sewing them flat against the entire strawberry.
When the cap feels secure, weave in the remaining yarn tail.
Cap checkpoint
The finished top should look centered and tidy.
You should be able to see the five green points around the upper edge, with the reinforced hanging loop emerging from the middle.
Step 12: Add the Keychain Hardware
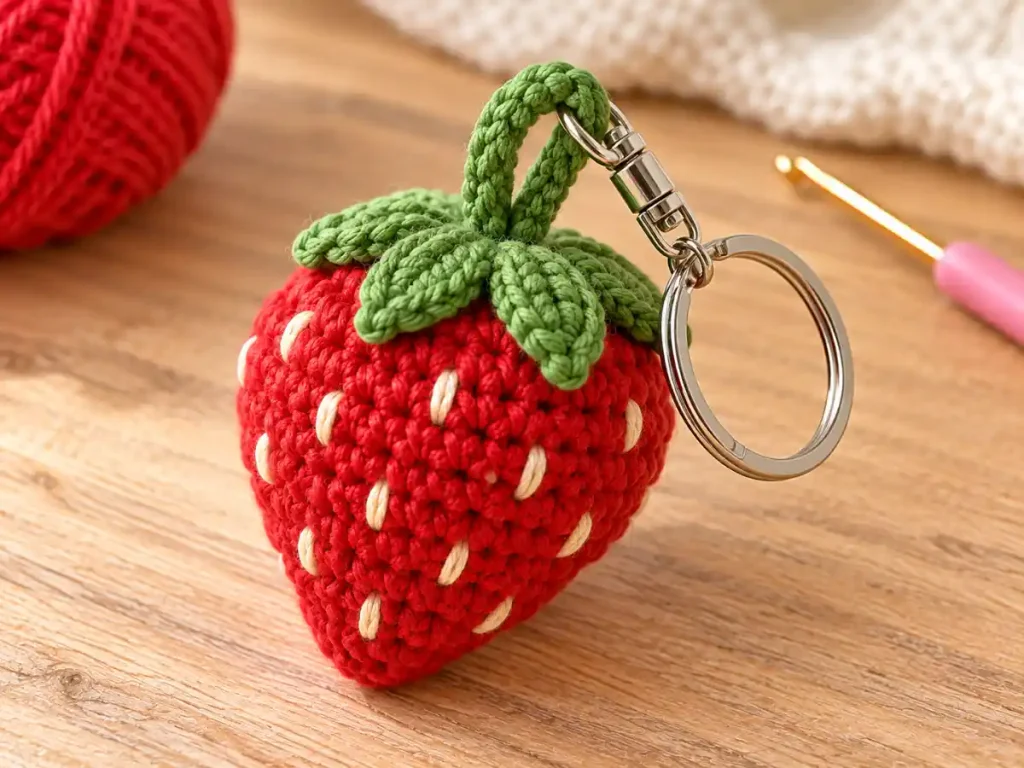
Choose the hardware that matches how you want to use the finished strawberry.
Option 1: Split Key Ring
Use a split key ring for a traditional keychain.
Feed the reinforced crochet loop onto the ring carefully.
The ring should move without pulling directly against the strawberry stitches.
Option 2: Lobster or Swivel Clasp
Use a lobster or swivel clasp if you want a removable crochet bag charm for a backpack, purse, tote, or zipper pull.
Attach the clasp through the reinforced loop.
Check that the clasp closes completely before using the charm.
The crochet construction stays the same for either option. Only the metal hardware changes.
Final Strawberry Keychain Check
Before you use or gift the keychain, inspect the whole project.
Check that:
- the bottom still has a strawberry-like taper;
- the upper body is fuller than the bottom;
- the stuffing is not visible through the stitches;
- the seed embroidery lies flat without puckering;
- the green cap is centered;
- all 5 leafy points are visible;
- the hanging loop is firmly anchored;
- the hardware moves freely through the loop;
- the strawberry hangs without one body stitch taking all the tension.
Give the crochet loop a gentle hand pull before attaching the keychain to everyday items.
If the loop shifts, the cap lifts, or one stitch stretches significantly, reinforce the attachment before using it.
What Should the Finished Strawberry Keychain Look Like?
The finished strawberry from this crochet keychain pattern should have a clear tapered shape.
The lower end should be narrower, while the upper section should look fuller and rounded without becoming a complete ball.
The embroidered seeds should sit lightly on the surface rather than pulling the fabric inward.
At the top, the five-point green cap should cover the closure and frame the hanging loop.
The loop should sit close to the center so the strawberry hangs naturally from the key ring or clasp.
A perfectly symmetrical strawberry is not necessary. Small handmade differences are normal, but the overall shape should still read clearly as a strawberry.
Common Crochet Keychain Problems and How to Fix Them
Why Does My Strawberry Look Round Instead of Tapered?
First, check your stitch counts.
The body should increase gradually from 6 to 24 stitches rather than widening very quickly in the first few rounds.
Overstuffing can also make the lower tip look round.
Remove a little stuffing, push the remaining filling higher into the body, and reshape the bottom with your fingers.
Why Can I See the Stuffing Through the Stitches?
The fabric may be too loose or the body may be overstuffed.
If the stitches were loose from the beginning, try a hook that gives you a denser fabric with the same yarn on your next version.
If the gaps appeared only after stuffing, remove some filling until the stitch openings relax.
Why Are the Seeds Making Dents?
Your embroidery tension is probably too tight.
Seed stitches only need to rest against the surface.
Do not pull the embroidery yarn hard enough to compress the crochet body.
Why Is the Green Cap Off-Center?
The cap may have been sewn down before it was fully positioned.
Remove a few attachment stitches if necessary, recenter the green circle over the strawberry closure, spread the five points around the top, and sew again.
Why Is the Hanging Loop Stretching?
A plain chain or a loop attached through too few body stitches can stretch more easily.
Use the reinforced cord construction and make sure both ends are sewn through several strawberry stitches.
The green cap should cover and support the attachment area, but the cap alone should not carry all the pulling force.
Why Does the Strawberry Hang Sideways?
The hanging loop is probably off-center or one side of the attachment is tighter than the other.
Before adding extra stitches, hold the strawberry by the loop and identify which direction it tilts.
Reposition or reinforce the loop closer to the center of the closed top.
Why Is the Hardware Pulling on One Crochet Stitch?
Remove the hardware and inspect the loop attachment.
The metal ring should pull on the reinforced crochet loop, not directly on one red or green body stitch.
If necessary, resew the loop ends through several stitches across the strawberry top.
Can I Use a Different Yarn?
Yes.
You can use this crochet keychain pattern with different yarns, but the finished size, weight, and hardware proportions will change.
A thinner yarn generally gives you a smaller strawberry.
A thicker yarn creates a larger and heavier keychain, which may need a stronger loop and hardware.
For a first attempt, smooth yarn is easier to count than very fuzzy yarn. It also makes the embroidered seeds and shaping checkpoints easier to see.
Whatever yarn you choose, use a hook that creates a dense fabric suitable for stuffing.
Can I Make the Strawberry Into a Bag Charm?
Yes.
The same strawberry can work as a keychain or a crochet bag charm.
For a removable charm, attach a lobster or swivel clasp to the reinforced loop instead of using a split key ring.
This lets you move the strawberry between a handbag, backpack, zipper, or tote without changing the crochet body.
Can I Make the Strawberry Larger or Smaller?
Yes.
The simplest way to change the scale is to change the yarn and hook together while keeping the stitch counts the same.
Remember that changing yarn weight also changes the weight of the finished strawberry.
If you make a much larger version, check that the reinforced loop and metal hardware are still suitable for the heavier project.
More Crochet Keychains & Bag Charms
Explore more small accessories in our Crochet Keychains & Bag Charms collection.
For another miniature accessory, try our mini crochet bag keychain pattern.
Frequently Asked Questions
Is This Crochet Keychain Pattern Beginner-Friendly?
The stitches themselves are simple: chains, slip stitches, single crochet, increases, and decreases.
The parts that need the most attention are counting continuous rounds, keeping the strawberry shape tapered, and anchoring the hanging loop securely.
If you are comfortable using a stitch marker and following stitch counts, the construction should be manageable.
When Should I Embroider the Strawberry Seeds?
Add the seeds after Round 9, while the top of the strawberry is still open.
This makes it easier to hide the embroidery tails inside the body before stuffing and closing.
How Do I Stop the Stuffing From Showing Through?
Use a hook that gives you dense crochet fabric and avoid overstuffing.
Add filling gradually rather than forcing a large amount into the body at once.
What Is the Best Way to Attach the Key Ring?
Attach the hardware through a reinforced crochet loop rather than directly through one strawberry stitch.
Secure both ends of the loop across several body stitches before sewing the leafy cap over the attachment.
Can I Use a Lobster Clasp Instead of a Split Ring?
Yes.
A lobster or swivel clasp is a useful option if you want the strawberry to be removable and used as a bag charm.
Do I Need an Exact Number of Strawberry Seeds?
No.
Space the short embroidered stitches visually around the body.
A balanced distribution matters more than matching a fixed seed count.
Finished Strawberry Crochet Keychain
This crochet keychain pattern combines a simple tapered strawberry body with small details that make the finished project more practical for everyday use.
The gradual increase sequence creates the shape, the embroidered seeds add texture without adding extra crochet pieces, and the five-point green cap gives the strawberry a recognizable finish.
The most important finishing detail is the reinforced hanging loop. Anchor it through several body stitches, cover the attachment with the green cap, and add the metal hardware only after the crochet assembly feels secure.
With a split ring, the strawberry becomes a small handmade keychain. With a lobster or swivel clasp, the same project works as a removable bag charm.
Pattern Notes
This crochet keychain pattern was created for Small Crochet Ideas with a focus on a compact construction, clear stitch-count checkpoints, minimal sewing, and a reinforced attachment method.
The pattern uses US crochet terminology. Finished size and proportions will vary with yarn, hook, tension, stuffing, and hardware.