Easy crochet patterns, cute projects, and beginner-friendly ideas to inspire your next make.


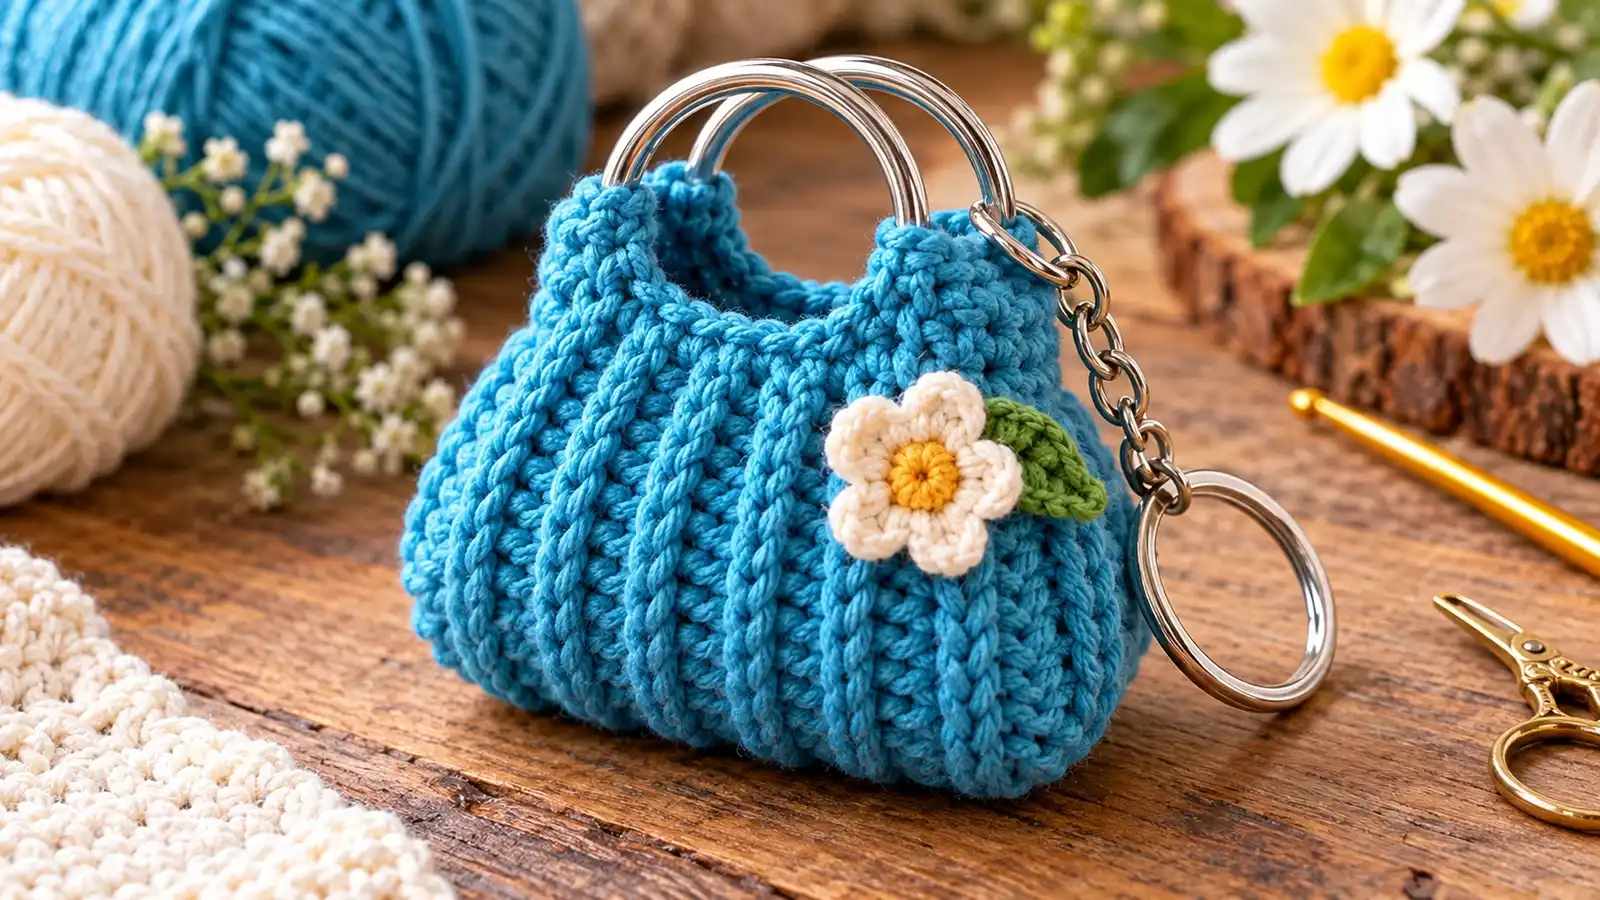
Looking for a cute little crochet project you can turn into a handmade gift? This mini crochet bag keychain pattern shows you how to make a tiny ribbed purse with circular metal handles, a soft rounded shape, and an optional flower decoration.
The best part is that you don’t need complicated amigurumi shaping. Instead, you’ll crochet a flat textured strip between two metal rings, fold it into a miniature handbag, and sew the sides together.
It’s a lovely way to practice simple crochet stitches while making something small enough to hang from your keys, backpack, or favorite everyday bag.
Table of Contents
Mini Crochet Bag Keychain at a Glance
This mini crochet bag keychain pattern combines simple stitches, textured ribbing, and metal ring handles to create a charming handmade accessory.
| Project detail | Information |
|---|---|
| Skill level | Beginner with basic crochet experience |
| Crochet hook | 2.20 mm |
| Yarn | Cotton or acrylic yarn suitable for the hook |
| Main stitches | Chain, single crochet, slip stitch, back-loop-only single crochet |
| Construction | One flat ribbed strip between two metal rings |
| Terminology | US crochet terms |
| Finished size | Depends on your yarn, ring size, and stitch count |
| Best use | Decorative keychain, bag charm, or small handmade gift |
| Time needed | Varies with crochet experience and finishing details |
This pattern is worked to your preferred size, so you can adjust the foundation length and number of rows to suit your materials.
Pattern note: The construction follows the ring-handle method demonstrated in Tuba Crochet’s mini purse keychain video. The instructions below explain that method in original, size-adjustable wording. The exact stitch counts and finished measurements have not been independently sample-tested.
Materials and Tools You’ll Need
Yarn and Crochet Hook
For this mini crochet purse, gather:
- Cotton or acrylic yarn in your favorite color
- A 2.20 mm crochet hook
- Two matching circular metal rings for the purse handles
- A keychain ring and short connector chain
- A tapestry needle
- Scissors
- A small amount of polyester fiberfill
- An optional miniature flower embellishment
- Small jewelry pliers for securing the keychain hardware
A smooth yarn is particularly helpful because it makes the stitches easier to see. Cotton can create a firm, defined fabric, while acrylic can produce a slightly softer finish, depending on its thickness and construction.
Use yarn that works comfortably with your hook. You want the fabric to be compact enough to hold its shape without becoming so tight that the stitches are difficult to work.
Choosing the Metal Rings
Choose two rings that are the same size and have smooth, secure edges.
These rings act as the miniature purse handles and are attached directly to the crochet fabric as you work. Keeping them the same size helps the finished bag look balanced when folded.
You’ll also need a separate keychain connector if you want to hang the finished purse from keys or a backpack.
Crochet Stitches and Abbreviations (US Terms)
This pattern uses a small collection of basic crochet stitches.
| Abbreviation | Meaning |
|---|---|
| ch | Chain |
| sc | Single crochet |
| sl st | Slip stitch |
| BLO | Back loop only |
| st / sts | Stitch / stitches |
| rep | Repeat |
| RS | Right side |
All stitch instructions use US crochet terminology.
If you’re learning to read written crochet patterns, the Craft Yarn Council’s crochet abbreviation guide is a useful reference.
How to Work Back Loop Only Single Crochet
Back-loop-only single crochet is the stitch technique that gives this miniature purse its ribbed appearance.
When you look at the top of a regular crochet stitch, you’ll see two loops forming a small V.
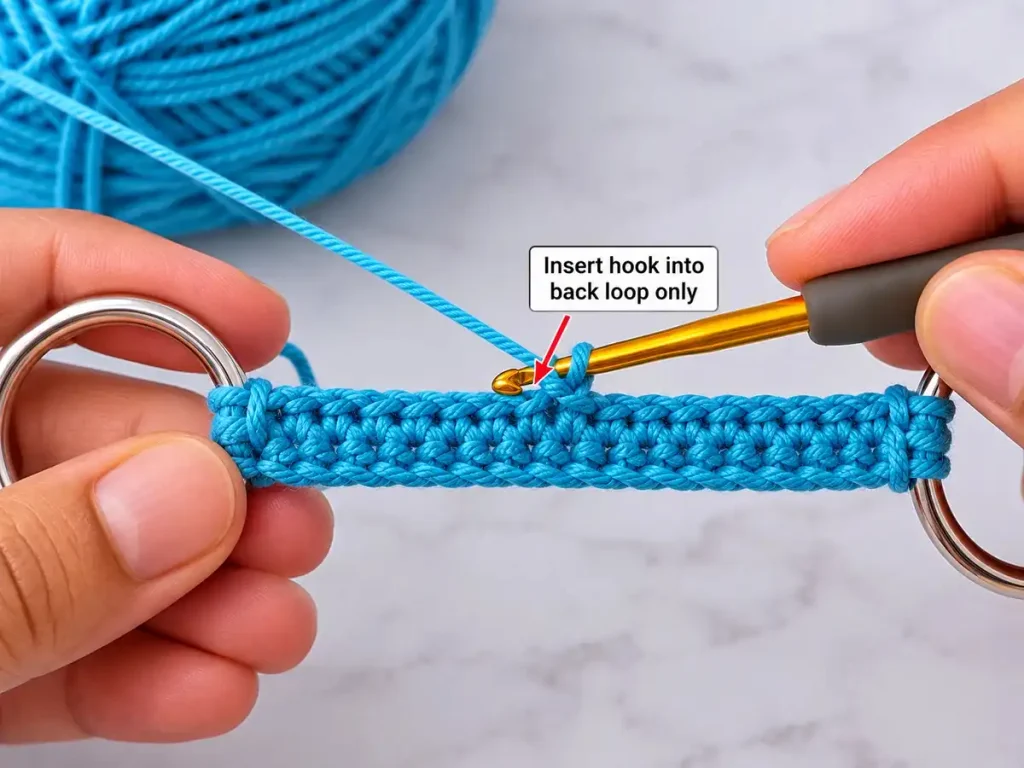
Normally, you insert your hook beneath both loops. For back-loop-only crochet, you insert the hook through the loop farthest away from you.
To work a BLO single crochet:
- Insert your hook through the back loop of the next stitch.
- Yarn over and pull up a loop.
- Yarn over again.
- Pull through both loops on your hook.
Repeat across the row.
Working into just one loop leaves the other loop visible on the surface, creating a subtle raised ridge. As you continue turning and repeating the rows, those ridges form the textured lines that make the finished mini purse look special.
Beginner tip: Keep the same stitch count in every row. Accidentally working into an attachment stitch or skipping the first body stitch can make the fabric uneven.
How to Crochet Around a Metal Ring
The metal rings replace ordinary crocheted handles in this project.
To secure your working yarn to a ring, insert the hook through the center of the ring, catch the yarn, and pull it through the ring and the loop on your hook to form a slip stitch.
Keep these attachment stitches snug but not excessively tight.
The important distinction is that the slip stitches used to secure the fabric to the rings are not counted as regular body stitches.
Before starting this mini crochet bag keychain pattern, take a moment to understand how the flat strip connects to the two metal rings.
Before You Start: Important Pattern Notes
Unlike many amigurumi patterns, this mini crochet bag does not begin with a magic ring or use continuous spiral rounds.
You’ll work back and forth in rows between two metal rings. The length of the strip becomes the front, bottom fold, and back of your purse. The number of rows determines how wide the purse becomes.
Because the exact chain and row counts of the source tutorial aren’t independently verified, this version uses a simple sizing method:
First, choose the length of your foundation chain based on your desired purse height. Then, count the single crochet stitches in your first completed row. Keep that same number throughout the remaining rows.
For easier counting, we’ll call the number of single crochet stitches in your first row N.
Every following body row should contain N single crochet stitches. The turning chain and metal-ring attachment slip stitches are not included in that count.
Choose your ring placement carefully before beginning. Both rings should remain untwisted and parallel so they can line up neatly when the fabric is folded.
Mini Crochet Bag Keychain Pattern: Step-by-Step Instructions
Step 1: Attach the Yarn to the First Metal Ring
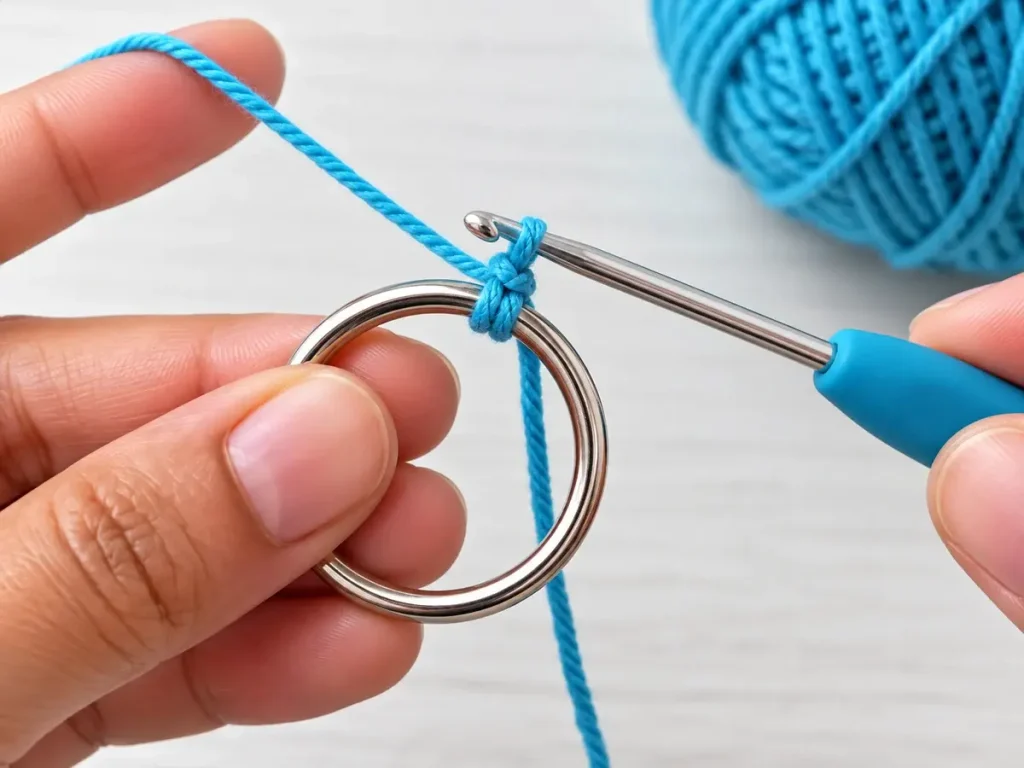
Begin by making a slip knot and placing it on your crochet hook.
Hold your first metal ring in your non-dominant hand.
Insert the hook through the ring, yarn over, and draw the yarn through the metal ring and the loop already on your hook, creating a secure slip stitch around the ring.
Gently tighten the yarn so the attachment sits against the metal without pulling too firmly.
This ring will form one of the handles of your miniature purse.
Make sure you still have room to work comfortably around the ring as the fabric grows.
Step 2: Make the Foundation Chain and Connect the Second Ring
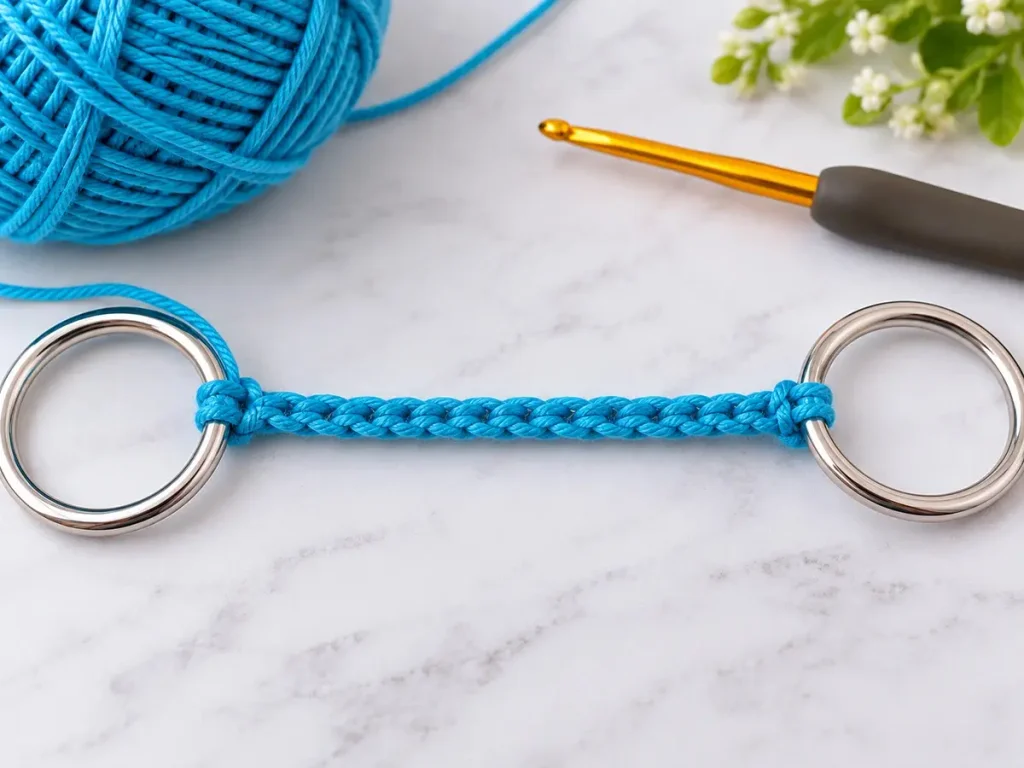
With your yarn attached to the first ring, begin making chain stitches.
Continue until you have a chain long enough to form the front and back height of your miniature purse when folded.
To estimate the length, imagine folding the chain in half. Each half should correspond roughly to the intended height of the finished purse body.
Avoid pulling the chain tightly while measuring it.
Once you’re happy with the length, hold the second metal ring at the free end of the chain.
Insert your hook through the second ring and secure the chain with a slip stitch around the metal.
Before continuing, check that the foundation chain is straight and the rings are not twisted.
You should now have a foundation chain connecting the two circular handles.
Step 3: Crochet the First Row
After attaching the foundation chain to the second ring, make one turning chain.
Working back toward the first ring, insert your hook into the foundation chain immediately next to the second ring.
Yarn over and pull up a loop. Yarn over again and pull through both loops to complete a single crochet.
Continue working one single crochet into each available foundation chain along the length of the strip.
When you reach the opposite metal ring, check that you have worked into each intended foundation stitch.
Count the single crochet stitches you just made and record the total. This is your body-stitch count, N, which you’ll maintain in the following rows.
Secure the working yarn to the first metal ring with a slip stitch.
Stitch-count reminder: Because the chain has already been attached to a metal ring and followed by a turning chain, don’t automatically assume that the usual “second chain from the hook” rule produces the correct count for this construction. Count the actual body stitches you have completed.
Step 4: Build the Ribbed Body With BLO Single Crochet
Now you’ll begin the rows that create the textured purse body.
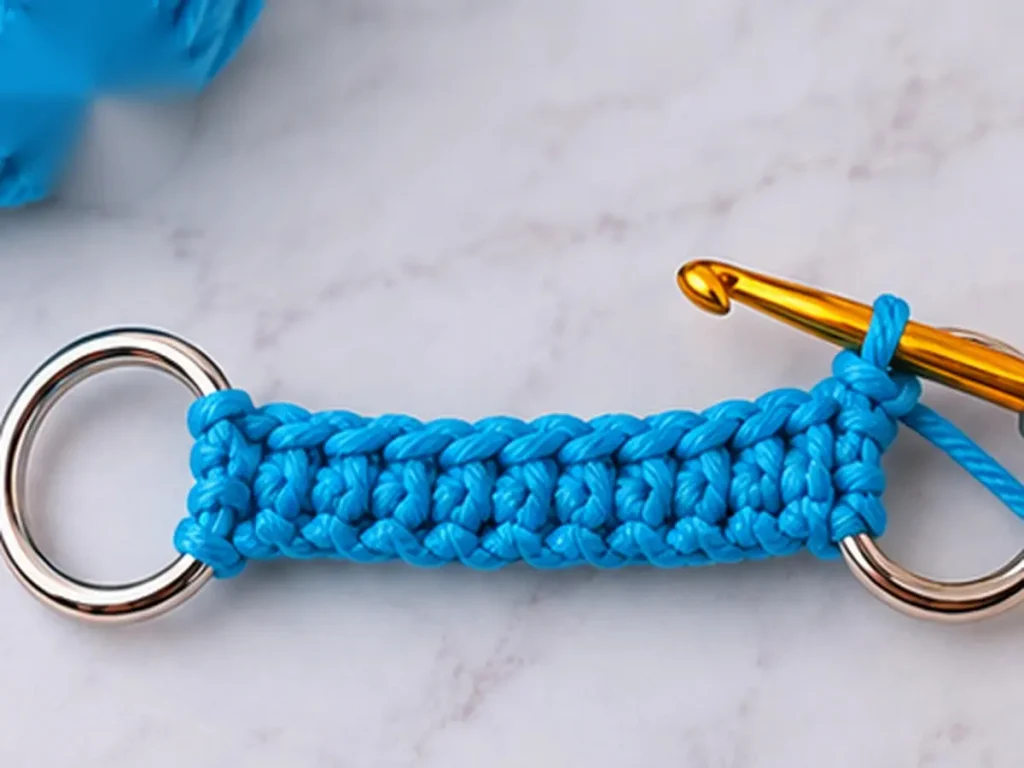
After securing the previous row to its metal ring, chain one and turn your work.
Insert your hook into the back loop of the first body stitch.
Work one back-loop-only single crochet in each body stitch across the row.
Be careful not to accidentally work into the turning chain or the slip stitch around the metal ring.
When you reach the opposite end, secure the row to the metal ring with another slip stitch.
Chain one, turn, and repeat.
Continue following this sequence:
Repeat row: Work one sc in the back loop of each body stitch across. Secure to the next metal ring with a sl st, ch 1, and turn.
Each completed body row should have the same N single crochet stitches you counted in Step 3.
As you add rows, you’ll notice a series of raised lines forming along the fabric.
These textured ridges are what give the miniature purse its distinctive appearance.
Keep the tension even as you work. If the fabric begins to narrow or widen, count your body stitches again before continuing.
Step 5: Complete the Crocheted Strip
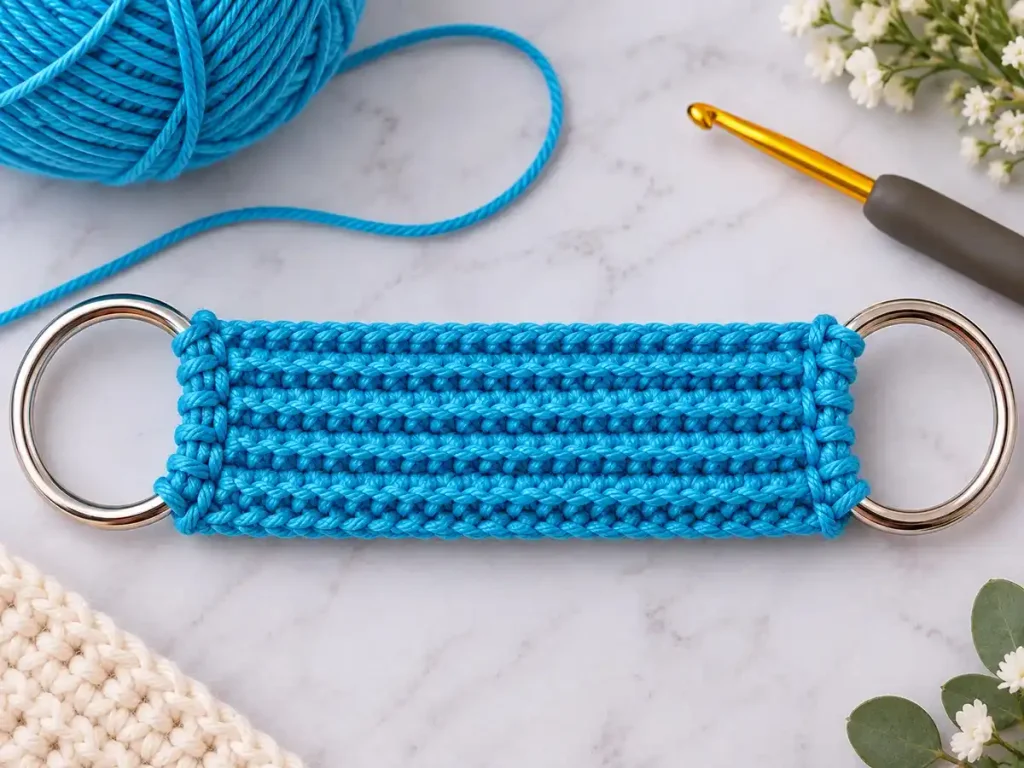
Continue making back-loop-only rows until the fabric is wide enough for your miniature purse.
The width of the flat strip will become the width of the folded bag. You can compare it with your metal rings and adjust the number of rows to get the proportions you want.
As the fabric grows, slide the attachment stitches together neatly along the lower portion of each ring, leaving the upper curves visible as handles.
Before finishing, lay the strip flat and inspect it.
Both rings should be securely attached, the fabric should lie without twisting, and the ribs should run consistently across the strip.
Fold it temporarily to preview the purse’s shape. If it looks too narrow, work additional rows before fastening off.
Once you’re satisfied, fasten off and leave a yarn tail long enough for sewing if you plan to use it for assembly.
Step 6: Fold the Strip Into a Mini Purse
Place your finished crocheted strip on a flat surface.
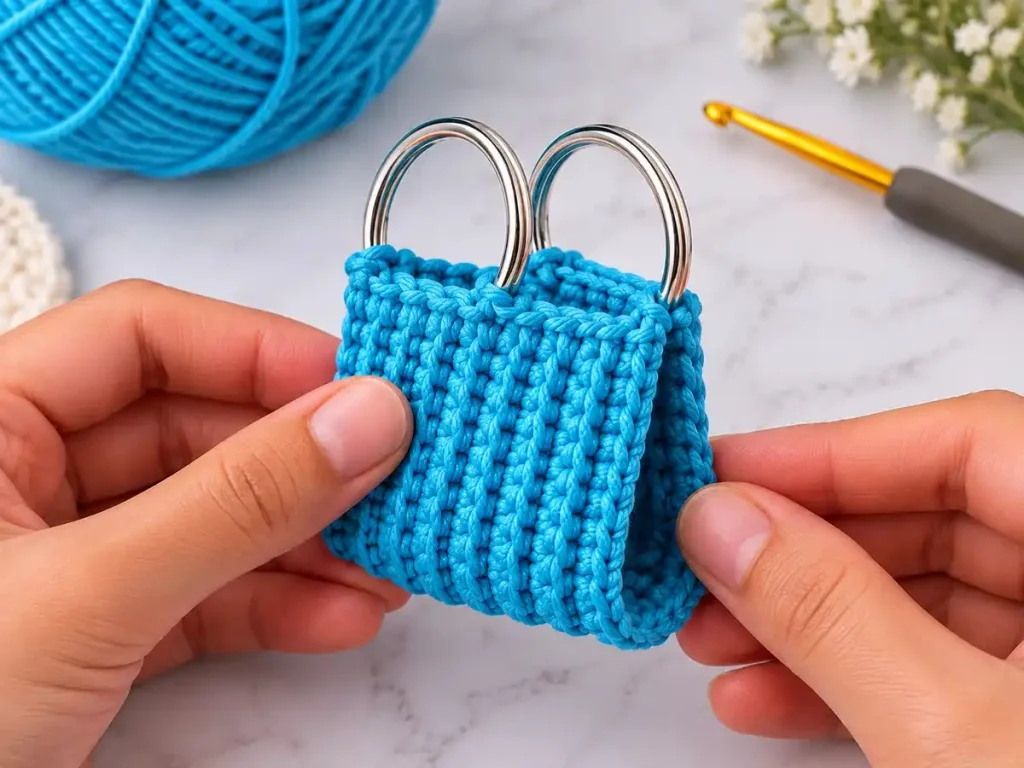
Fold it in half at the midpoint between the two metal rings.
Bring the rings together so they sit side by side at the top of the folded fabric.
The fold forms the bottom of your purse, while the two layers create the front and back.
Adjust the fabric so the ribbed texture faces outward and both side edges line up evenly.
You should now see the basic shape of a tiny handbag with two circular handles.
Make sure the bottom fold is centered. If the fold is uneven, the purse may appear crooked after sewing.
Step 7: Sew the Side Seams
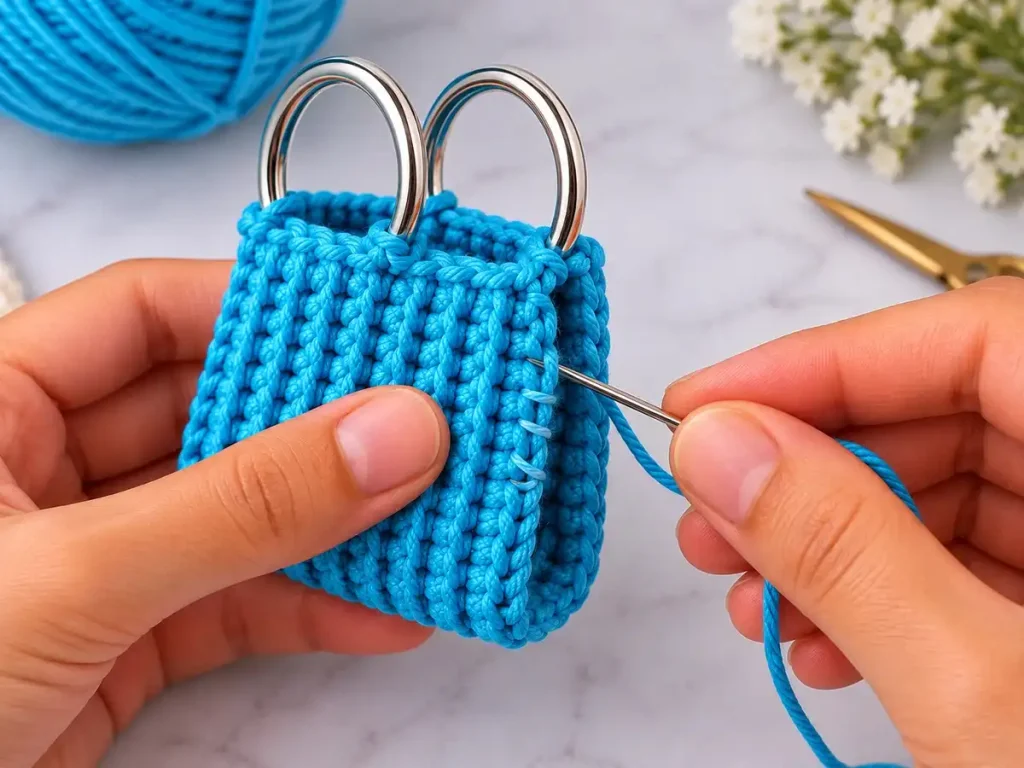
Thread your tapestry needle with the yarn tail or a matching length of yarn.
Hold the folded purse so the front and back layers remain aligned.
Starting near the bottom fold, join the first pair of side edges using small, even stitches.
Pass the needle through corresponding edge loops on both layers, pulling the yarn snugly enough to close the seam without puckering the fabric.
Continue toward the top, keeping your stitches as consistent as possible.
Repeat on the opposite side.
Use the same seaming method on both sides so the finished purse remains symmetrical.
Do not sew the two metal rings permanently together. They should remain aligned as handles while retaining their individual attachments to the crocheted body.
If you’re planning to stuff the purse, leave enough access for the fiberfill before completing any seam that would block it.
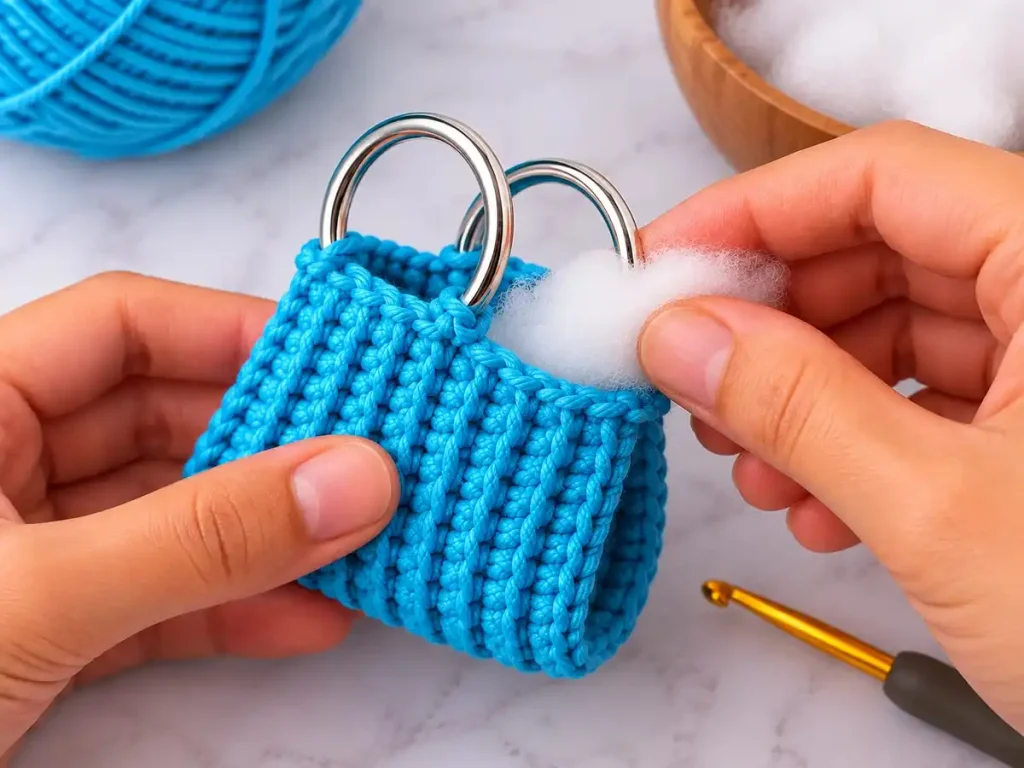
Step 8: Add the Stuffing and Shape the Purse
For the rounded decorative look shown in the tutorial, add a small amount of polyester fiberfill to the miniature purse.
Separate a little stuffing with your fingers and gently insert it into the body.
Use the blunt end of your crochet hook or a suitable stuffing tool to guide the fiberfill into the bottom corners if needed.
The goal is to give the purse a soft, rounded shape without making it look overfilled.
Avoid packing the stuffing too tightly. Excess stuffing can stretch the ribbed fabric, distort the side seams, or make the top opening gape.
Add a little at a time until you’re happy with the shape.
If you’ve left part of a seam unfinished, close it securely after stuffing. Keep the filling below the top edge; add small hidden retaining stitches if necessary to prevent it from slipping out.
Important: A stuffed mini purse is a decorative keychain, not a practical storage pouch. If you want to turn the design into a functional miniature bag, leave out the stuffing and create an appropriate closure.
Step 9: Add the Flower and Keychain Hardware
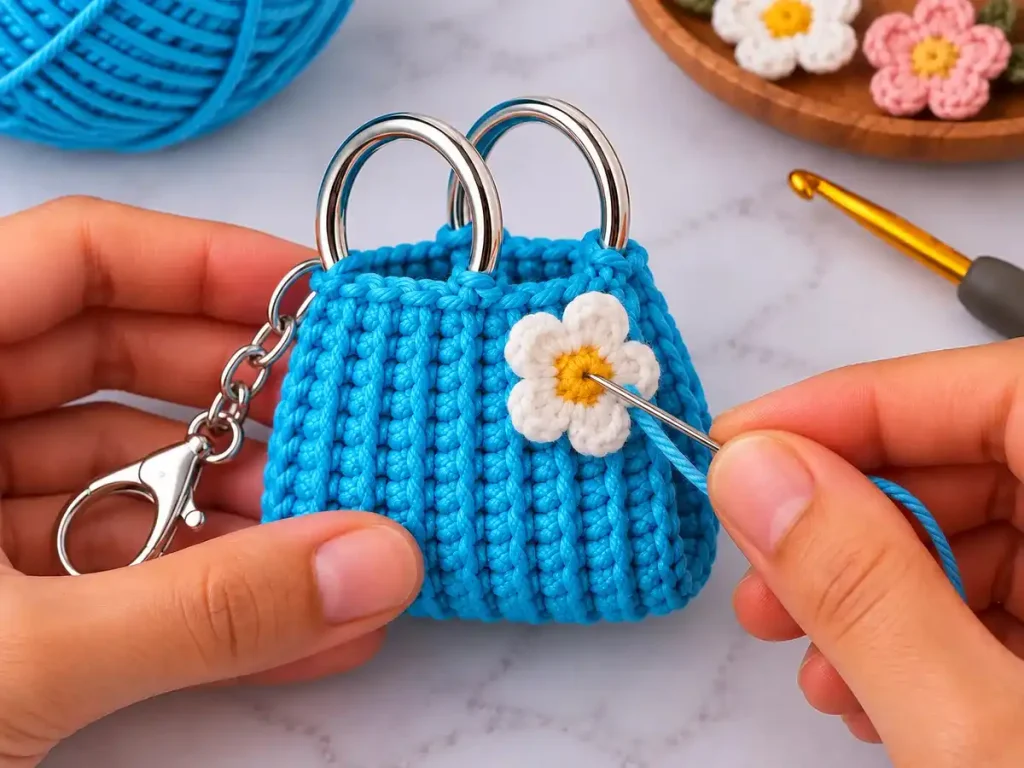
Now it’s time to give your tiny crochet purse its finishing touches.
Place a miniature flower on the front of the bag, slightly off-center or near one lower corner.
You can use a small crochet flower or a suitable ready-made embellishment.
If using a crocheted flower, sew it securely through the purse fabric with matching yarn or thread.
For a purchased embellishment, follow the manufacturer’s attachment directions and choose a method appropriate for fabric.
Keep the decoration small enough that it doesn’t cover the ribbed texture or overwhelm the miniature purse.
Next, attach your keychain connector to the metal handle hardware.
Use jewelry pliers if needed to open the connector, position it through a suitable part of the metal ring, and close it securely.
Check that the metal connection is fully closed and that the purse hangs evenly.
Finally, weave in any remaining yarn ends and trim them neatly.
Your mini crochet bag keychain is ready to decorate a set of keys, a backpack, or a favorite handbag!
Tips for a Neat and Durable Crochet Purse Keychain
A few small adjustments can make a noticeable difference in the finished result.
Keep your tension consistent. Uneven tension makes the ribbing look irregular and may cause one side of the purse to become longer than the other.
Count your stitches frequently. If you’re adding or losing stitches, check whether you’re accidentally including the metal-ring slip stitches or missing the first body stitch after turning.
Avoid twisting the foundation chain. Before working the first row, check that the chain lies flat between the two rings.
Keep the metal rings aligned. Both attachment edges should have enough room to sit neatly around their rings without bunching.
Sew the side seams carefully. Use small, even stitches and avoid pulling the yarn so tightly that the edges pucker.
Use only a little stuffing. A softly filled purse usually holds its decorative shape better than one that’s packed firmly.
Check the keychain hardware. Make sure the metal connector is securely closed before attaching the charm to your everyday bag.
Cute Mini Crochet Bag Color and Decoration Ideas
Once you’re comfortable with the basic construction, try making your purse keychain in different colors.
Soft pink, cream, lavender, and sage green create a gentle pastel look. Bright yellow, coral, or turquoise can make the tiny bag stand out against a darker backpack.
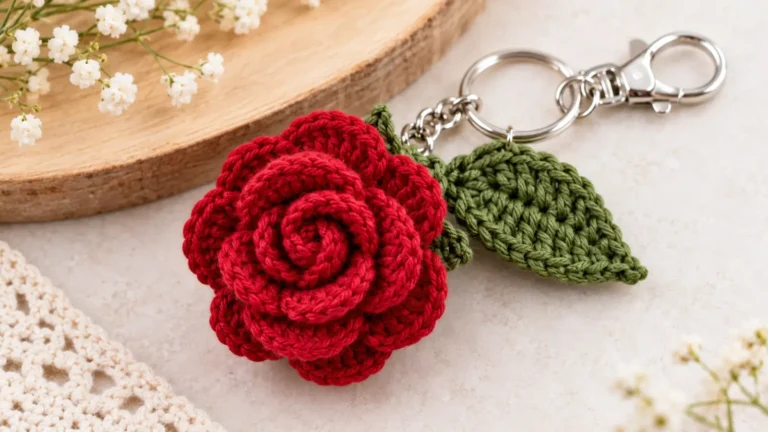
You can also add a miniature crochet flower for a more personalized finish.
If you’d like to make your own floral embellishment, start with our Easy Crochet Flower Pattern. A small version can make a sweet decorative detail.
For another flower style, take a look at our Crochet Daisy Pattern and adapt the size if needed.
Just remember to keep your embellishments proportional to the purse.
These little bags can also make thoughtful handmade gifts. Choose colors that suit the recipient, add a matching keychain ring, and present the finished charm in a small gift pouch.
Frequently Asked Questions
Is this mini crochet bag keychain suitable for beginners?
Yes, it’s suitable for beginners who already know how to make chains, single crochet stitches, and slip stitches.
The most challenging parts are attaching each row securely to the metal rings and keeping the back-loop-only stitches consistent.
If you’re new to BLO crochet, practice a few rows on a small swatch before beginning the bag.
How long does it take to crochet a mini purse keychain?
The time depends on your experience, yarn, and chosen purse size.
The body uses simple repetitive stitches, but the metal-ring attachments and sewing require extra care.
If you’re a beginner, set aside a relaxed crafting session rather than rushing through the finishing steps.
What yarn is best for a mini crochet bag?
Smooth cotton or acrylic yarn is a practical choice.
Cotton can provide crisp stitch definition and a structured look. Acrylic may give the project a softer feel, depending on the yarn.
Choose a yarn that works comfortably with your hook and produces fabric firm enough to maintain the purse’s shape.
Do I need to add stuffing?
No, stuffing is optional.
The demonstrated decorative purse uses a small amount of fiberfill to create a rounded appearance.
If you prefer a flatter charm, you can leave the stuffing out.
For a functional miniature pouch, omit the stuffing and add a suitable fastening method instead.
Can I make this mini crochet bag bigger?
Yes. You can adjust the length of the foundation chain and work additional rows to make a wider purse.
Remember that the foundation-chain length determines the front-to-back distance of the flat strip before folding, while the number of rows determines its width.
You may also need larger rings or a different hook and yarn combination to keep the proportions balanced.
Make a small test piece before committing to a larger version.
More Small Crochet Projects to Try
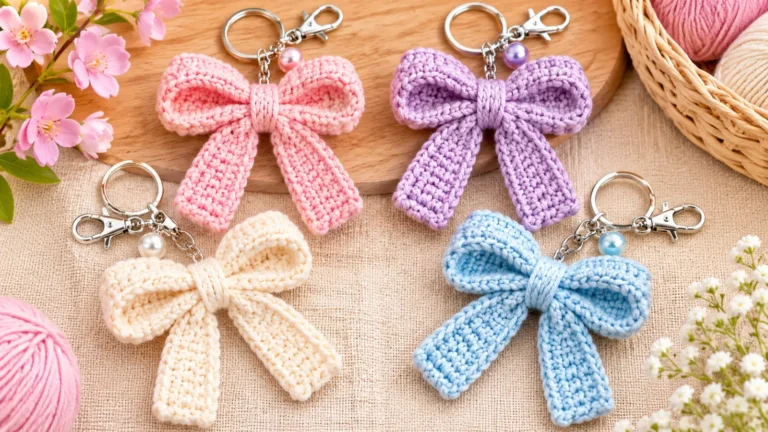
Once you’ve completed this mini crochet bag keychain pattern, you can experiment with different yarn colors and tiny embellishments to create personalized gifts. Make another small accessory with our crochet bow keychain pattern.
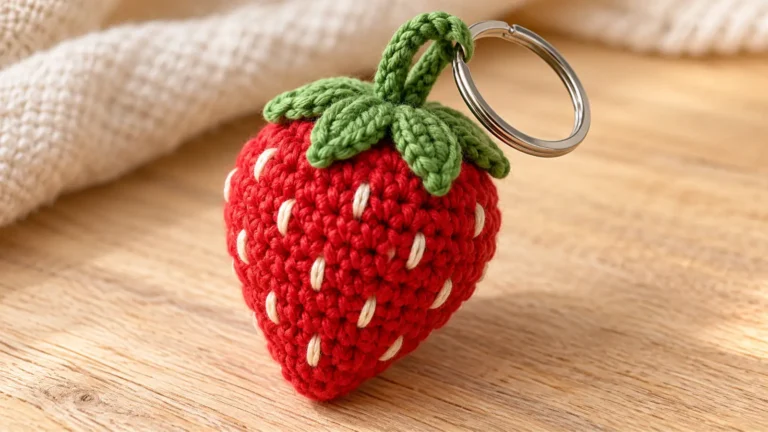
For a fruit-shaped design, try this strawberry crochet keychain pattern.
This mini crochet bag keychain is a fun introduction to making tiny accessories from simple stitches.
Once you’ve finished your purse, you can experiment with other miniature bag charms, crochet flowers, and quick handmade gifts.
Small projects like these are especially satisfying because they let you practice a technique, personalize the result, and create something useful or decorative without committing to a large crochet project.
Save this mini crochet bag keychain pattern for your next crafting session, and have fun choosing your favorite yarn color and tiny decorations!