Easy crochet patterns, cute projects, and beginner-friendly ideas to inspire your next make.


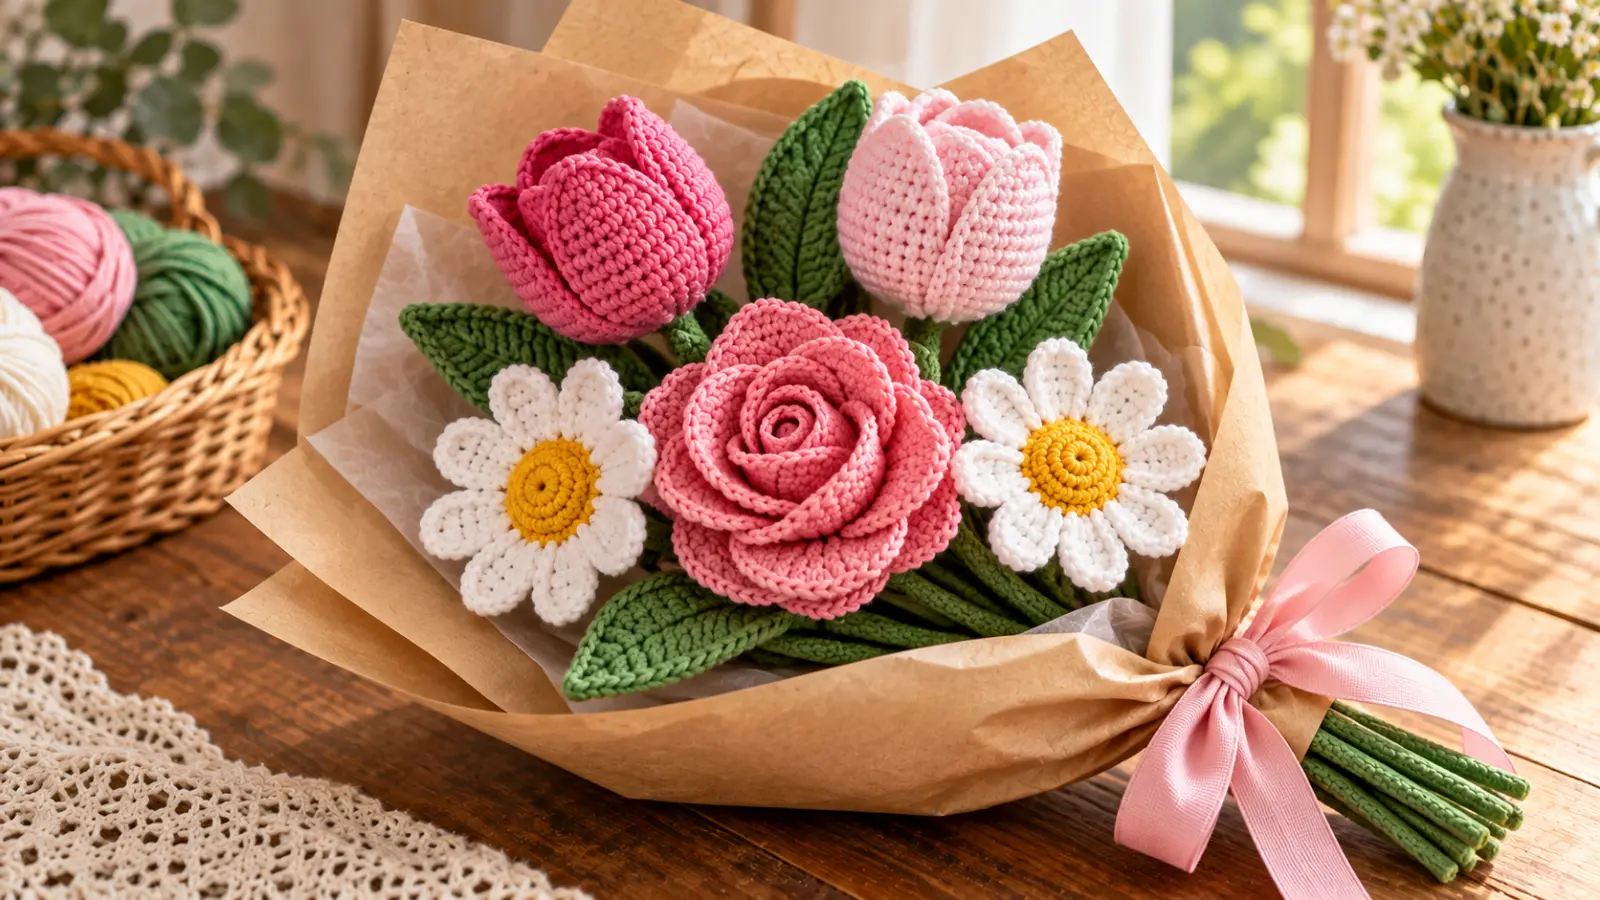
A crochet bouquet is a simple way to turn individual handmade flowers into one finished project that feels polished, giftable, and easy to display. You do not need to crochet a completely new set of flowers for this tutorial. Instead, you can use flowers you have already made, prepare their stems, arrange them at different heights, and secure everything into a balanced bouquet.
This guide uses a small mixed bouquet as an example: one focal flower, two taller flowers, and two supporting flowers. You can change the flower types, colors, and fullness to suit what you have on hand. The most important part is the arrangement—not matching an exact number of stems.
Table of Contents
Crochet Bouquet at a Glance
| Project detail | What to expect |
|---|---|
| Project type | Crochet flower bouquet |
| Example arrangement | 5 flower stems |
| Focal flower | Rose or sunflower |
| Taller flowers | Tulips |
| Supporting flowers | Daisies |
| Optional filler | Small crochet flowers or leaves |
| Main skills | Arranging, balancing, securing, wrapping |
| Crochet terminology | Follow the individual flower patterns |
| Finished size | Depends on your flowers, stems, and arrangement |
The bouquet can be kept simple for a small handmade gift or expanded with more flowers and greenery for a fuller arrangement.
Flowers for This Crochet Bouquet
You can build the bouquet with any compatible crochet flowers, but using flowers with different shapes makes the finished arrangement easier to balance.
Focal Flower: Crochet Rose
A rose works well near the center because its rounded, layered bloom gives the eye a clear focal point.
Use our crochet rose pattern if you want a dimensional flower with a finished stem and leaf.
For the sample arrangement, use 1 rose.
Taller Flowers: Crochet Tulips
Tulips add height and a different silhouette, which helps prevent the bouquet from looking flat.
Follow our crochet tulip pattern to make one or two taller stems.
For the sample arrangement, use 2 tulips.
Supporting Flowers: Crochet Daisies
Daisies make useful supporting flowers because their flatter, lighter shape fills space without competing too strongly with the focal bloom.
Use our crochet daisy pattern.
For the sample arrangement, use 2 daisies.
Optional Focal Substitute: Sunflower
If you want a bolder centerpiece, replace the rose with a sunflower rather than using both as large focal flowers in a small bouquet.
Our sunflower crochet pattern gives you a dimensional flower with a supported stem and leaf.
Optional Filler Flowers
If the bouquet still has small gaps after you arrange the main flowers, add one or two smaller blooms from our easy crochet flower pattern.
Use filler only where it improves the shape. A small bouquet does not need to be packed tightly to look complete.
What You’ll Need
For the bouquet assembly, prepare:
- completed crochet flowers on finished or supported stems;
- green yarn and/or floral tape;
- a yarn needle;
- scissors;
- extra floral wire or stem support if one flower needs reinforcement;
- ribbon, optional;
- kraft paper, tissue, or bouquet wrap, optional.
Follow each individual flower pattern for its own yarn, hook, stitch, and construction requirements.
If your flowers were made with noticeably different yarn weights, compare them before arranging. A very heavy flower beside several much smaller flowers may need stronger stem support or a different position in the bouquet.
If you are combining flowers made with different yarns, the Craft Yarn Council’s Standard Yarn Weight System can help you compare yarn thickness categories before arranging the bouquet.
Before You Arrange the Bouquet
Finish every flower before you start binding the stems together.
Check each bloom for:
- loose yarn ends;
- a stable stem;
- a secure flower head;
- a clear front-facing direction;
- leaves that sit naturally without hiding the flower.
Then separate the flowers by role.
For a small beginner-friendly arrangement, a useful starting formula is:
1 focal flower + 2 taller flowers + 2 supporting flowers
That gives you five stems to work with, but it is only a starting point. You can remove a flower for a looser arrangement or add more flowers if your blooms are small and the bouquet needs more fullness.
The best arrangement is the one that looks balanced with the specific flowers you made.
How to Make a Crochet Bouquet Step by Step
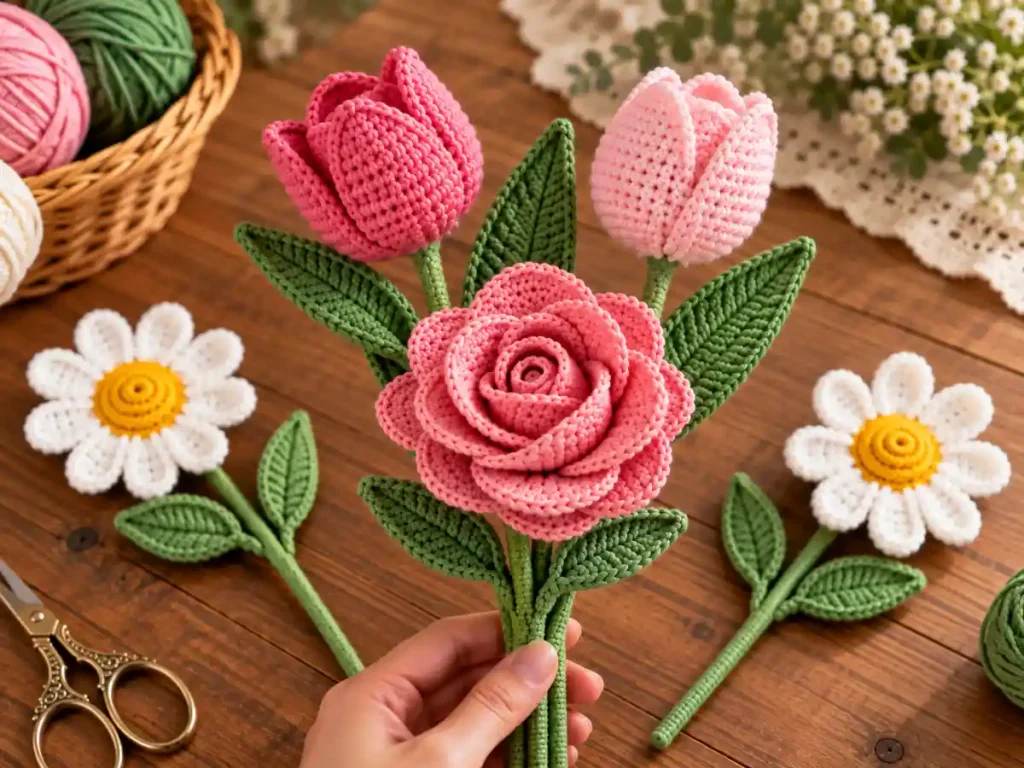
Step 1: Lay Out All the Crochet Flowers
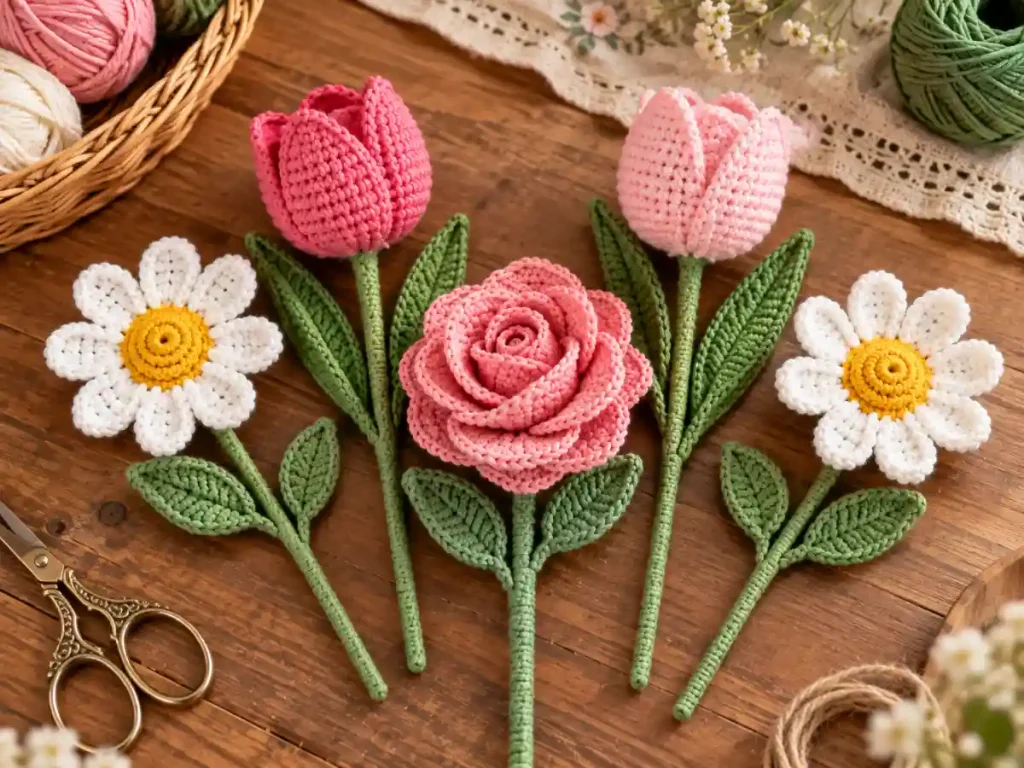
Place all the finished flowers on a table before you hold them together.
Compare:
- flower size;
- stem length;
- color placement;
- bloom direction;
- leaf placement;
- stem strength.
Do not bind anything yet.
At this stage, you are looking for obvious problems. If one stem bends under the weight of its flower, reinforce it before it goes into the bouquet. If one bloom faces sharply sideways, gently adjust it so it can be positioned more easily later.
You should also decide which flower will be the focal point.
Step 2: Choose the Focal Flower
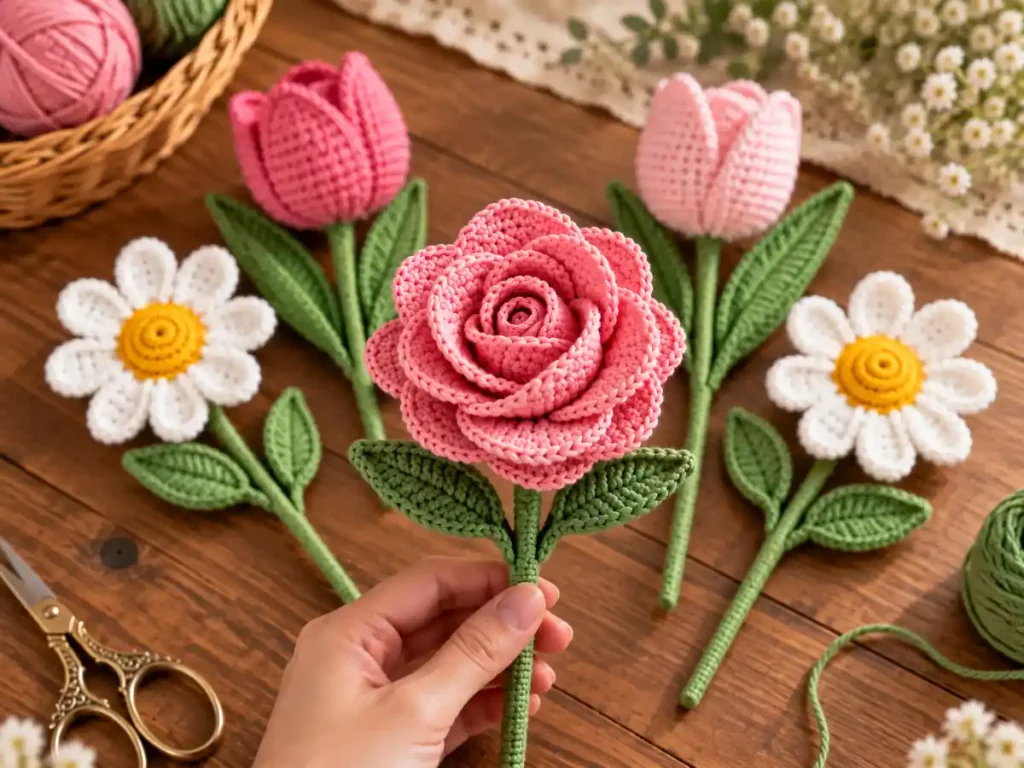
Start the crochet bouquet with one visually dominant flower.
For the sample arrangement, that is the rose.
Hold it near the center of the bouquet, but do not worry about making it mathematically centered. A bouquet often looks more natural when the focal bloom sits slightly off-center while the other flowers balance it.
If you are using a sunflower instead, treat it the same way: let it lead the arrangement rather than surrounding it with several equally dominant blooms.
Step 3: Add the Taller Flowers
Add the tulips one at a time.
Place them slightly behind or around the focal flower so they add height without covering it.
Do not force the two tulips to sit at exactly the same level. A small difference in height usually gives the arrangement more movement.
After adding each tulip, look at the bouquet from the front.
Ask:
- Can I still see the focal flower clearly?
- Do the tall flowers frame it rather than hide it?
- Is one side becoming much heavier than the other?
Make small adjustments now while the stems are still loose.
Step 4: Add the Supporting Flowers
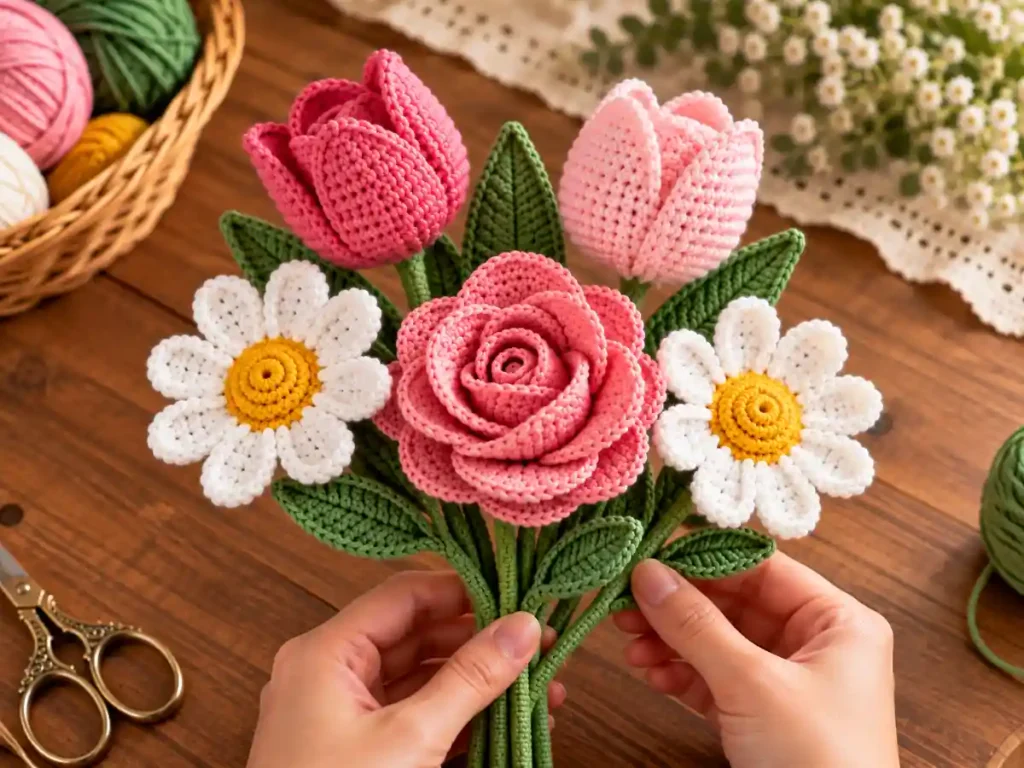
Place the daisies around the sides and front of the arrangement.
These flowers should help fill open areas and soften the transition between the focal flower and the taller blooms.
A crochet flower bouquet usually looks fuller when the flowers are not lined up in one straight row.
Move one supporting flower slightly forward and the other slightly to the side or back.
The goal is depth, not perfect symmetry.
Step 5: Check the Bouquet From Every Side
This step is easy to skip, but it makes a large difference.
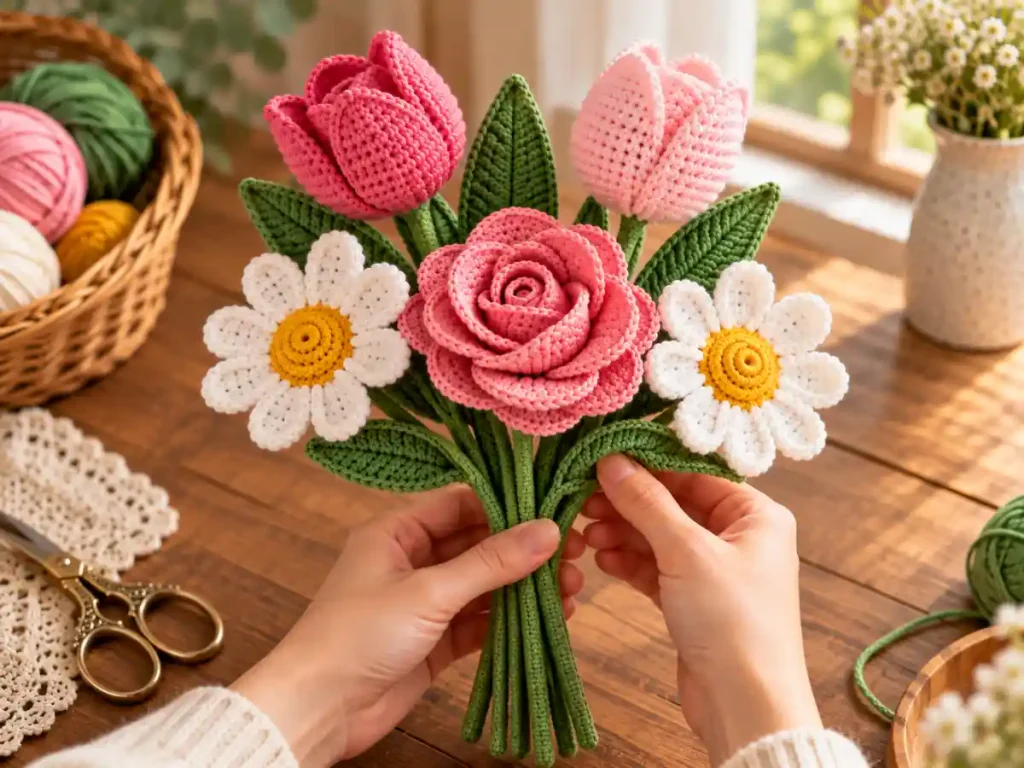
Hold the stems together loosely and rotate the bouquet.
Check it from:
- the front;
- the left side;
- the right side;
- slightly above.
Look for:
- large empty gaps;
- flowers all facing the same direction;
- one color concentrated on only one side;
- a focal flower that has disappeared behind taller blooms;
- leaves blocking the flower heads;
- too many blooms sitting on one flat horizontal line.
If something looks wrong, release your grip and rearrange the stems.
Do not secure the bouquet until you are happy with the overall shape.
Step 6: Add Optional Filler Flowers or Greenery
If the bouquet still has small empty areas, add filler now.
Good filler options include:
- one or two small crochet flowers;
- simple crochet leaves;
- existing leaves from the flower stems.
Keep filler secondary.
It should help connect the main flowers visually, not create a new focal point.
If the bouquet already looks balanced, skip this step. Adding more pieces simply because there is room can make a small arrangement feel crowded.
Step 7: Adjust the Stem Heights
Before binding, compare the flowers again.
A simple arrangement often works well when:
- the tallest flowers sit toward the back;
- the focal flower occupies the middle visual area;
- shorter supporting flowers sit toward the sides and front.
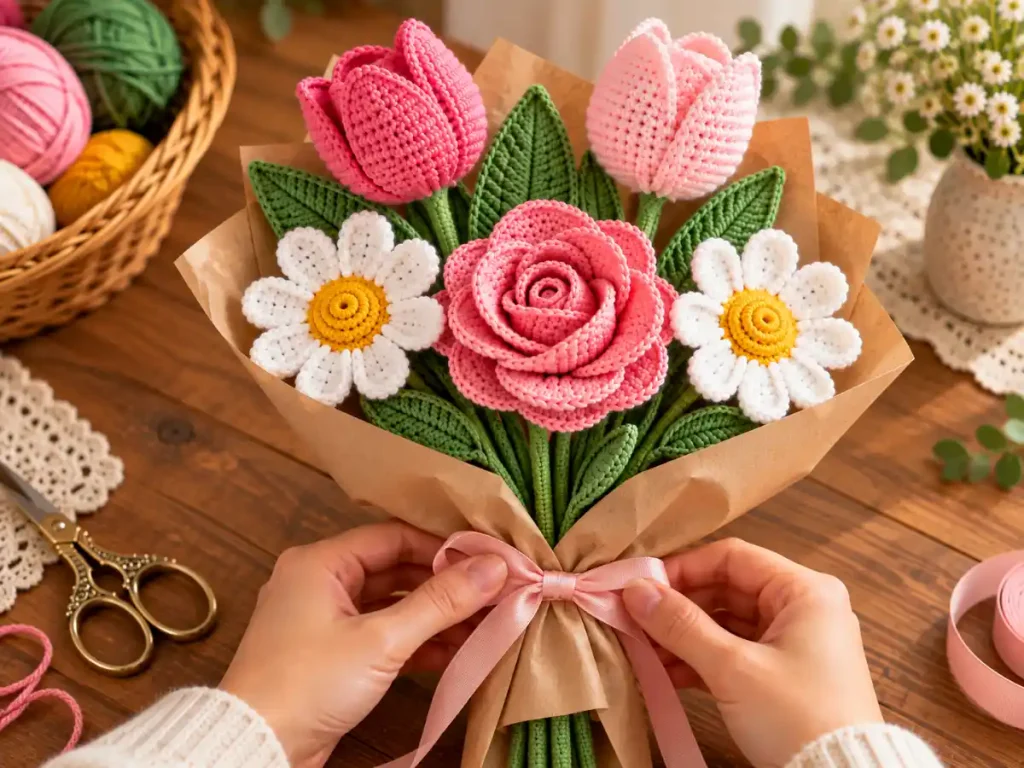
These are relative positions, not fixed measurements.
Slide individual stems up or down in your hand until the bouquet has a clear shape.
If one flower is too low, raise the stem rather than trying to bend the bloom upward.
If one flower sits too high and looks disconnected, lower it slightly so it relates to the rest of the bouquet.
Step 8: Secure the Bouquet
Once you are satisfied with the arrangement, hold all stems firmly together near the point where they naturally meet.
Bind them with green yarn or floral tape.
Work firmly enough that the stems cannot rotate easily, but avoid crushing or sharply bending them.
Wrap around the same section several times until the bundle feels stable.
If you are using yarn, tie or secure it neatly and hide the end where possible.
Check the flowers again before moving on.
If a bloom has turned or shifted while you were binding, correct it now rather than covering the stems and discovering the problem at the end.
Step 9: Wrap the Stems
You can finish the bouquet in one of two simple ways.
Simple Stem Finish
Leave the bouquet unwrapped and cover any visible joining area with green yarn or floral tape.
This works well for a bouquet that will sit in a vase or be used as a small decorative arrangement.
Gift Bouquet Finish
For a gift-style finish, add kraft paper, tissue, or another suitable bouquet wrap around the lower part of the flowers and stems.
Keep the wrap low enough that it does not cover the main blooms.
Finish with ribbon if you want a softer gift presentation.
The wrap should support the bouquet visually, not squeeze the flower heads together.
Step 10: Final Bouquet Check
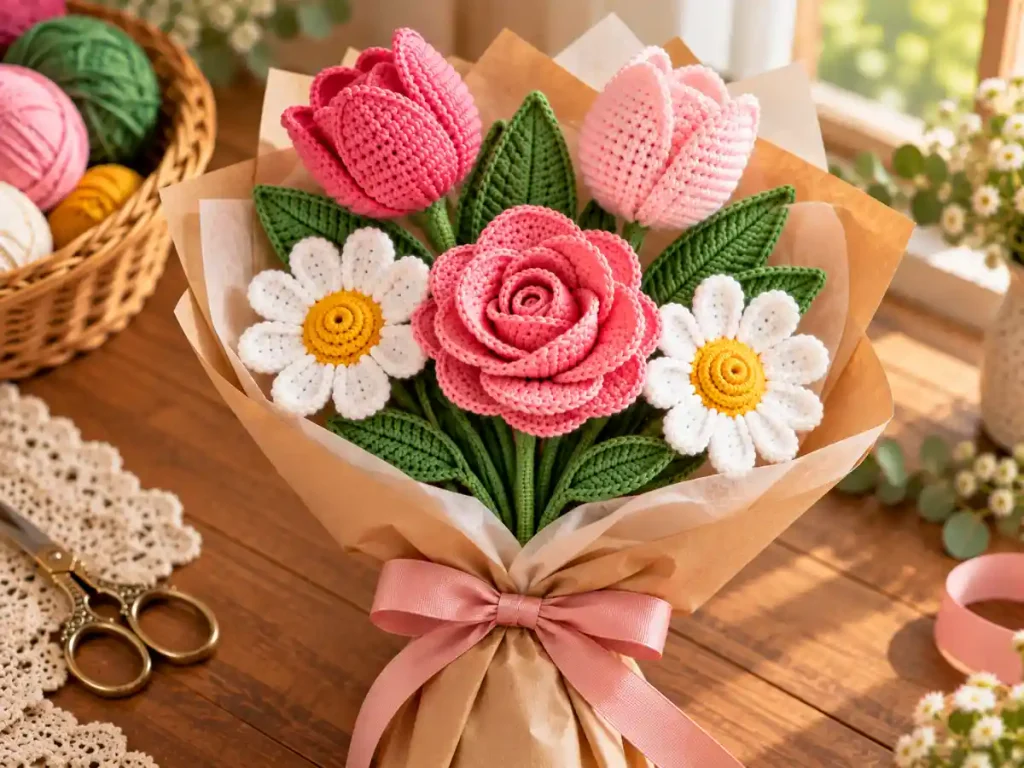
Before calling the project finished, hold the bouquet naturally and check it one last time.
A balanced bouquet should have:
- one clear focal area;
- visible height variation;
- supporting flowers around the focal bloom;
- no large accidental gaps;
- stems that stay together securely;
- flowers that do not spin freely;
- wrapping that leaves the flowers visible.
Turn the bouquet slightly and check the side view too.
A bouquet can look balanced from the front but still feel very flat from the side.
How Many Crochet Flowers Do You Need for a Bouquet?
There is no single correct number.
For a small handmade bouquet, five flowers can be a practical starting arrangement, especially when the blooms are dimensional and each one has a visible stem.
A simple five-stem bouquet might use:
- 1 focal flower;
- 2 taller flowers;
- 2 supporting flowers.
If your flowers are small, you may want more stems.
If your flowers are large, a smaller number may already feel full.
Instead of choosing a number first, arrange the flowers you have and add more only when the shape genuinely needs them.
How to Choose Colors for a Crochet Flower Bouquet
Color is easier to manage when you keep the palette simple.
One Main Color + One Accent
Use one dominant flower color and one contrasting or lighter accent color, with green stems and leaves connecting everything.
This is one of the easiest options for a beginner because the bouquet feels coordinated without requiring many shades.
Two Related Flower Colors
Choose colors that sit comfortably together, such as two shades from the same color family.
This creates a softer crochet bouquet of flowers where the differences come more from flower shape than strong color contrast.
Mixed Colors With One Repeating Shade
If you want a brighter bouquet, repeat at least one color in more than one flower.
That repeated shade helps connect the arrangement visually.
Avoid placing every flower of one color on the same side. Spread repeated colors through the bouquet where possible.
How to Keep a Crochet Bouquet From Looking Flat
A flat bouquet usually has too many flowers sitting at the same height and facing the same direction.
To create more depth:
- vary the stem heights slightly;
- move some supporting flowers forward;
- keep taller flowers slightly behind;
- angle a few blooms gently instead of facing every flower straight forward;
- rotate the bouquet while arranging;
- avoid lining every flower head across one horizontal level.
Do not try to create depth by bending stems sharply.
Adjusting their height and position is usually enough.
Common Crochet Bouquet Problems and How to Fix Them
The Bouquet Looks Flat
The flowers are probably sitting in the same visual plane.
Raise one or two flowers, lower another, and move supporting flowers slightly forward or backward.
Check the bouquet from the side after each adjustment.
The Bouquet Looks Top-Heavy
You may have too many large flowers near the top or stems that are not strong enough for the blooms.
Try removing one dominant flower, lowering a large bloom, or reinforcing the weakest stem.
A small bouquet usually needs only one main focal flower.
The Flowers Keep Turning
The stems may not be secured tightly enough at the binding point.
Reposition the flower heads, hold the stems firmly, and add another secure layer of yarn or floral tape around the bundle.
Also check the individual flower-to-stem connection. If the bloom rotates on its own stem, fix that connection before rebinding the bouquet.
One Side Looks Heavier
Look at both flower size and color.
A large flower or a very strong color can make one side feel heavier even if the number of stems is equal.
Move one supporting flower to the lighter side or reposition the focal flower slightly.
The Bouquet Has Obvious Gaps
Rearrange the existing flowers before adding filler.
Sometimes a small change in stem angle or height closes the gap without adding another flower.
If a gap remains, add a small flower or leaf rather than another large bloom.
The Wrapping Hides Too Much of the Bouquet
Lower the wrap.
The paper or tissue should frame the flowers, not cover them.
Reduce bulky folds near the flower heads and keep the upper edges of the wrap below the main blooms.
Can I Make the Bouquet With Only One Flower Type?
Yes.
A mixed arrangement is useful for demonstrating balance, but a bouquet made from one flower type can also work well.
You could make:
- an all-rose bouquet;
- an all-tulip bouquet;
- a daisy bouquet;
- a sunflower-focused arrangement.
When every bloom has the same shape, create variety through color, stem height, or slight changes in flower direction.
For example, a rose bouquet can still have depth if some blooms sit slightly higher or lower than others.
Can I Make a Crochet Bouquet Without Floral Wire?
That depends on the construction and weight of the flowers.
A lightweight flower may work with another suitable stem support, while a larger dimensional bloom needs a stem that is firm enough to keep the flower upright.
Do not choose a very flexible stem simply to avoid wire if the flower head causes it to bend.
Use the stem method recommended in the individual flower pattern whenever possible.
Crochet Bouquet Gift Ideas
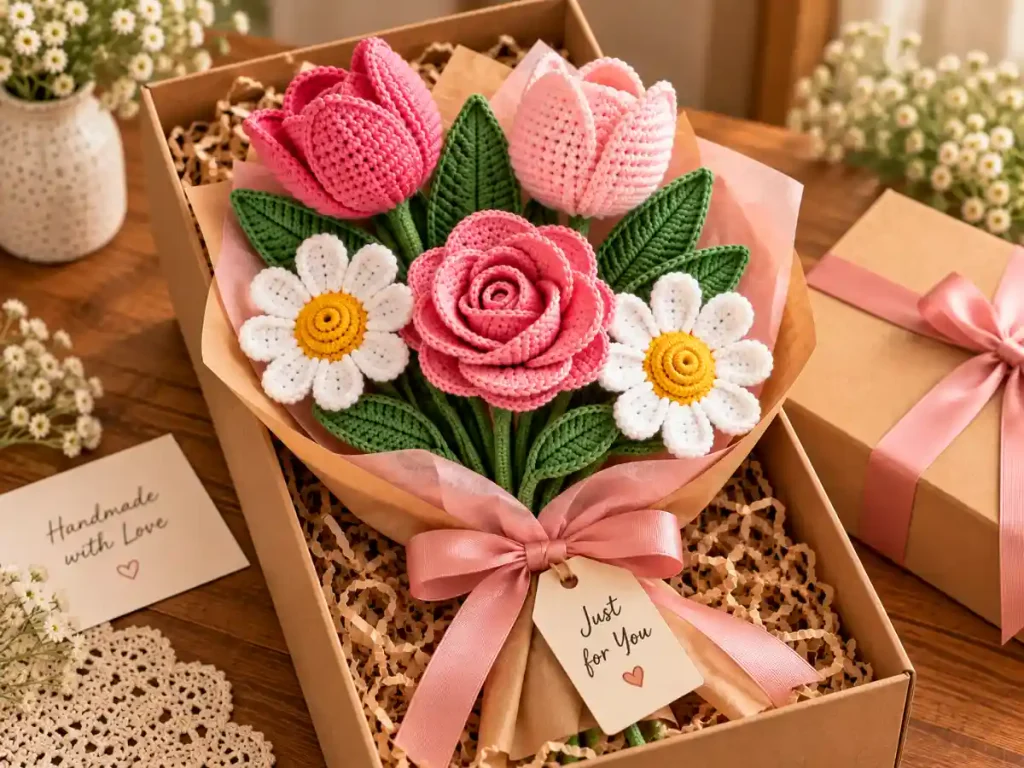
A handmade bouquet can work well as:
- a birthday gift;
- a thank-you gift;
- a graduation gift;
- a Mother’s Day project;
- a desk or shelf decoration;
- a handmade floral arrangement for a special event.
The bouquet does not need to be large to feel giftable.
A small, well-balanced arrangement with a clean stem finish can look more polished than a crowded bouquet with too many flowers.
More Crochet Flower Patterns
If you want more flowers to mix into future arrangements, explore our Crochet Flowers collection for additional small floral projects and step-by-step tutorials.
Frequently Asked Questions
How Many Flowers Should I Put in a Crochet Bouquet?
There is no fixed number.
For a small beginner bouquet, five stems are a useful starting point, but the right number depends on the size of your flowers and how full you want the arrangement to look.
What Flowers Work Well Together in a Crochet Bouquet?
Flowers with different shapes are easier to arrange because each one can serve a different role.
For example, a rose can act as the focal bloom, tulips can add height, and daisies can fill the sides and front.
How Do You Arrange Crochet Flowers So the Bouquet Looks Full?
Use different stem heights, avoid lining every bloom at the same level, and place supporting flowers slightly forward or to the sides.
Rotate the bouquet as you work so you can see gaps from more than one angle.
How Do You Secure Crochet Flower Stems Together?
Hold the stems in the arrangement you want, then bind them firmly with green yarn or floral tape near the point where the stems naturally meet.
Check that individual blooms are not rotating before you finish wrapping the stem bundle.
Can Beginners Make a Crochet Flower Bouquet?
Yes, especially if the individual flowers are already finished.
The bouquet stage is mainly about arranging, balancing, and securing the stems rather than learning a new complicated crochet stitch sequence.
Can I Use Different Yarn Colors in the Same Bouquet?
Yes.
A mixed-color bouquet can look cohesive when one shade repeats, when the colors belong to a simple palette, or when green stems and leaves visually connect the flowers.
Finished Crochet Bouquet
A successful crochet bouquet does not depend on using a large number of flowers.
The most important details are choosing one clear focal bloom, varying the flower heights, checking the arrangement from several angles, and securing the stems only after the bouquet feels balanced.
Start with a small arrangement, make adjustments while the stems are still loose, and add filler only where it genuinely improves the shape. Once the flowers are secure, a simple stem wrap or gift-style finish is enough to turn separate crochet flowers into one complete handmade project.
Project Notes
This crochet bouquet guide was created for Small Crochet Ideas as a practical assembly tutorial for combining finished crochet flowers into a balanced arrangement.
The example bouquet uses five stems as a simple starting point, but flower size, stem construction, yarn choice, and personal preference will change the final arrangement.
