
Easy crochet patterns, cute projects, and beginner-friendly ideas to inspire your next make.


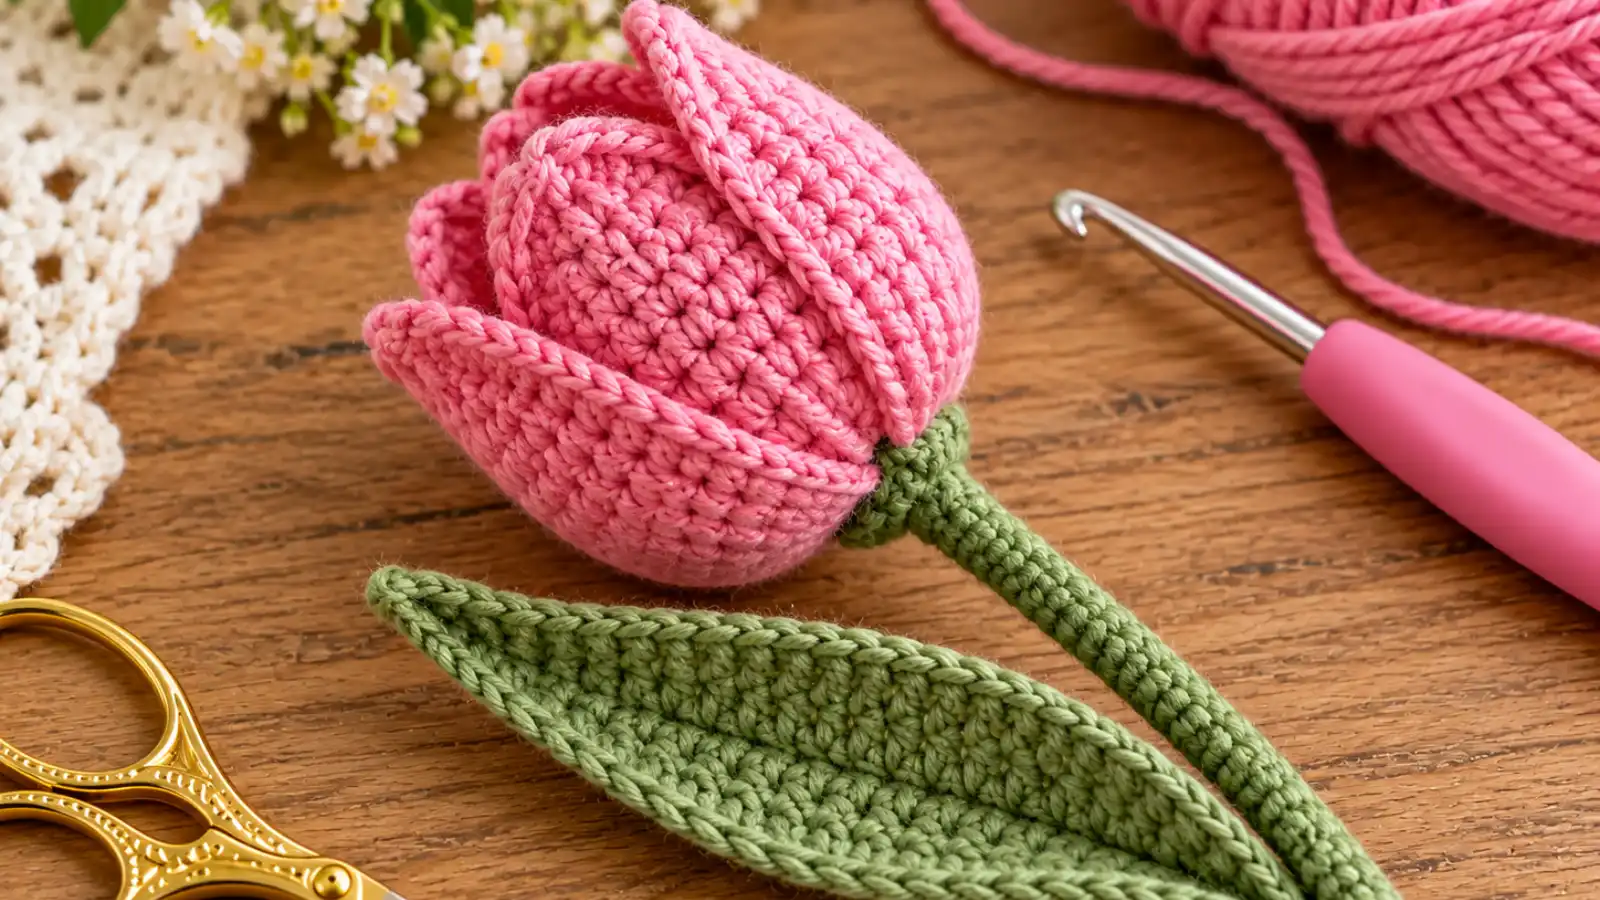
This crochet tulip pattern makes a three-dimensional flower with a softly shaped bud, a long green leaf, and a structured stem. The flower head is worked as one main piece, so you do not need to crochet and assemble several separate petals before the tulip starts to take shape.
The written pattern below is designed to keep the construction easy to follow: crochet the bud, add light stuffing and the stem, shape the top, make one leaf, and finish the assembly.
Pattern note: Finished size, yarn usage, and completion time can vary depending on your yarn, hook size, tension, and stuffing.
Table of Contents
Crochet Tulip Pattern at a Glance
| Pattern detail | Information |
|---|---|
| Crochet terms | US terminology |
| Construction | One-piece 3D flower head, separate leaf, structured stem |
| Flower style | Standing crochet tulip |
| Main technique | Single crochet in continuous rounds |
| Stuffing | Lightly stuffed |
| Stem support | Yes |
| Main stitches | ch, sl st, sc, inc |
| Gauge | Not critical, but the fabric should be firm enough to contain stuffing |
The finished proportions will depend on the yarn, hook, tension, amount of stuffing, and stem length you use.
What You’ll Need
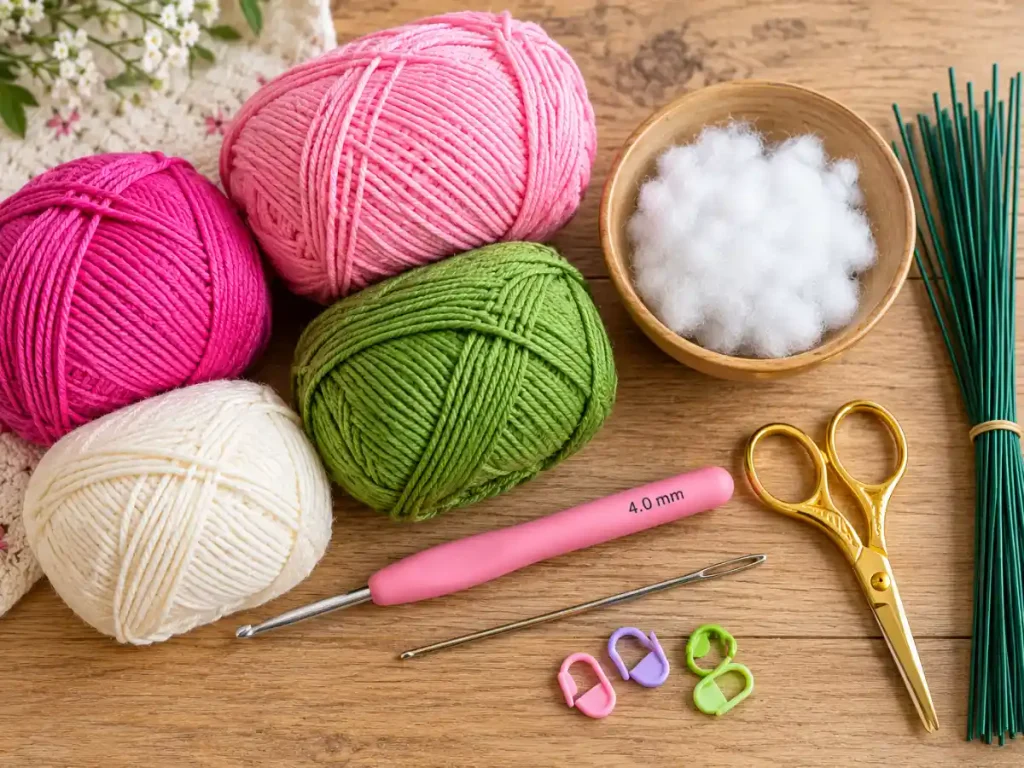
For one tulip, prepare:
- smooth DK or light worsted yarn in your tulip color;
- green yarn for the leaf and stem finishing;
- a crochet hook that creates a firm fabric with your chosen yarn;
- a stitch marker;
- a yarn needle;
- scissors;
- a small amount of polyester fiberfill;
- a sturdy floral stem or craft wire suitable for handmade flowers;
- pliers or wire cutters if your stem material requires them.
A 3.5–4 mm crochet hook works well as a starting point with DK or light worsted yarn. Choose the size that gives you a firm fabric so the stuffing does not show through the stitches.
Choose a smooth yarn rather than a very fuzzy one for the first tulip. Clear stitch definition makes the round counts and top shaping easier to see.
A Note About the Stem
The flower head needs support if you want it to stand like the tulips shown in the main search results for this type of project.
Use a floral stem or craft wire that is firm enough to hold the flower without drooping. If you are cutting or bending wire, use the appropriate tools and keep sharp ends covered while you work.
Crochet Stitches and Abbreviations
This pattern uses US crochet terminology. For a broader reference, see the Craft Yarn Council’s standard crochet abbreviations.
- ch — chain
- sl st — slip stitch
- sc — single crochet
- inc — work 2 single crochets in the same stitch
- st / sts — stitch / stitches
The flower head uses only single crochet and increases, which keeps the construction simple and easy to follow. The shaping at the top is done with a yarn needle rather than by crocheting separate petals.
Before You Start
The tulip is made in four main stages:
- Crochet the flower head from the bottom upward.
- Add the stem and light stuffing.
- Shape the open top into the tulip form.
- Crochet and attach one long green leaf.
The flower head is worked in continuous rounds, so do not join each round.
Place a stitch marker in the first stitch of every round and move it upward as you work. This matters most in the straight body rounds, where it is easy to lose track of the beginning.
The flower expands from 6 to 24 stitches and then stays at 24 stitches while the bud gains height.
How to Crochet a Tulip Step by Step
Step 1: Crochet the Tulip Flower Base
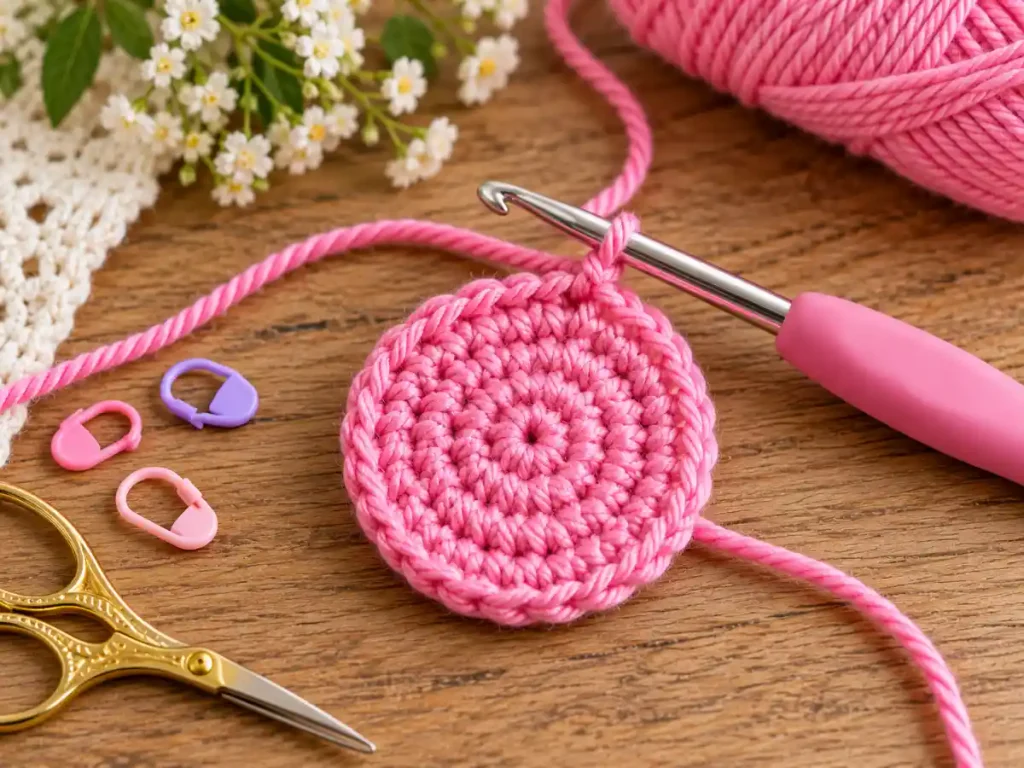
With your tulip-color yarn, make a magic ring.
Round 1: Work 6 sc into the magic ring. [6]
Pull the ring closed.
Round 2: Inc in each stitch around. [12]
Round 3: Sc in next st, inc in next st. Repeat around. [18]
Round 4: Sc in next 2 sts, inc in next st. Repeat around. [24]
The stitch progression is:
6 → 12 → 18 → 24
Stop and count after Round 4.
Checkpoint: You should have exactly 24 stitches.
If the count is wrong, correct it before continuing. The four-point shaping at the top depends on an even 24-stitch opening.
Step 2: Build the Tulip Bud
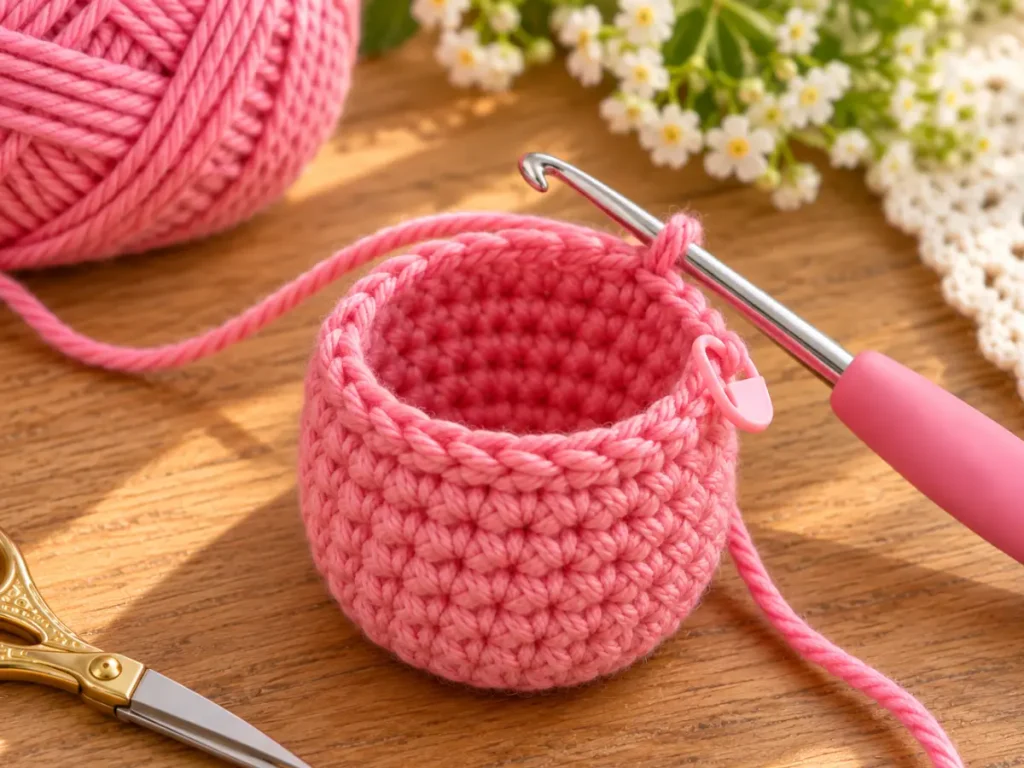
Continue without increasing.
Rounds 5–9: Sc in each stitch around. [24 stitches per round]
These straight rounds give the flower head its height.
Do not stuff the flower yet.
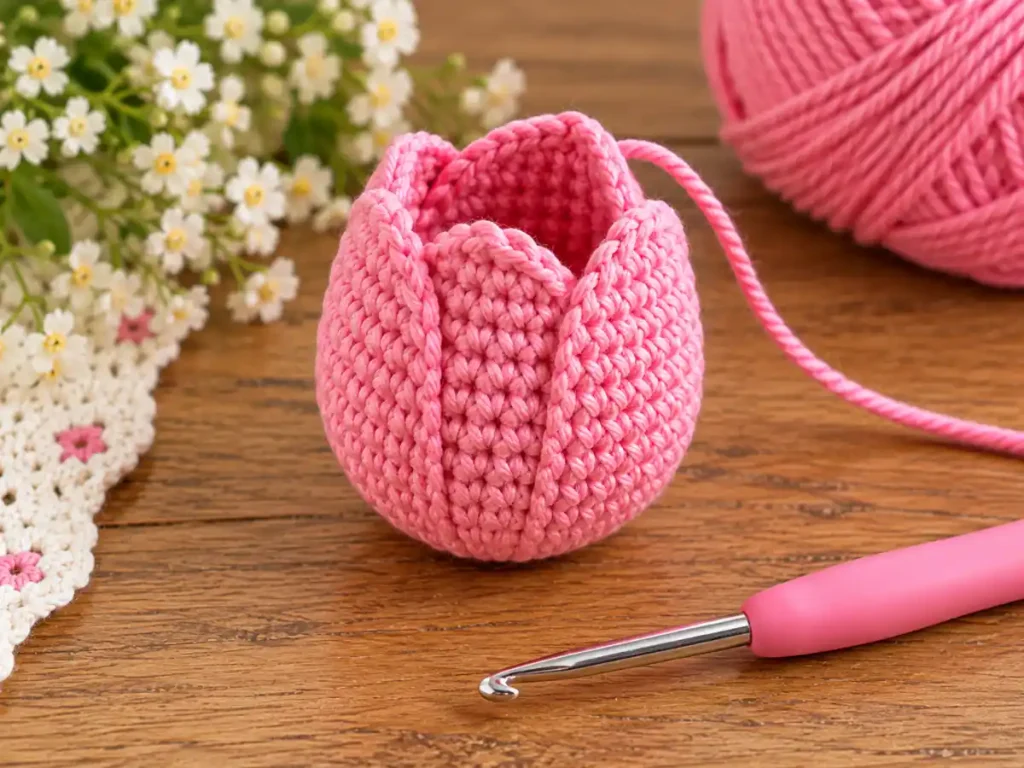
At the end of Round 9, the piece should look more like a small open cup or tube than a round ball.
If it already looks very wide and shallow, check your tension and yarn-to-hook combination. A tulip bud needs enough height to keep a recognizable flower silhouette after the top is shaped.
Checkpoint: Count the final round again. You should still have 24 stitches.
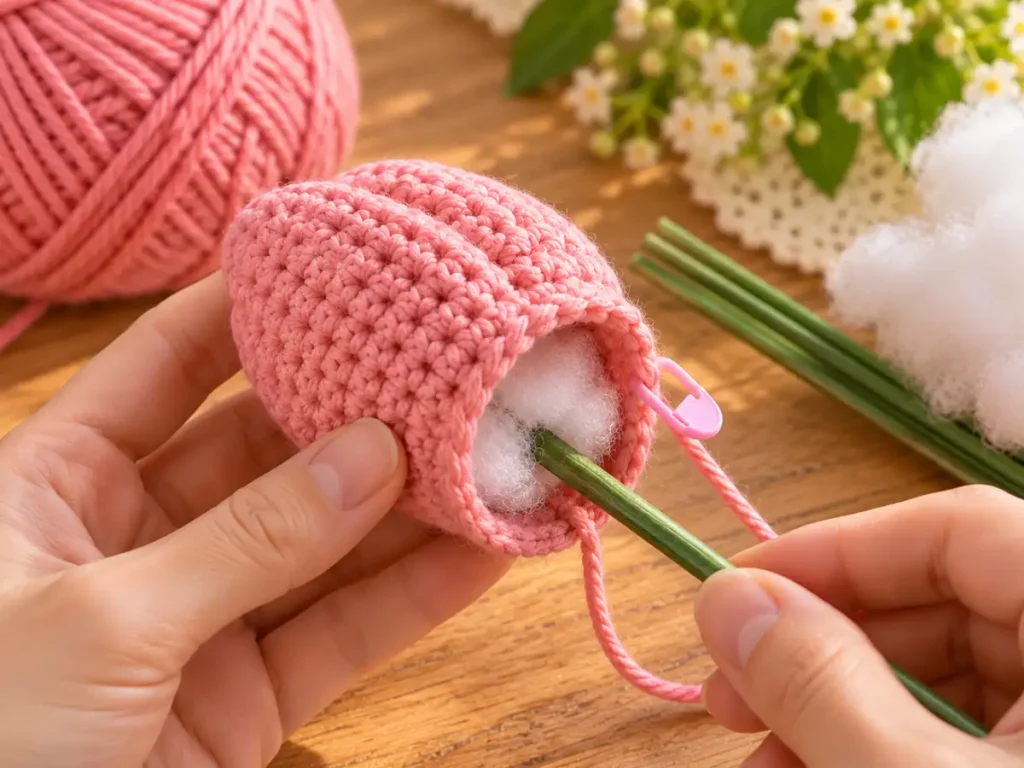
Step 3: Add the Stem and Stuffing
Before closing the top, prepare the stem.
If you are using craft wire, bend one end into a small closed loop so there is no sharp point loose inside the flower.
Carefully guide the straight end of the stem down through the open flower head and out through the center at the bottom of the bud. Pull it through until the small loop rests inside the flower.
The loop acts as an anchor inside the stuffed head.
Take your time here. Do not force a sharp wire end through the yarn. If needed, use a yarn needle first to gently open a path between stitches at the center of the base.
Now add a small amount of fiberfill around the stem anchor.
The bud should feel:
- firm enough to keep its shape;
- soft enough to pinch and shape at the top;
- not so full that the stitches stretch apart.
Avoid packing stuffing tightly against the open edge.
Stuffing checkpoint: When you squeeze the upper part of the bud, the fabric should still move easily.
Step 4: Shape the Top of the Tulip
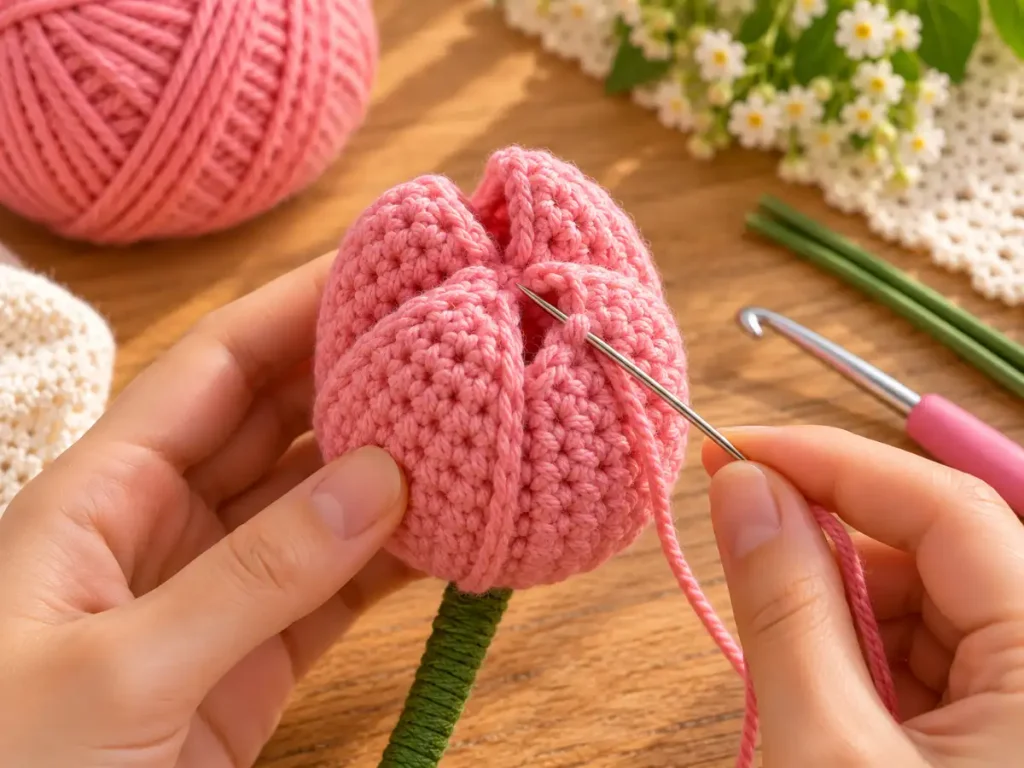
This is the step that changes the open crochet cup into a tulip.
Fasten off the flower yarn, leaving a long tail for shaping.
Thread the tail onto a yarn needle.
With 24 stitches around the opening, identify four points spaced 6 stitches apart.
You can place temporary stitch markers at approximately:
- stitch 1;
- stitch 7;
- stitch 13;
- stitch 19.
These four points divide the opening into four equal sections.
Bring the first marked point toward the opposite point and take a small securing stitch.
Then bring the remaining two marked points toward the center.
Pull the yarn gradually rather than tightening everything at once.
The goal is to create four soft folds around the top, not to gather the entire opening into a tight circle.
Once the shape looks even:
- take one or two small stitches through the inner edges of the folds;
- close any small center gap;
- secure the yarn inside the flower;
- weave in the tail.
Do not flatten the four folds completely. A little fullness between the points helps the top look more like a flower and less like a closed pouch.
Shaping checkpoint: Viewed from above, you should see four balanced folds meeting near the center.
Step 5: Crochet the Tulip Leaf
Use green yarn.
Ch 21.
Starting in the second chain from the hook, work along the first side of the foundation chain:
- sl st in next ch;
- sc in next 3 ch;
- hdc in next 4 ch;
- dc in next 5 ch;
- hdc in next 4 ch;
- sc in next 2 ch;
- work 3 sc in the last chain to turn around the tip.
Now work back along the unused loops on the opposite side of the foundation chain:
- sc in next 2 ch;
- hdc in next 4 ch;
- dc in next 5 ch;
- hdc in next 4 ch;
- sc in next 3 ch;
- sl st in the final ch.
Join neatly at the base if needed.
Fasten off, leaving a tail long enough to attach the leaf.
The leaf should be long and tapered rather than round.
If your leaf looks too wide, use a slightly smaller hook or replace some of the double crochets with half double crochets rather than pulling the stitches tighter.
Step 6: Finish the Stem
Once the flower head is secure, cover or finish the visible stem.
You can wrap the stem with green yarn or use green floral tape, depending on the material you chose.
If using yarn:
- secure the green yarn close to the base of the flower;
- wrap downward in close, even turns;
- keep the wraps snug without bending the stem;
- secure the yarn near the bottom.
Keep the flower upright as you work so the yarn wrapping does not twist the head out of position.
If the stem material is already green and visually clean, you can keep the covering minimal.
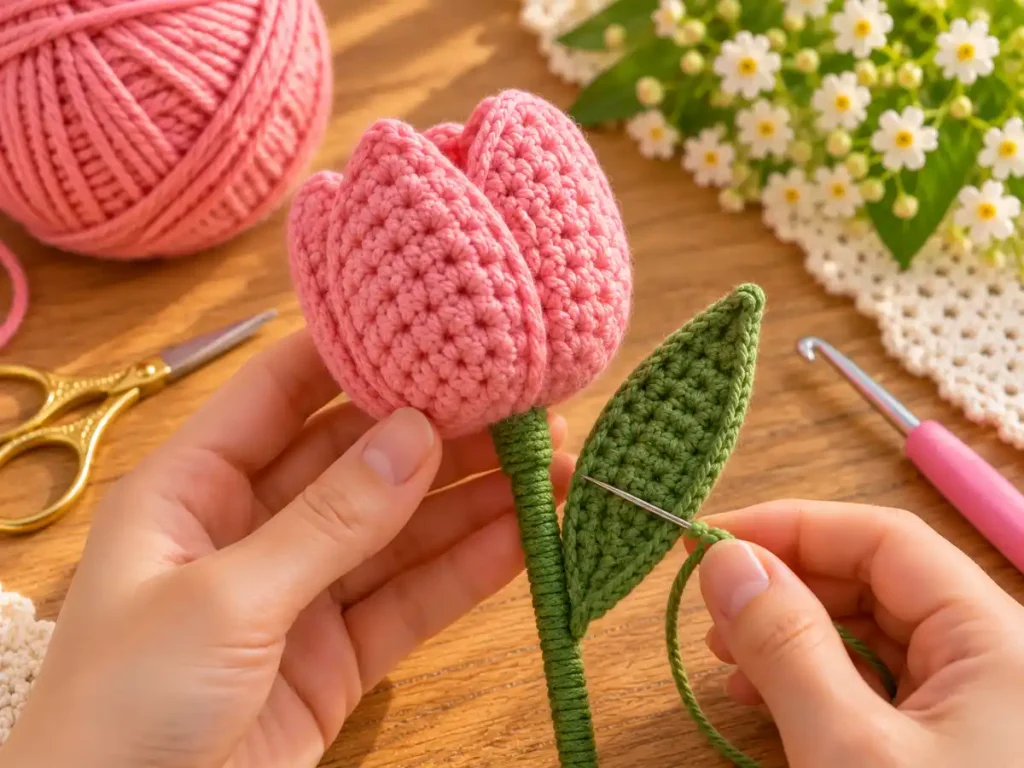
Step 7: Attach the Leaf
Place the leaf alongside the stem before sewing it permanently.
A tulip leaf usually looks most natural when it begins below the flower head and extends upward along the stem rather than sticking straight out to the side.
Using the green yarn tail:
- secure the base of the leaf to the stem;
- take several small stitches through the lower edge of the leaf;
- wrap the yarn around the stem if extra support is needed;
- weave in the remaining end.
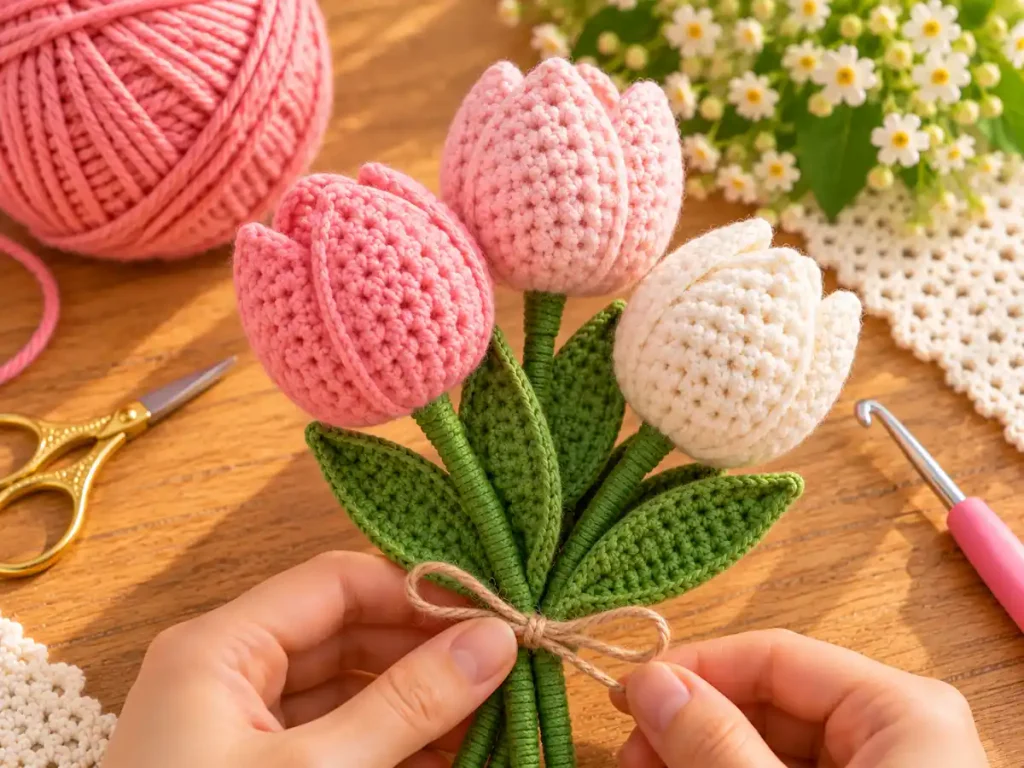
Do not sew the full length of the leaf flat against the stem. Leaving the upper section free gives it a more natural shape.
Final Tulip Check
Before calling the flower finished, check four things:
- the flower head is secure and does not spin freely;
- the top has a clear, balanced tulip shape;
- the stem stays upright;
- the leaf is firmly attached but still has some natural movement.
Gently adjust the folds at the top with your fingers if needed.
Common Problems and How to Fix Them
Why Does My Crochet Tulip Look Too Round?
The most likely reason is too much stuffing.
A tulip head needs enough filling to hold its shape, but the top must still be flexible enough to pinch inward.
Remove a little stuffing before you secure the final shaping stitches.
Also check the body proportions. Rounds 5–9 are worked without increases so the flower gains height rather than continuing to widen.
Why Won’t the Top Hold Its Tulip Shape?
First, make sure you divided the 24-stitch opening into four equal sections.
The marked points should be 6 stitches apart.
Bring the four points toward the center gradually and secure them with small stitches. If you simply gather all 24 stitches around the rim, the flower will close like a drawstring pouch instead of forming distinct folds.
If the four-point closure feels loose, secure the center with one or two additional small stitches rather than pulling the entire opening tighter.
Why Is My Stem Drooping?
A soft stem usually means the support material is not rigid enough for the weight of the flower head.
Use a floral stem or craft wire intended to hold decorative flowers upright.
The yarn wrapping is decorative; it does not replace the internal structure.
Also check the amount of stuffing. An overfilled head adds unnecessary weight.
Why Is the Flower Head Spinning on the Stem?
The anchor inside the flower may be too small or may not be surrounded securely by stuffing.
A small closed loop at the inside end of the stem gives the filling something to hold around.
If the flower head still rotates, add a few discreet green stitches at the base of the flower to stabilize the stem before wrapping it.
Why Does My Leaf Look Too Wide or Too Short?
Leaf proportions change quickly when you substitute yarn or hook sizes.
A thicker yarn produces a wider and heavier leaf even when the stitch counts stay the same.
For a slimmer leaf, try a slightly smaller hook with the same yarn or replace some of the widest stitches with shorter stitches in your finished tulip.
Avoid stretching the finished leaf aggressively. Shape it gently with your fingers instead.
Can I Use a Different Yarn?
Yes, but the finished tulip will change in size and texture.
A finer yarn generally produces a smaller, more delicate flower. A thicker yarn produces a larger flower and may require a stronger stem.
Keep the fabric firm enough that the stuffing does not show between stitches.
If you change yarn weight, choose a hook that works well with that yarn rather than treating one hook size as mandatory for every version.
Make one complete tulip before planning a large bouquet. That first sample will tell you whether the yarn, hook, stuffing, and stem are working well together.
How to Make a Crochet Tulip Bouquet
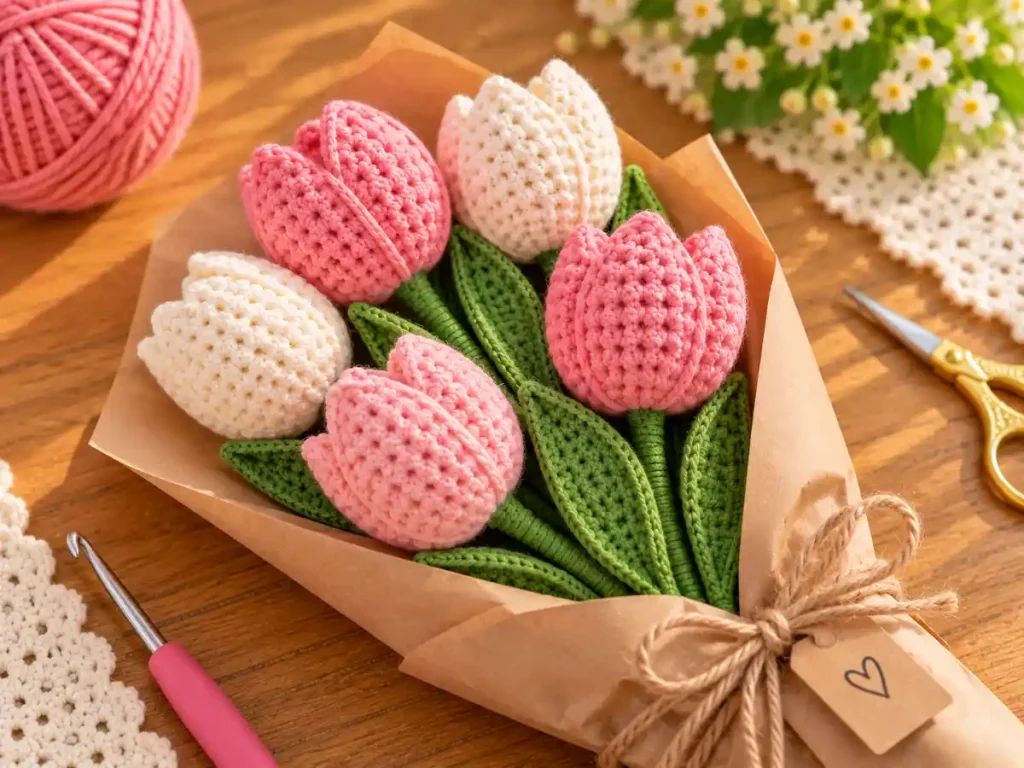
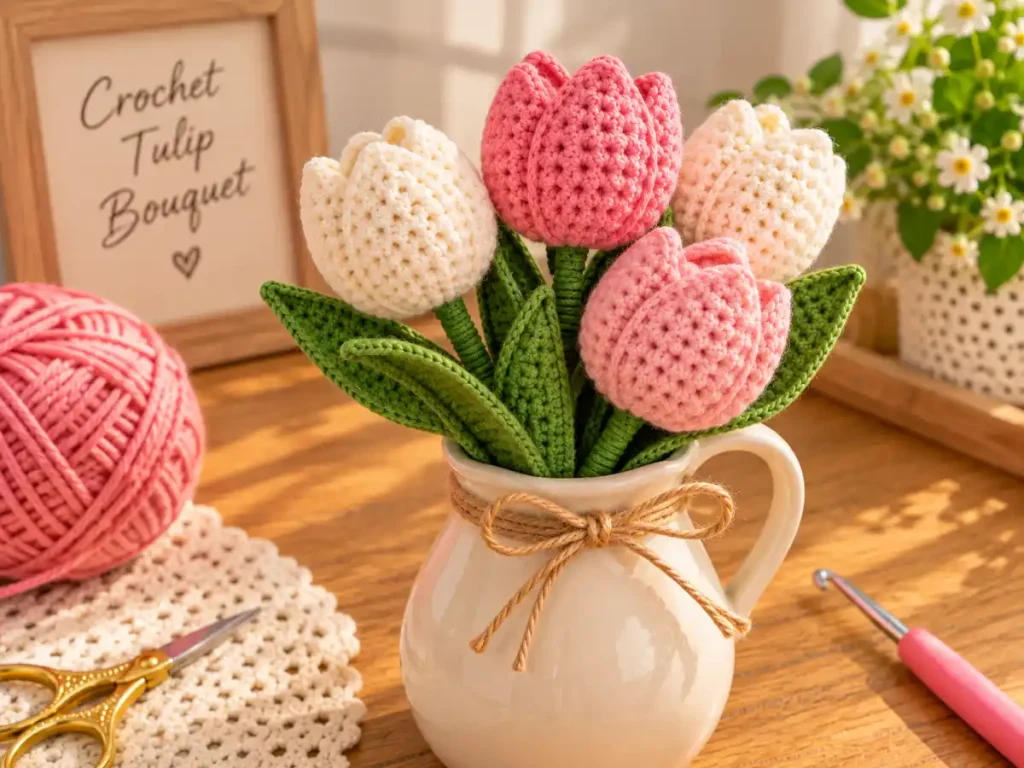
Once you are happy with one flower, repeat the same pattern in several colors.
A small bouquet can look especially effective when you vary the tulip colors while keeping the leaves and stems consistent.
Try:
- soft pink;
- cream;
- yellow;
- coral;
- lavender;
- deep red.
Keep the flower-head construction the same so the bouquet feels coordinated.
You can also vary the stem lengths slightly to keep all the flowers from sitting at exactly the same height.
If you are making several tulips, finish one complete flower first before batching the parts. It is much easier to correct the proportions after one sample than after six unfinished flower heads.
More Crochet Flower Patterns
If you want to keep building your flower collection, try the easy crochet flower pattern for a small five-petal motif.
You can also make a crochet daisy pattern for another flower shape with a completely different construction.
For more projects in the same topic, browse the Crochet Flowers collection. For a bolder flower with a dark center and pointed golden petals, try our sunflower crochet pattern.
These patterns work well together because each flower teaches a different construction method rather than repeating the same generic motif.
Frequently Asked Questions
Is This Crochet Tulip Pattern Suitable for Beginners?
This pattern uses a small set of basic crochet skills, including single crochet, increases, simple shaping, and basic assembly. The flower head is worked as one main piece, which avoids the need to crochet and join several separate petals. The stem insertion and top shaping are the most detailed parts, so take those steps slowly and use the tutorial images as checkpoints.
Do I Need Wire to Make the Crochet Tulip?
You need some type of internal support if you want the tulip to stand upright on a long stem.
A floral stem or sturdy craft wire is the simplest option.
For a decorative flower head without a standing stem, the support could be omitted, but that would create a different finished project from the one shown in this tutorial.
Does the Crochet Tulip Need Stuffing?
This version uses a small amount of stuffing to support the three-dimensional bud.
Do not fill it firmly like a plush toy.
Light stuffing is enough to hold the shape while still allowing the top to be pinched into folds.
Can I Make the Tulip Larger or Smaller?
Yes.
Changing the yarn and hook is the simplest way to change the scale without rewriting the stitch counts.
A thicker yarn usually creates a larger flower; a finer yarn usually creates a smaller one.
Remember that the stem and leaf should stay proportional to the new flower size.
Can I Make Several Tulips Into a Bouquet?
Yes.
Repeat the same flower in several colors and adjust the stem lengths slightly before arranging them together.
Make one complete sample first so you can confirm the proportions before crocheting the rest.
Finished Crochet Tulip
A tulip is a useful next project after learning basic crochet flowers because the finished shape comes from construction and shaping rather than a large number of decorative stitches.
This version keeps the flower head in one main piece, then adds the stem and leaf separately so each stage is easy to see.
Once you’re comfortable with the shaping method, you can repeat the same pattern in different colors for gifts, spring decorations, or a handmade crochet bouquet.
Pattern Notes
This crochet tulip pattern was created for Small Crochet Ideas with a focus on clear construction, practical shaping, and easy-to-follow instructions.
The pattern uses US crochet terminology and includes step-by-step guidance for the flower head, stem, leaf, shaping, and final assembly.
For best results, follow the stitch counts carefully and compare your work with the tutorial images as you go.
