Easy crochet patterns, cute projects, and beginner-friendly ideas to inspire your next make.

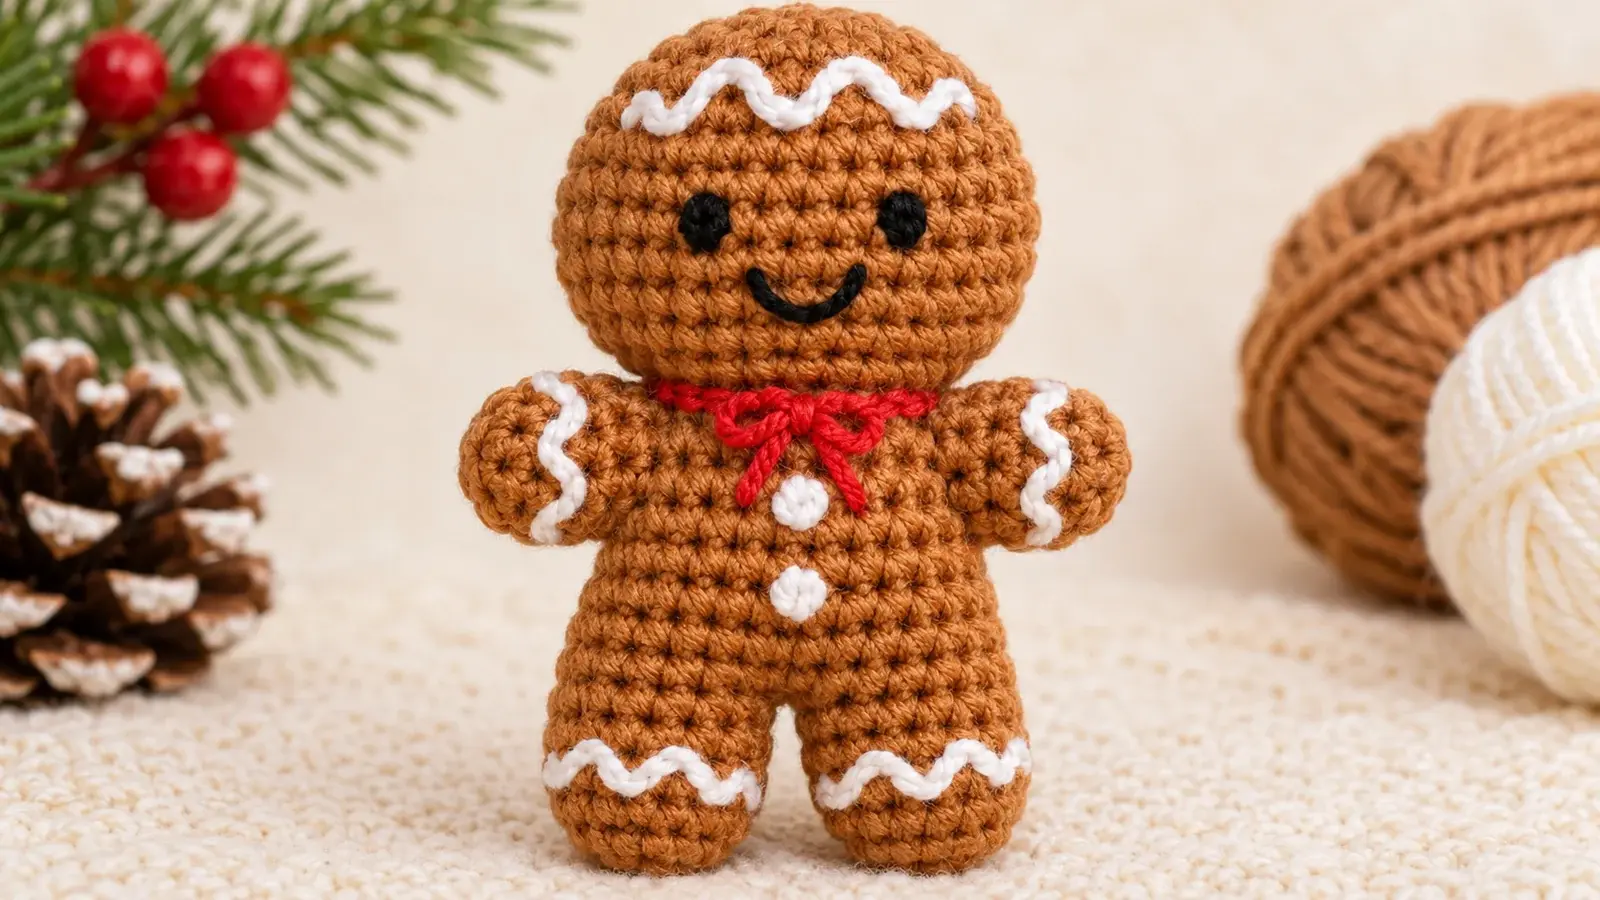
A crochet gingerbread man is a cute little project for adding a handmade touch to your Christmas decorations. This free pattern guides you through making a tiny gingerbread character with two joined legs, a rounded head, and little bobble-stitch arms—all worked together without sewing separate body pieces.
With simple stitches, a little stuffing, and sweet embroidered details, you can create a festive mini amigurumi character.
Table of Contents
Crochet Gingerbread Man Pattern at a Glance
This mini gingerbread man crochet pattern begins with two small legs. You’ll join them using a short chain bridge, continue upward to shape the body, add bobble-stitch arms, and crochet the head directly onto the neck.
The construction is designed to avoid sewing separate arms or a head onto the body.
| Pattern Detail | Information |
|---|---|
| Project | Mini 3D gingerbread man |
| Skill level | Confident beginner (provisional) |
| Yarn | Medium-weight (#4), suggested |
| Crochet hook | 3.5 mm, suggested starting size |
| Crochet terms | US terminology |
| Construction | Continuous spiral rounds |
| Legs | Two pieces joined with crochet |
| Arms | Integrated 5-dc bobble stitches |
| Head | Crocheted directly onto the neck |
| Stuffing | Polyester fiberfill |
| Sewing separate body parts | Not intended |
| Finished size | Not yet measured |
| Yarn quantity | Not yet measured |
| Completion time | Not yet verified |
| Pattern status | Mathematically reviewed; physical test pending |
The most important parts are joining the legs correctly and keeping track of your stitches as the body narrows and the head widens.
What does no-sew mean here? The head and limbs are designed to be incorporated into the crocheted body rather than sewn on separately. You’ll still need a yarn needle for the facial embroidery, icing details, and finishing. The complete no-sew construction remains subject to sample testing.
Materials and Tools You’ll Need
Gather these supplies before starting:
- Brown yarn: Medium-weight (#4) yarn for the body, legs, arms, and head.
- Crochet hook: 3.5 mm as a starting recommendation.
- White yarn: For the gingerbread icing details.
- Black yarn or embroidery thread: For the eyes and smile.
- Red yarn: Optional, for a small embroidered neck decoration.
- Polyester fiberfill: For lightly stuffing the figure.
- Stitch marker: To mark the beginning of each round.
- Yarn needle: For embroidery and weaving in ends.
- Scissors: For cutting yarn.
Smooth yarn can help you see your stitches clearly, especially when working the decreases and bobbles.
The suggested hook size is intended to create firm amigurumi fabric, but the correct combination of yarn and hook still needs to be confirmed with a sample. If gaps appear between your stitches, check your tension before continuing.
You won’t need safety eyes, plastic buttons, or separate crocheted arms for the proposed design. The facial features and decorations are made with yarn.
Crochet Stitches and Abbreviations
This pattern uses US crochet terminology.
| Abbreviation | Meaning |
|---|---|
| MR | Magic ring |
| ch | Chain |
| sc | Single crochet |
| inc | Increase: 2 sc in one stitch |
| dec | Invisible single crochet decrease |
| dc | Double crochet |
| bo | 5-dc bobble stitch |
| st / sts | Stitch / stitches |
| rnd | Round |
| FO | Fasten off |
Numbers in parentheses indicate the number of stitches you should have after completing a round.
For more help with crochet terminology, see the Craft Yarn Council’s crochet abbreviations guide.
How to Make a 5-Double-Crochet Bobble
The bobble stitch creates a raised section of crochet fabric. In this pattern, two bobbles are used to form the gingerbread man’s small arms.
To make a 5-dc bobble:
- Yarn over and insert your hook into the next stitch.
- Yarn over and pull up a loop.
- Yarn over and pull through two loops, leaving the double crochet unfinished.
- Repeat the partially completed double crochet four more times in the same stitch.
- You should now have six loops on your hook.
- Yarn over and pull through all six loops to close the bobble.
Important: One completed bobble counts as one stitch, even though five partially completed double crochets are used to make it.
Do not add an extra chain unless the pattern specifically instructs you to.
How to Make an Invisible Decrease
Invisible decreases help narrow amigurumi fabric without leaving large gaps.
- Insert your hook under the front loop of the next stitch.
- Without finishing the stitch, insert your hook under the front loop of the following stitch.
- Yarn over and pull through both front loops.
- Yarn over again and pull through the remaining two loops.
You’ve now turned two stitches into one.
The invisible decrease is used to shape the gingerbread man’s neck and close the head.
Before You Start This Crochet Gingerbread Man Pattern
A few details will make the instructions easier to follow.
Work in continuous rounds. Don’t join each round with a slip stitch unless instructed. Use your stitch marker to keep track of where each new round begins.
Keep the correct side facing outward. This is especially important when you reach the bobble arms, because they need to project away from the body.
Count every shaping round. The joining round, arm round, neck decreases, and head increases are the most important places to check.
Leave both leg openings accessible. The first leg is fastened off, but its top opening stays open. You’ll continue directly from the second leg to join them together.
Stuff gradually. Add small amounts of fiberfill rather than forcing everything into the figure at the end.
If any joining or shaping step doesn’t work as described, pause and check your stitch placement. The pattern’s stitch counts are mathematically consistent, but the physical construction has not yet been verified.
How to Crochet a Gingerbread Man — Step by Step
We’ll start at the feet and work upward to the head.
Step 1: Crochet the First Leg
Using your brown yarn, make a magic ring.
Round L1: Work 6 sc into the magic ring. (6)
Pull the yarn tail to close the center.
Round L2: [Sc in next st, inc in next st] × 3. (9)
Round L3: Sc in each stitch around. (9)
Round L4: Sc in each stitch around. (9)
Fasten off and secure the finishing tail, leaving the top opening unclosed.
Stitch checkpoint: Your first leg should have exactly nine stitches around its open top.
Keep it aside while you make the second leg.
Step 2: Crochet the Second Leg
Using the same brown yarn, repeat the first leg.
Round L1: 6 sc in a magic ring. (6)
Round L2: [Sc in next st, inc in next st] × 3. (9)
Round L3: Sc around. (9)
Round L4: Sc around. (9)
Do not fasten off this leg.
You’ll use the working yarn from the second leg to connect both legs and begin the body.
Place the legs side by side with their openings facing upward and the right sides of the crochet fabric facing outward.
Stitch checkpoint: You should now have two matching legs, each with nine stitches around its opening.
Step 3: Join the Legs Together
This is one of the most important stages of the pattern.
You’ll create a short bridge between the legs, then work around both leg openings and both sides of that bridge.
Body Round B1 — Joining Round
Starting from the working yarn attached to Leg 2:
- Ch 2 to make the connecting bridge.
- Move to Leg 1 and work 9 sc around its open top, starting at the inside-facing joining point.
- Work 2 sc along one side of the chain bridge toward Leg 2.
- Work 9 sc around the opening of Leg 2.
- Work 2 sc into the unused loops on the opposite side of the chain bridge, returning toward Leg 1.
Total: 22 stitches.
Here’s the stitch-count breakdown:
| Section | Stitches |
|---|---|
| Leg 1 | 9 |
| First side of bridge | 2 |
| Leg 2 | 9 |
| Second side of bridge | 2 |
| Total | 22 |
Place a stitch marker in the first stitch of the next round.
Before moving on, check that the bridge isn’t twisted and that you haven’t accidentally added stitches at the connection points.
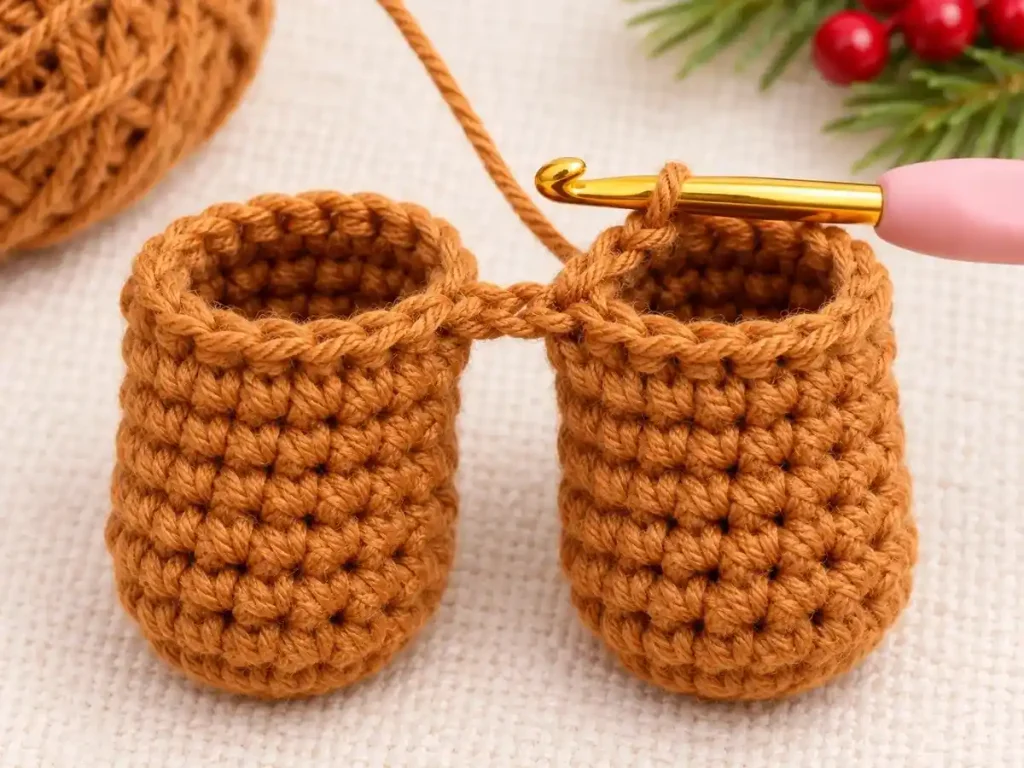
Construction checkpoint: The joining round should contain 22 stitches. The finished bridge shape and any gaps between the legs still need physical testing.
Step 4: Crochet the Gingerbread Man Body
Now that the legs are connected, continue working upward in continuous rounds.
Round B2: [10 sc, inc] × 2. (24)
This round increases the body from 22 to 24 stitches.
Round B3: Sc in each stitch around. (24)
Round B4: Sc around. (24)
Round B5: Sc around. (24)
The stitch count stays the same through Rounds B3–B5, giving the body a short section of even fabric.
At this point, you can begin adding a little stuffing to the legs while they’re still accessible.
Use small amounts and keep the area around the joining bridge flexible.
Stitch checkpoint: You should have 24 stitches around the torso.
Step 5: Make the Integrated Bobble Arms
Instead of making separate arms and sewing them onto the body, this prototype uses two bobble stitches.
Each bobble is worked into one stitch of the existing round.
Round B6:
Work the following sequence:
6 sc, bo in next st, 11 sc, bo in next st, 5 sc
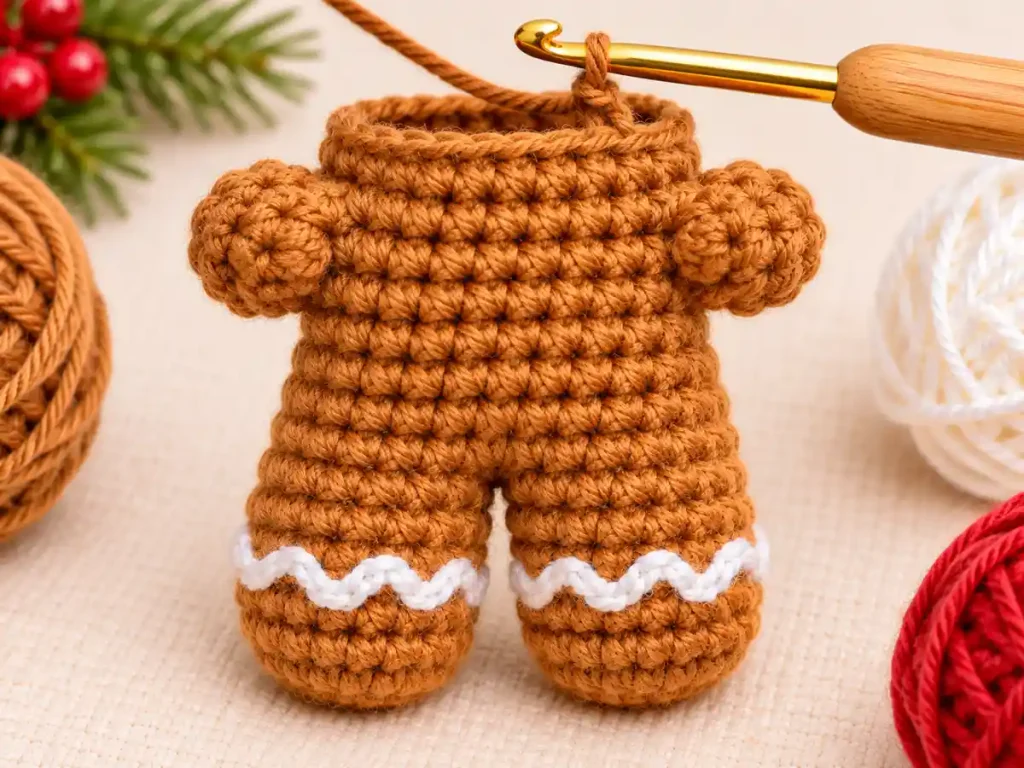
Total: 24 stitches.
The bobbles occupy stitch positions 7 and 19.
These positions are 12 stitches apart in the 24-stitch round.
After making each bobble, gently encourage it to project outward from the body.
Round B7: Sc in every stitch around, including the stitch at the top of each bobble. (24)
Round B8: Sc around. (24)
Count carefully when working Round B7 so that you don’t accidentally skip a stitch above a bobble.
Important construction note: The two bobbles are mathematically positioned on opposite sides of the round. However, their exact appearance, outward projection, and suitability as recognizable arms still require physical testing.
Step 6: Shape the Neck
The next two rounds gradually narrow the torso to create the neck.
Round B9: [Sc in next 2 sts, dec] × 6. (18)
Round B10: [Sc in next st, dec] × 6. (12)
Your stitch count should decrease as follows:
24 → 18 → 12
Before the opening becomes too narrow, add stuffing to the torso.
Keep the filling light and evenly distributed. Avoid packing too much fiberfill directly into the neck area.
The head will be worked from these remaining 12 stitches.
Stitch checkpoint: You must have exactly 12 stitches at the top of the torso before starting the head.
The neck’s ability to support the finished head remains an important sample-test requirement.
Step 7: Crochet the Gingerbread Man Head
Continue with the same brown yarn. There’s no need to fasten off or attach a separate head.
The first three rounds increase the stitch count to create the wider head.
Round B11: [Sc in next st, inc] × 6. (18)
Round B12: [Sc in next 2 sts, inc] × 6. (24)
Round B13: [Sc in next 3 sts, inc] × 6. (30)
Now work six even rounds:
Round B14: Sc around. (30)
Round B15: Sc around. (30)
Round B16: Sc around. (30)
Round B17: Sc around. (30)
Round B18: Sc around. (30)
Round B19: Sc around. (30)
Stop after completing Round B19.
You should now have 30 stitches around the open head.
Stitch checkpoint: Make sure each round from B14 through B19 contains exactly 30 stitches.
The intended result is a rounded gingerbread head. Its finished proportions will depend on the actual yarn, hook, tension, stuffing, and sample construction.
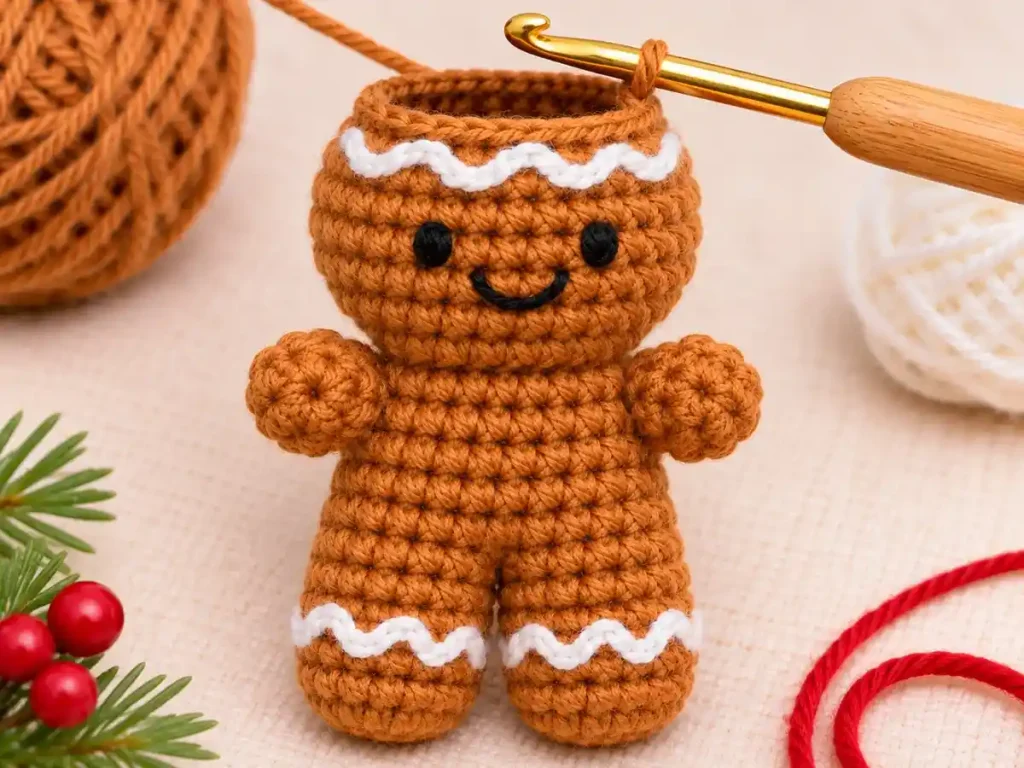
Step 8: Embroider the Gingerbread Man’s Face
Before beginning the head decreases, take a moment to plan the facial details.
Keeping the head open makes it easier to secure embroidery ends inside.
Use the legs and the two bobble arms as guides for finding the front of the figure.
For the eyes:
Thread your yarn needle with black yarn or embroidery thread.
Plan two small embroidered eyes on the front of the head, keeping them visually balanced.
For the smile:
Use the same black yarn to make a small curved smile underneath the eyes.
Check the face from the front before securing the thread ends inside.
The exact stitch positions for the eyes and mouth haven’t been established through physical testing, so don’t treat a fixed placement as verified.
Small embroidered features are the default for this design. You don’t need to attach separate plastic eyes.
Step 9: Stuff and Close the Head
Once the face is embroidered, continue shaping the head with the brown working yarn.
Round B20: [Sc in next 3 sts, dec] × 6. (24)
Round B21: [Sc in next 2 sts, dec] × 6. (18)
The opening is now smaller, making this a useful point to add stuffing.
Place small amounts of polyester fiberfill into the head.
Distribute the filling carefully and check whether the head appears centered over the neck.
Avoid forcing in more stuffing than the fabric can comfortably hold.
Continue decreasing:
Round B22: [Sc in next st, dec] × 6. (12)
Round B23: Dec × 6. (6)
Fasten off, leaving a yarn tail for closing the opening.
Thread the tail through your yarn needle.
Pass the needle through the front loops of the remaining six stitches, then gently pull the yarn to close the opening.
Secure the end and hide it inside the head.
Final stitch checkpoint: The head closes from 30 stitches down to 6 through the approved decrease sequence.
The closure count has been verified mathematically. The final head shape, firmness, and neck stability must still be checked on a crocheted sample.
Add the Gingerbread Icing Details
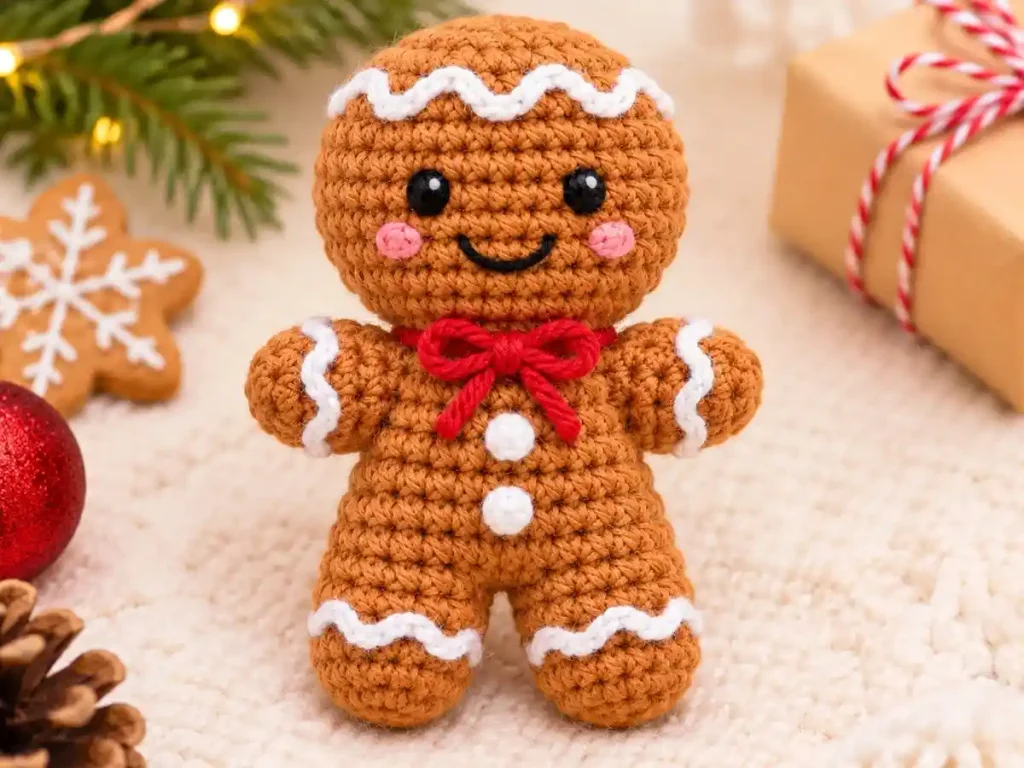
The white icing-style decorations are what give a gingerbread character its festive cookie-inspired appearance.
These details are embroidered after the main crochet structure is complete.
They don’t change the stitch counts of the body or head.
Embroider the White Icing
Thread your yarn needle with white yarn.
The proposed decoration areas are:
- Forehead: Small white icing-style stitches near the upper front of the head.
- Wrists: Short decorative white stitches near the ends of the bobble arms.
- Ankles: Small white details near the lower portion of each leg.
Keep the embroidery simple so it doesn’t cover too much of the brown crochet fabric.
The exact stitch placement and appearance of these decorations haven’t been validated on a physical sample.
Avoid pulling the embroidery too tightly, which could distort the underlying fabric.
Add an Optional Red Neck Detail
For a little Christmas color, you can add an embroidered red accent below the head.
Use a short length of red yarn and your yarn needle to make a small decorative detail on the upper torso.
Keep the yarn ends secure and hidden.
This is an optional decoration, not a structural component.
A separately crocheted red bow isn’t included in Pattern V1.1, so it shouldn’t be treated as part of the core instructions.
Beginner Tips and Troubleshooting
Working on a small amigurumi project means that a single missed increase or misplaced decrease can affect the next round.
Here are the main areas to check while following this gingerbread man crochet pattern.
Why Is There a Gap Between the Legs?
First, check the joining round.
Each leg must contribute nine stitches, and the chain bridge must have two stitches worked along each side.
The total should be 22 stitches.
Make sure the bridge isn’t twisted and that the legs were positioned correctly before joining.
A visible gap could indicate a problem with stitch placement, tension, or the bridge construction. Don’t automatically add extra stitches to close it, since that would change the verified stitch count.
Why Are My Bobble Arms Facing Inward?
Bobble stitches can project toward the opposite side of the fabric from the side where they’re worked.
Check that the right side of your crochet fabric faces outward.
After working a bobble, gently encourage it toward the outside of the torso.
If it doesn’t remain in the intended position, treat that as a construction issue requiring testing rather than changing the pattern without checking the full round.
Why Do the Arms Look Like Small Bumps?
The current pattern uses one 5-dc bobble for each arm.
This creates a raised section of fabric, but the prototype hasn’t yet been physically tested to confirm that the bobbles look like recognizable gingerbread arms.
If the arm shape isn’t clear on your sample, record the result. The stitch size or arm construction may need a separate technical revision before publication.
Why Does the Gingerbread Man’s Head Lean?
The head expands from a 12-stitch neck to a maximum of 30 stitches.
That difference creates a potential balance issue.
Check your stuffing distribution and make sure the neck hasn’t been stretched or compressed unevenly.
The correct amount of filling and the stability of the completed figure still need physical validation.
How Can I Keep My Stitch Counts Correct?
A stitch marker is especially helpful when you’re working in continuous rounds.
Pay close attention to these checkpoints:
| Construction stage | Required count |
|---|---|
| Top of each leg | 9 sts |
| Joined legs — B1 | 22 sts |
| Body — B2–B8 | 24 sts |
| After B9 | 18 sts |
| Neck — B10 | 12 sts |
| Head — B13–B19 | 30 sts |
| Final head opening — B23 | 6 sts |
If your count doesn’t match the pattern, check the previous round before continuing.
Gingerbread Man Color and Decoration Ideas
A traditional gingerbread-brown body makes the white embroidery stand out, but you can experiment with shades of warm brown to create slightly different looks.
For a classic Christmas style, keep the brown body, white icing details, and black embroidered face.
You can add a small red embroidered accent for a festive touch without changing the main crochet construction.
If you prefer a softer appearance, choose a lighter brown yarn and cream-colored embroidery.
These color changes don’t alter the written stitch counts, although yarn substitutions can affect the finished shape and size.
Keep additional decorations simple until the main figure has been successfully tested.
Frequently Asked Questions
Is This Crochet Gingerbread Man Suitable for Beginners?
The pattern is aimed at confident beginners who already know how to make a magic ring, work single crochet stitches, increase, decrease, and count rounds.
The leg join and integrated bobble arms require closer attention than a basic crochet ball.
Its final beginner suitability remains provisional until the construction has been physically tested.
Is This a No-Sew Gingerbread Man Pattern?
The design is intended to avoid sewing separate legs, arms, or a head onto the body.
The legs are crocheted together, the arms are formed using bobble stitches, and the head continues directly from the neck.
You’ll still need a yarn needle for embroidery and finishing.
Because the construction hasn’t been physically validated, the no-sew description remains provisional.
What Yarn Is Best for a Crochet Gingerbread Man?
Medium-weight (#4) yarn is the proposed starting choice for this pattern.
A smooth yarn can make the stitches easier to see, especially during the leg join and bobble rounds.
The suggested 3.5 mm hook and yarn combination still require testing to confirm the final appearance.
Can I Make This Gingerbread Man Smaller?
Changing yarn thickness and hook size may change the finished dimensions.
However, smaller yarn doesn’t automatically guarantee the same proportions or stability.
Make a sample and check the shape before treating a modified version as complete.
Does This Pattern Require Stuffing?
Yes. The prototype is designed as a three-dimensional amigurumi figure using polyester fiberfill.
The legs, torso, and head are filled gradually as the construction progresses.
The exact amount of stuffing hasn’t been measured.
Can I Use This Gingerbread Man as a Christmas Ornament?
The finished character could potentially be adapted into an ornament, but Pattern V1.1 doesn’t include a tested hanging loop.
A separate attachment method would need to be developed and checked before the design could be presented as a ready-to-hang ornament.
Can I Turn It Into a Bag Charm?
A miniature gingerbread character may also work as a decorative bag charm with suitable hardware.
However, the current prototype does not include a verified keyring or clasp attachment.
Any additional hanging hardware must be securely attached and tested before regular use.
More Easy Crochet Projects to Try
If you enjoy small seasonal crochet projects, there are a few more handmade ideas to explore.
Our Crochet Snowman Ornament Pattern shows you how to make a small Christmas snowman with an embroidered face, scarf, and hanging loop.
You might also like the Crochet Christmas Tree Ornament Pattern, a flat tree design made with simple rows and a small crocheted trunk.
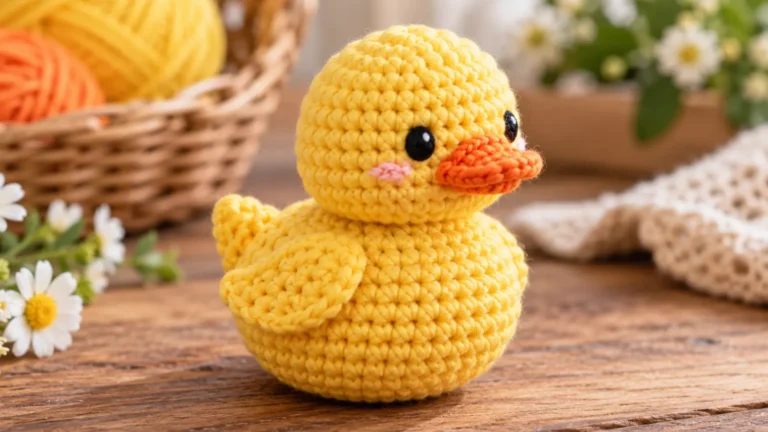
For another project using amigurumi techniques, visit our Crochet Duck Pattern, or browse the No-Sew Amigurumi collection for more small crochet ideas.
A Little Handmade Christmas Character
A crochet gingerbread man brings together simple amigurumi shaping and cute embroidered details in one festive design. From the tiny legs to the rounded head, each section builds on the stitches you’ve already made.
Keep your stitch counts close by, take care with the joining and shaping, and enjoy working with your favorite Christmas colors.
Happy crocheting!
Lily Parker — Small Crochet Ideas